Friday FAQs: High-protein recipes, sunflower seed butter troubleshooting, freezing aquafaba, and more!

20160118 - App Smoothies 00591

This week was a bit of a grab bag and I’m pretty anxious to unwind this weekend. We had two random basement leaks (thanks to a water softener and laundry machine both bursting within days of one another), lots of work deadlines, and some setbacks with our renovation plans. There’s promise of a gorgeous weekend though, and I can’t wait to soak it up. I’ve made some fun Father’s Day plans, and we’re hitting up the St. Lawrence Market in Toronto too. I can’t recall the last time I went to the St. Lawrence Market—probably years and years!—so I’m anxious to check it out (let me know if there are any “must-see” vendors to visit). With any luck I’ll be able to find some plant-based foods to satisfy my non-stop hunger of late. I hope you all have a great weekend. Happy Father’s Day!

ps- My 25 weeks pregnancy update is now up on the Baby blog.

Q1. Angela—this mayo recipe looks really great! Have you (or any of your readers) had any luck freezing the chickpea liquid and then thawing and using it in your recipes? It seems I always open a can of chickpeas when I don’t need the brine, or need the brine when I have no cans of chickpeas. I’m hoping storing the brine (possibly as ice cubes?) for can-less days might be the solution. Any thoughts, anyone??

A. Hi Tia, I haven’t tried it personally yet, but I’ve read that you can in fact freeze aquafaba! Using an ice cube tray (I like using silicone ice cube trays because they’re so easy to pop out) is a great idea for storing, because then you’ll have easy-to-grab, ready-measured amounts available for use in recipes. (My advice is to measure how many tablespoons one cube holds so you know.)

Q2. Hi Angela, Can you recommend the best substitute for hemp in your Crowd-Pleasing Vegan Caesar Salad (specifically, the Nut and Seed Parmesan Cheese)? It’s actually illegal to ingest hemp in Australia (crazy I know…)!!!!!! thanks

A. Hi Alecia, Since the parmesan only calls for a couple tablespoons of hulled hemp seeds, I’d probably just swap it with a couple more tablespoons of cashews! Easy that way. 🙂

Q3. Angela, Thank you so much for this wonderful recipe! I just made your Golden Red Lentil Dal tonight and the flavors were unbelievable! I have also tried your Crispy Smashed Potatoes with Avocado Garlic Aioli and loved those too! May I ask something though? The dal dish had a slightly grainy texture when it was finished. I’m unsure if it was from the spices or something else. I prepared it exactly as the recipe stated and measured precisely. Any advice on how to fix that would be lovely! Again, wonderful blog and site! I look forward to trying many more of your recipes!

A. Hi Mandy, I’m so happy to hear you enjoyed these recipes! With respect to the dal, it sounds like you did everything right with the recipe! I think the texture you’re experiencing may just be the natural texture of the red lentils. Red lentils break down a lot when they cook. If you’re a fan of the dal’s flavouring but not so much its texture, you could try black or French green lentils, which hold up a bit better and don’t break down as much. I hope this helps, and thank you so much for the kind words!

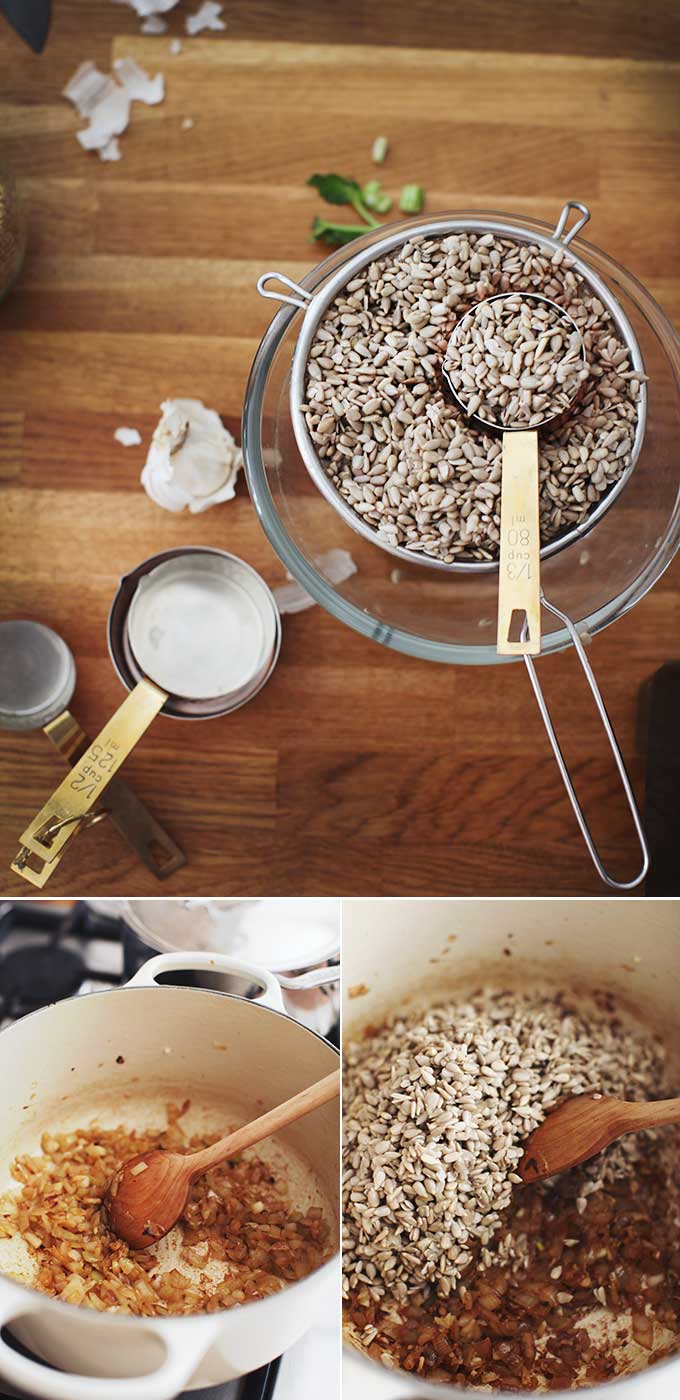
Q4. Hi everyone, I’m not sure where my sunflower seed butter went wrong? Mine didn’t turn out anything like the pictures at all. I didn’t have coconut sugar so I used stevia. Please help!

A. Hey Jessica, Oh I’m so sorry that happened to you! I’m wondering what kind of food processor you use? I find some machines just can’t "butterize" nuts and seeds as they aren’t powerful enough. I absolutely love this machine. Also, I haven’t tested this recipe with stevia before so that could’ve been the culprit. It’s also very important that the sunflower seeds are roasted beforehand (I’ve had zero luck using raw sunflower seeds in this recipe). Lastly, did you use the coconut oil? That’s really important to help thin it out. I hope this helps, and let me know if you try it out again! It’s such a tasty alternative to nut butter.

Q5. Hi Angela! Big congrats to you and your growing family! My girls are 20 months apart (now 8 mos. and 2 1/2) and it is wonderful and chaos and all the things that make for a happy family. 🙂 I was wondering if you wouldn’t mind listing your favorite protein-packed recipes? I am getting back in the gym and trying to get some muscle definition back in my life and some extra protein is in order! Thanks so much!

A.  Hi Abbey, Thank you for the warm congrats! Getting back to the gym after time away can be such a challenge—but delicious, protein-packed foods can help make that transition so much easier. For a super quick post-workout option, an apple spread with 2 tablespoons of almond or peanut butter will pack in about 7 to 9 grams of protein. If you’re a green smoothie lover like me, I recommend checking out my Green Warrior Protein Smoothie. My Protein Power Goddess Bowl, Energizing Broccoli Dal, Spiced Red Lentil, Tomato, and Kale Soup, Chickpea Salad, and Glowing Spiced Lentil Soup are also filled to the brim with high-protein goodness, as are my Super-Power Chia Bread (page 229 of The Oh She Glows Cookbook) and roasted chickpeas (try the ones on page 220 of the cookbook and on the blog here, or Salt & Vinegar Roasted Chickpeas on page 221) for a “snackier” option. Alternatively, if you’re looking for a sweet snack to grab on the go heading to or from the gym, there’s my Super Seed Chocolate Protein Bites or Two-Layer Raw Chocolate Brownies (which have about 4 grams of protein per square…not bad for a dessert). Who doesn’t love a sweet treat after killing a workout? All the best to you and your family!

Comments of the week:

“Hi Angela! I started the shift toward a vegan diet almost a year ago and have been loving your blog for meal inspirations and recipes! I have your app and also your cookbook and have to say that I have never made one of your recipes that did not turn out fantastic. The rest of my family is not vegan at all and they also love every recipe of yours that I have made. I love making your dishes and sharing them with other people to show that a vegan diet can be delicious and satisfying. I have made this avocado pudding bowl three or four times now and absolutely love it! My most recent time making this recipe I whipped up some coconut whipped cream and mixed it with the pudding and it turned out as a chocolate mousse. I would definitely recommend this method as it worked very well. Thanks for doing what you do, I really look up to you!”

Hi Alexis, I’m so happy to hear that your shift to a vegan diet is going so well, and that you’re inspiring others with the recipes too! Your chocolate mousse spin-off sounds fantastic. I’m working on a mousse recipe that involves aquafaba (of all things, I know!) and hopefully I can share it on the blog if I can get it just right. Thanks for taking the time to write me such a lovely note.

“I’m enjoying all of your recipes so much, thank you! I was never one for working from a cookbook before, but you’ve got me inspired, and I’ve gifted your book several times over, all to very grateful recipients. I used to dance around the edges of a health food store, eager but mostly unsure about how to mix what with what… This weekend I’m headed to an enormous VegFest (a celebration of all things vegan, natural, joyful and healthy!) And Oh She Glows was my introduction. So, thank you. Your enthusiasm and work is appreciated – big time!”

Hi Janey, I’m so happy for you, and also super thankful for your support. It sounds like you’re having so much fun with this new lifestyle which is so, so important. Have fun at the Vegfest this weekend!!

Oh She Glows

Mini Pumpkin Pie Tarts with a Sunflower Cookie Crust (Nut-free, Vegan)

veganpumpkinpienutfree (1 of 1)

A couple weeks ago, I received a reader recipe request. Let’s call him “Jason”. Jason asked if I could create a nut-free version of my Raw Pumpkin-Maple Pie with a Baked Oat Crust (found in my cookbook, page 247) because his wife can’t have cashews and pecans. Apparently, it was tormenting her not to be able to try this pie! He wants to surprise her next month with this dessert as a special thank you because “she’s the best wife and mom ever”.

He went on to write, “Angela, I have no clue where to begin and don’t want to mess this up like I usually do.”

I immediately knew that I had to step up to the (pie) plate on this one (no pressure, no pressure!) because the world needs more love. And pie. Plus, I’ve always wondered how I could make this recipe without pecans or cashews, and now I have a nice option to share with you all. I tested multiple fillings and there was a clear winner that I’m sharing below. Spoiler alert – a combo of super luxurious full-fat coconut cream and sunflower seed butter worked so well as a replacement for cashews! It tastes so awesome.

I also paired it with a new toasted sunflower seed and oat “cookie” crust that’s a wonderful, crunchy compliment to the creamy and cool pumpkin pie filling. Pie crusts should never be boring or flavourless, and I love that this one is an easy “press-in” crust.

I meant to have this recipe up on Monday, but I ended up testing this pie about 7 times this week! I can’t sleep at night unless I’ve tested all of my options. Better late than never, I say. I’d rather not rush a recipe just to get it out on time. Anyway, I made this pie as a contribution to our Thanksgiving dinner later today (we’re in the US currently), and I’m so looking forward to the spread at my mom and stepdad’s. I hope those of you celebrating have a happy, fun, and safe Thanksgiving! And if you can’t make this pie today or this weekend, I hope you’ll include it on your holiday baking list.

Well, Jason (you know who you are) I hope this works out for you. If it doesn’t, I’d prefer that you not mention my name.

I’m joking! It’ll work out. Promise.

veganpumpkinpienutfreeglutenfree

Mini Pumpkin Pie Tarts with a Sunflower Cookie Crust (Nut-free)

Vegan, gluten-free, nut-free, refined sugar-free, soy-free

This is a luxurious and creamy nut-free version of my favourite Raw Pumpkin Pie from The Oh She Glows Cookbook. After many trials, I ended up using a combination of sunflower seed butter and full-fat coconut cream to replace the cashews in the original recipe, and it worked out so well! The pie has a light coconut flavour, but it’s balanced out nicely by the earthy sunflower seed butter. As a bonus, this filling doesn’t use any whole nuts or whole seeds so you don’t need a Vitamix (or other high powdered blender) to get the filling super smooth. I used 4 tart-sized (about 4-inches diametre) “freestanding” baking cups which I found at Target, but you can also use a standard muffin tin lined with paper liners (or simply greased well) to make mini tarts. I’d imagine a 7-9 inch springform cake pan would work well too. The dough is a bit difficult to shape into a traditional pie crust (with high sides) so that’s why I went with a flat crust for this recipe. If you don’t mind fiddly things, then by all means take a stab at the regular pie crust. Also, the paper liners are easily removed if you remove them while the pies are frozen.

Yield
8-10 servings
Freeze time
24 hours (chill can of coconut milk in the fridge) + 3-5 hours
Prep Time
30 Minutes
Cook time
12 Minutes
Total Time
42 Minutes

Ingredients:

For the crust:
  • 1/2 cup raw sunflower seeds
  • 1 3/4 cups rolled oats (use certified gluten-free if necessary)
  • 1/4 teaspoon fine sea salt
  • 1/4 cup coconut oil, melted*
  • 3 tablespoons pure maple syrup
  • 2 tablespoons smooth sunflower seed butter (pour off oil before measuring)
  • 2-3 teaspoons water, if needed to bind dough
For the filling:
  • 1/2 cup canned full-fat coconut cream**
  • 1 cup unsweetened pumpkin puree
  • 3/4 cup pure maple syrup
  • 1/2 cup coconut oil, melted*
  • 2 tablespoons + 2 teaspoons sunflower seed butter
  • 2 teaspoons pure vanilla extract
  • 1-2 teaspoons pumpkin pie spice, to taste***
  • 1/4 teaspoon fine sea salt
For serving:
  • Coconut Whipped Cream (I used So Delicious Coco Whip here)

Directions:

  1. Preheat oven to 350F. Grab four (4-inch diameter) baking paper cups, or 12 standard muffin paper liners and set aside. You can also use a 7-9 inch springform cake pan greased and lined with a circle of parchment paper.
  2. Add the sunflower seeds into a skillet and toast the seeds over medium heat for 5-8 minutes, until lightly golden and fragrant. Remove from heat.
  3. For the crust: Add the toasted sunflower seeds, oats, and salt into a food processor and process until finely chopped, resembling a coarse flour. Now, add the melted oil, maple syrup, and sunflower seed butter, and process until the mixture comes together into a heavy dough. The dough should stick together when pressed between your fingers very easily. If it’s still a tad too dry, add the optional water and process again until it comes together. I find that I always need 2 teaspoons of water, but it’ll depend on your ingredient’s moisture content.
  4. Divide the dough equally between the liners, crumbling it all over each base. (Note: I reserved about 1/2 cup of the dough for sprinkling on the pies when serving.) Lightly wet your fingers. Starting at the centre, press the dough into the base to form a crust. If the dough starts to stick to your hands at any time, lightly wet your hands and shake off the excess water. Once the crust is all pressed in, poke the base with a fork about 2-3 times to allow the air to escape while baking. I place the 4 liners onto a baking sheet so it’s easy to remove them from the oven.
  5. Bake the crusts for around 10-12 minutes until lightly golden around the edges. Place baking sheet on a cooling rack and cool the crusts for at least 15-20 minutes, or longer if you have the time.
  6. For the filling: Open the chilled can of coconut milk. Scoop off 1/2 cup of the white coconut cream only (not the water) and place it into a blender. (You can save the remaining contents of the can for a smoothie or other use.) Add the pumpkin puree, maple syrup, melted oil, sunflower seed butter, vanilla, pumpkin pie spice (to taste, I use 2 tsp), and salt. Blend, starting at a low speed and increasing the speed, until smooth.
  7. Divide the filling equally among the cooled crusts. Carefully, transfer the baking sheet (or muffin tin, if making 12 mini tarts) into the freezer on a flat surface. Chill until firm, about 3-5 hours. There’s no need to cover it.
  8. After the tarts are solid, carefully remove the paper liners. Here you can transfer the pies to the fridge for a mousse-like texture, but I prefer the texture when frozen after sitting on the counter for 5-10 minutes before serving.
  9. Serve with coconut whipped cream on top, if desired. This pie filling softens a great deal at room temperature, so it’s best not to leave leftovers on the counter. Return them to the fridge or freezer for best results.

Tips:

*A note about coconut: Health Canada classifies coconut as a “seed of a fruit” and not as a tree nut, however the U.S. FDA classifies coconut as a tree nut, so as you can see there is some confusion over classification when it comes to coconut. As always, if you think you might be allergic to coconut, be sure to talk to your doctor before consuming.

If you want to minimize the light coconut flavour in this pie, you can use refined (flavourless) coconut oil here rather than virgin.

**Be sure to chill a can of full-fat coconut milk for at least 24 hours before you begin this recipe. When ready, open the can and carefully scoop out 1/2 cup of the white coconut cream making sure not to use any of the coconut water.

***I used 2 teaspoons of Whole Food’s 365 Pumpkin Pie Spice since I’m currently away from home. You can also try my homemade Pumpkin Pie Spice Mix.

veganpumpkinpienutfree1

Oh She Glows

Back To School: Luxurious Homemade Sunflower Seed Butter

sunflowerseedbutter-8823

Not only is it the month that my baby will turn one*, it’s also the time of year when my nut-free recipes are getting a lot more action. Yup, back to school season. After receiving a request from a blog reader recently, I decided to share this sunflower seed butter recipe that’s been raved about by my testers. It’s so creamy and delicious! (I recently heard that some schools are now banning seed butters too, so I realize this recipe won’t work for those schools.)

This blog post is also proof that I’m still alive! Not that you are waiting with bated breath for my next post or anything, but I wanted to apologize for my absence. My manuscript is due at the beginning of October and I’ve been working around the clock finalizing recipes, writing, and editing the introductory chapters and headnotes. I can’t believe I’m SO CLOSE to finishing the first draft. It feels amazing and I’m looking forward to getting back to a (somewhat) normal life again. Thanks for hanging in there with me.

*gentle sobs.

sunflowerseedbutter-8786

We start by roasting the sunflower seeds. For the love of everything nut/seed buttery, please do not skip this part. Not only does roasting give the seeds a nutty, toasted flavour, but it helps the seeds turn into butter much faster. I speak from experience because I once tried to make sunflower seed butter using raw sunflower seeds and I processed for like 30 hours and nothing happened except dust. It took me years to try it again after that experience!

sunflowerseedbutter-8797

Sunflower seed glam shots. Just cuz.

sunflowerseedbutter-8800

Here is a glimpse into the various food processor stages below. It takes me about 7-8 minutes in my processor. Keep in mind your own processing times will vary based on your food processor and its butterizing prowess. I recommend using a heavy-duty food processor (such as this model) to make nut or seed butter as smaller machines can overheat. You can also make nut and seed butter in the Vitamix, but I never do because I find the butter a huge pain to scrape out from the bottom of the Vitamix container. For me, the food processor for nut/seed butter is where it’s at!

homemadesunflowerseedbutter

I always let it run a couple minutes longer than I think I should just to get it super silky and runny.

sunflowerseedbutter-8825

Luxurious Sunflower Seed Butter

Vegan, gluten-free, grain-free, nut-free, refined sugar-free, soy-free

Plain sunflower seed butter can taste quite bitter so I’ve improved its flavour by adding a touch of coconut sugar, cinnamon, and some virgin coconut oil to thin the consistency just a bit. The result is a sunflower seed butter you’ll want to add to everything, and eat by the spoonful. Even though it’s not the ever popular almond or peanut butter, you won’t feel like you’re missing out when you make this nut-free spread.

Yield
1 3/4 cups
Prep Time
15 Minutes
Cook time
10 Minutes
Total Time
25 Minutes

Ingredients:

  • 3 cups (about 400g) raw shelled sunflower seeds
  • 1/4 cup coconut sugar
  • 2 tablespoons virgin coconut oil, softened
  • Pinch of pink Himalayan sea salt or other fine sea salt, to taste
  • 1/2 teaspoon cinnamon, or to taste (optional)
  • 1 teaspoon pure vanilla extract
  • 1 vanilla bean, seeded or 1/4 teaspoon pure vanilla bean powder (optional)

Directions:

  1. Preheat oven to 325F. Line a large baking sheet with parchment paper and spread on the seeds in an even layer. Roast for 9-12 minutes, until some of the seeds are lightly golden. Cool the seeds for a few minutes before using.
  2. Meanwhile, add the sugar into a high speed blender and grind until a powder forms. Leave the lid on and set aside so the “dust” can settle.
  3. Spoon the toasted seeds into a heavy-duty food processor. (I like to spoon the seeds into my measuring cup and transfer them that way. When I have about 1/2 cup of seeds left on the pan I will use the parchment paper to “funnel” the remaining seeds into the processor.)
  4. Process the seeds for a few minutes, stopping to scrape the bowl every minute. It will look dry and powdery at this stage. (If you have a chute, you can leave it open to allow steam to escape.)
  5. Add the coconut oil and process for another couple minutes. The butter will clump together into a large ball and it’ll start rattling around for a bit. Then, the ball will eventually break down into butter again. Stop to scrape down the bowl as needed.
  6. Now, add in the ground sugar, salt, and cinnamon. Process for another few minutes until smooth. Now, slowly stream in the vanilla while processing. Add in the vanilla bean seeds, if using. You can add a touch more oil if you need to thin out the butter (but do not add water or liquid sweetener because it will seize). I like to let the machine run at least another 2 minutes to get the sunflower seed butter super smooth. I process for a total of about 8 minutes, but timing will vary based on your food processor and preference. Some machines may need to run for upwards of 15 minutes to get the seed butter smooth enough.
  7. Transfer the sunflower seed butter into an air-tight container. Chill in the fridge. Here it’ll keep for about 2 months and it will remain “spreadable” even when chilled.

Tips: 1) Do not skip toasting the seeds; it’s necessary for the seeds to break down in the processor. 2) The sweetener is added because sunflower seed butter is bitter; feel free to adjust the sweetener to your own taste. 3) If for some reason your seeds aren’t breaking down after the specified times, add a touch more coconut oil, a teaspoon at a time. Some machines just might need to run a bit longer though, so be patient!

sunflowerseedbutter-8826

And now some recipes to use homemade sunflower seed butter…

Quick and Easy No Bake Protein Bars

3-Layer Nut-Free Dream Cups

Flourless Thumbprint Breakfast Cookies

PS – 21 Allergy-Friendly Back To School Snack Recipes

Oh She Glows

Inspirational Sunflower Seed Risotto

risotto2

Inspiration is a perplexing creature. As someone who relies on a constant stream of ideas to do what I do, having an endless supply is rather essential.

Of all the questions I am asked, the most common of them all is where my inspiration comes from.

The funny thing about this is, I can’t really give a straight answer because I get ideas from everywhere. Literally. Yes of course there are the obvious places like cookbooks, the farmer’s market, my vegetable garden, but I’ve had ideas strike me like lightening while listening to music, smelling a certain scent wafting on the breeze, the colours in a particular vintage dress. My main motivation for writing a cookbook actually came from a postcard I found randomly, which pictured a faceless girl picking wildflowers. Nothing to do with food. At this point I’ve learned that the most important thing for me is to put myself in the way of beauty as often as possible, keep an open mind, and not do discount any sources or ideas as weird, because the best things most often come out of the seemingly strange.

I will say that one thing that consistently brings me a lot of inspiration, is just talking to other people who really love food. Sometimes getting out of my head and into someone else’s, or at least hearing about their experience with a particular dish or special ingredient can help jumpstart a flood of ideas. For instance, the last time I was in Amsterdam teaching cooking classes, one of the attendees came up to me at the end of the day and told me about a very exciting meal she had eaten in Copenhagen, of all places. It was a risotto made out of sunflower seeds. Sunflower seeds! At first this sounded totally bizarre, but then again, I haven’t been able to stop thinking about this seriously inspiring idea ever since. I knew that sunflower seeds were about the same size and shape as grains of rice. They were nearly the same colour. But how would they taste? How would they become creamy? What is it like to boil them?

When I googled it, all the recipes called for a pressure cooker, which makes sense for those that aren’t familiar with the awesome power and health benefits of soaking. I knew that that spending the day in a warm bath would make the sunflower seeds totally relaxed and willing to tenderize in a sultry spa of caramelized alliums for dinner that evening. Also, I don’t own a pressure cooker.

So setting out to make this, I anticipated a week’s worth of trial-and-errors, a pile of dirty dishes and a lot of semi-edible sunflower seeds. But I treated the seeds very much like I would treat rice in a risotto and after one (one!) attempt, it was pretty darn near perfect. And pretty darn inspiring.

risotto4
To say that this recipe is totally surprising is an understatement. The sunflower seeds are tender and chewy, with just the slightest bit of tooth still left – not unlike the real deal. It’s remarkably simple to make with just a few common ingredients, truly delicious and deeply satisfying. You can make it suit any season as the seeds create a foundation to build upon no matter what time of year you’re enjoying. Since we are finally getting some lovely fresh spring produce here in Denmark, I chose to go that route. I found some beautiful young rainbow carrots, peas in their pods, white and green asparagus and some super fresh watercress. This would be equally lovely with sautéed mushrooms, roasted root vegetables, pumpkin or squash.

I am sure you’re wondering how the seeds get creamy from cooking, and the truth is they don’t – you’ll need to help them out a little. When cooking a rice-based risotto, starch emerges from the grains as they cook, and magically melds with the broth to create a velvety texture. To mimic this I simply blended some of the soaked seeds with equal parts water and added it back into the mix at the end of cooking, the results astounding. This makes the risotto rich and creamy without any starches or carbohydrates.

But what shocks me most of all is how darn flavourful the dish is with such minimal ingredients. The caramelized onions and garlic are really all you need (in this dish, as well as life, I wager) although herbs would be a welcome addition; dried ones during cooking or fresh ones stirred in at the end. My version uses watercress as a finishing touch and is totally lovely with its peppery bite, but I will leave the brilliant blank canvas for you project your own inspiration on to.

risotto5

Everyone Loves the Sunflowers
Easy-to-find, inexpensive, and nutrient-rich, sunflower seeds are one of my favourite additions to a number of dishes that I make, from breakfast to dinner and snacks in between. They are delicious toasted or soaked, blended up into seed butter or even milk!

Sunflower seeds are one of nature’s highest sources of vitamin E, the body’s primary fat-soluble antioxidant. Vitamin E is important for overall health, as it functions as a free-radical neutralizer and prevents damage to fat-containing structures and molecules, such as brain cells, cholesterol, and cell membranes. When the fats in cell membranes become damaged, the function of the cell itself can be compromised. This is why researchers have studied whether diets low in Vitamin E are associated with many diseases associated with aging.

Sunflower seeds are so high in vitamin E, that just one serving of this risotto contains over 100% of your daily recommended intake!

Because sunflower seeds have such a high (and healthy!) fat content, it is best to store them in a tightly sealed glass container in the refrigerator. Keeping them cool will help preserve their delicate, nourishing oils, which can then in turn nourish you! They will also last much longer stored this way. If you purchase shelled sunflower seeds in bulk make sure to sniff the bin first: it should smell fresh and nutty, without any traces of sourness, which can indicate that the fats have become rancid. And always have a good look at the seeds to ensure that they are not discoloured or damaged.

risotto1

risotto3

Where do you get your inspiration from? How does it come to you? What have you been inspired by lately? Tell me! Especially if it’s about food…

Wishing you an inspired day! Love always,
Sarah B


My New Roots