Hello summer people! It’s celebration time! I’m here to deliver the party favours …a seriously tasty treat and a whole lotta food porn. Ready?
This tart is everything you want from a summer recipe: quick to make, foolproof, delicious, and uses all the delights of the season. Since I am well aware that you would rather be spending your time at the beach or on the dock and not in the kitchen, making this treat will only take up about half an hour of your day, and the rest you can enjoy nibbling and relaxing!
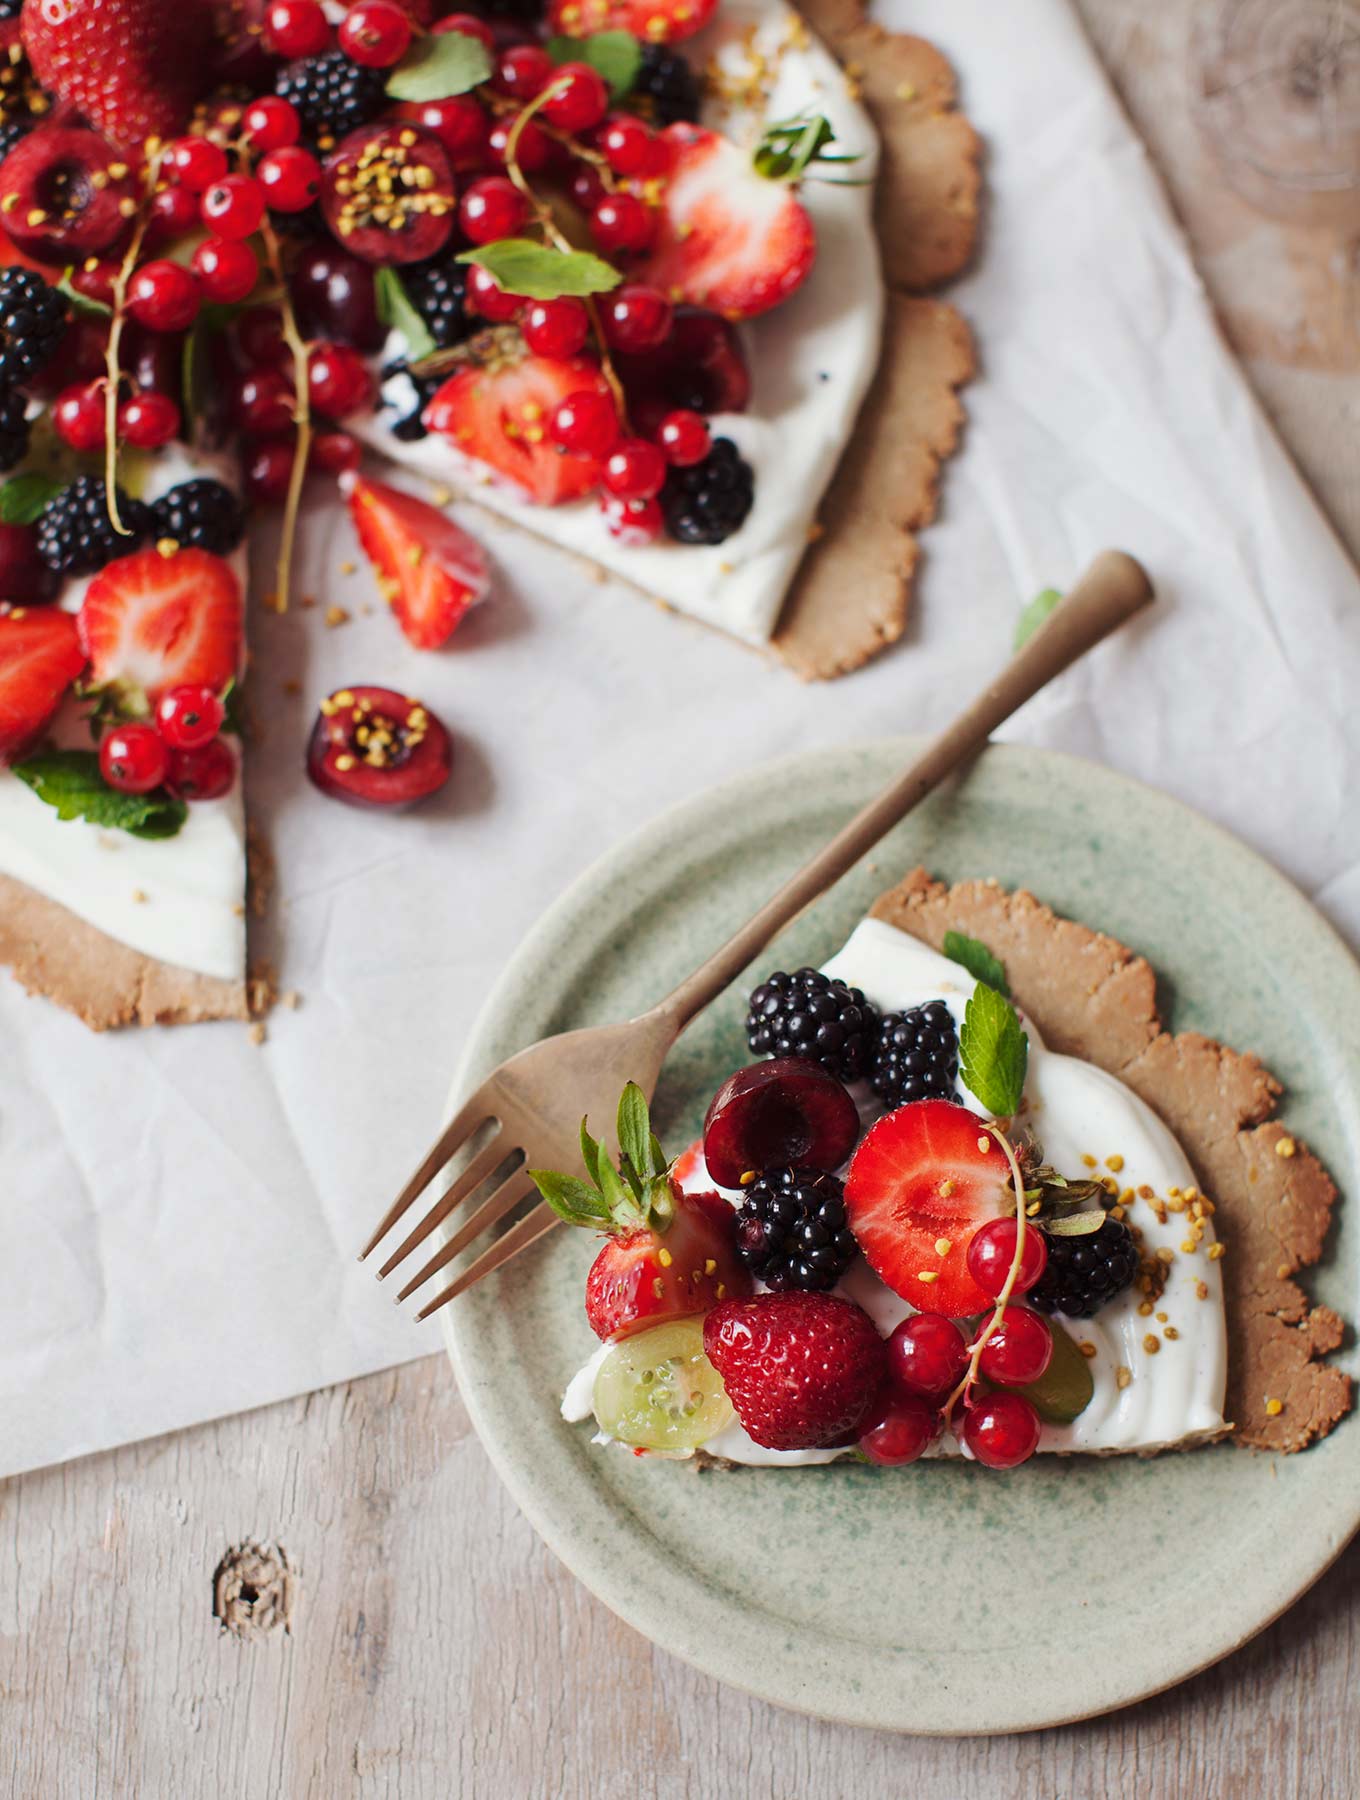
I couldn’t quite settle on which meal this recipe would best be suited for, so I’ll let you decide on that one. It’s a perfectly respectable breakfast (you’re welcome), but would also make a lovely brunch side, afternoon iced tea accompaniment, or after dinner dessert. Because you can make the crust ahead of time, it can also be taken to a picnic or barbeque and assembled before serving.
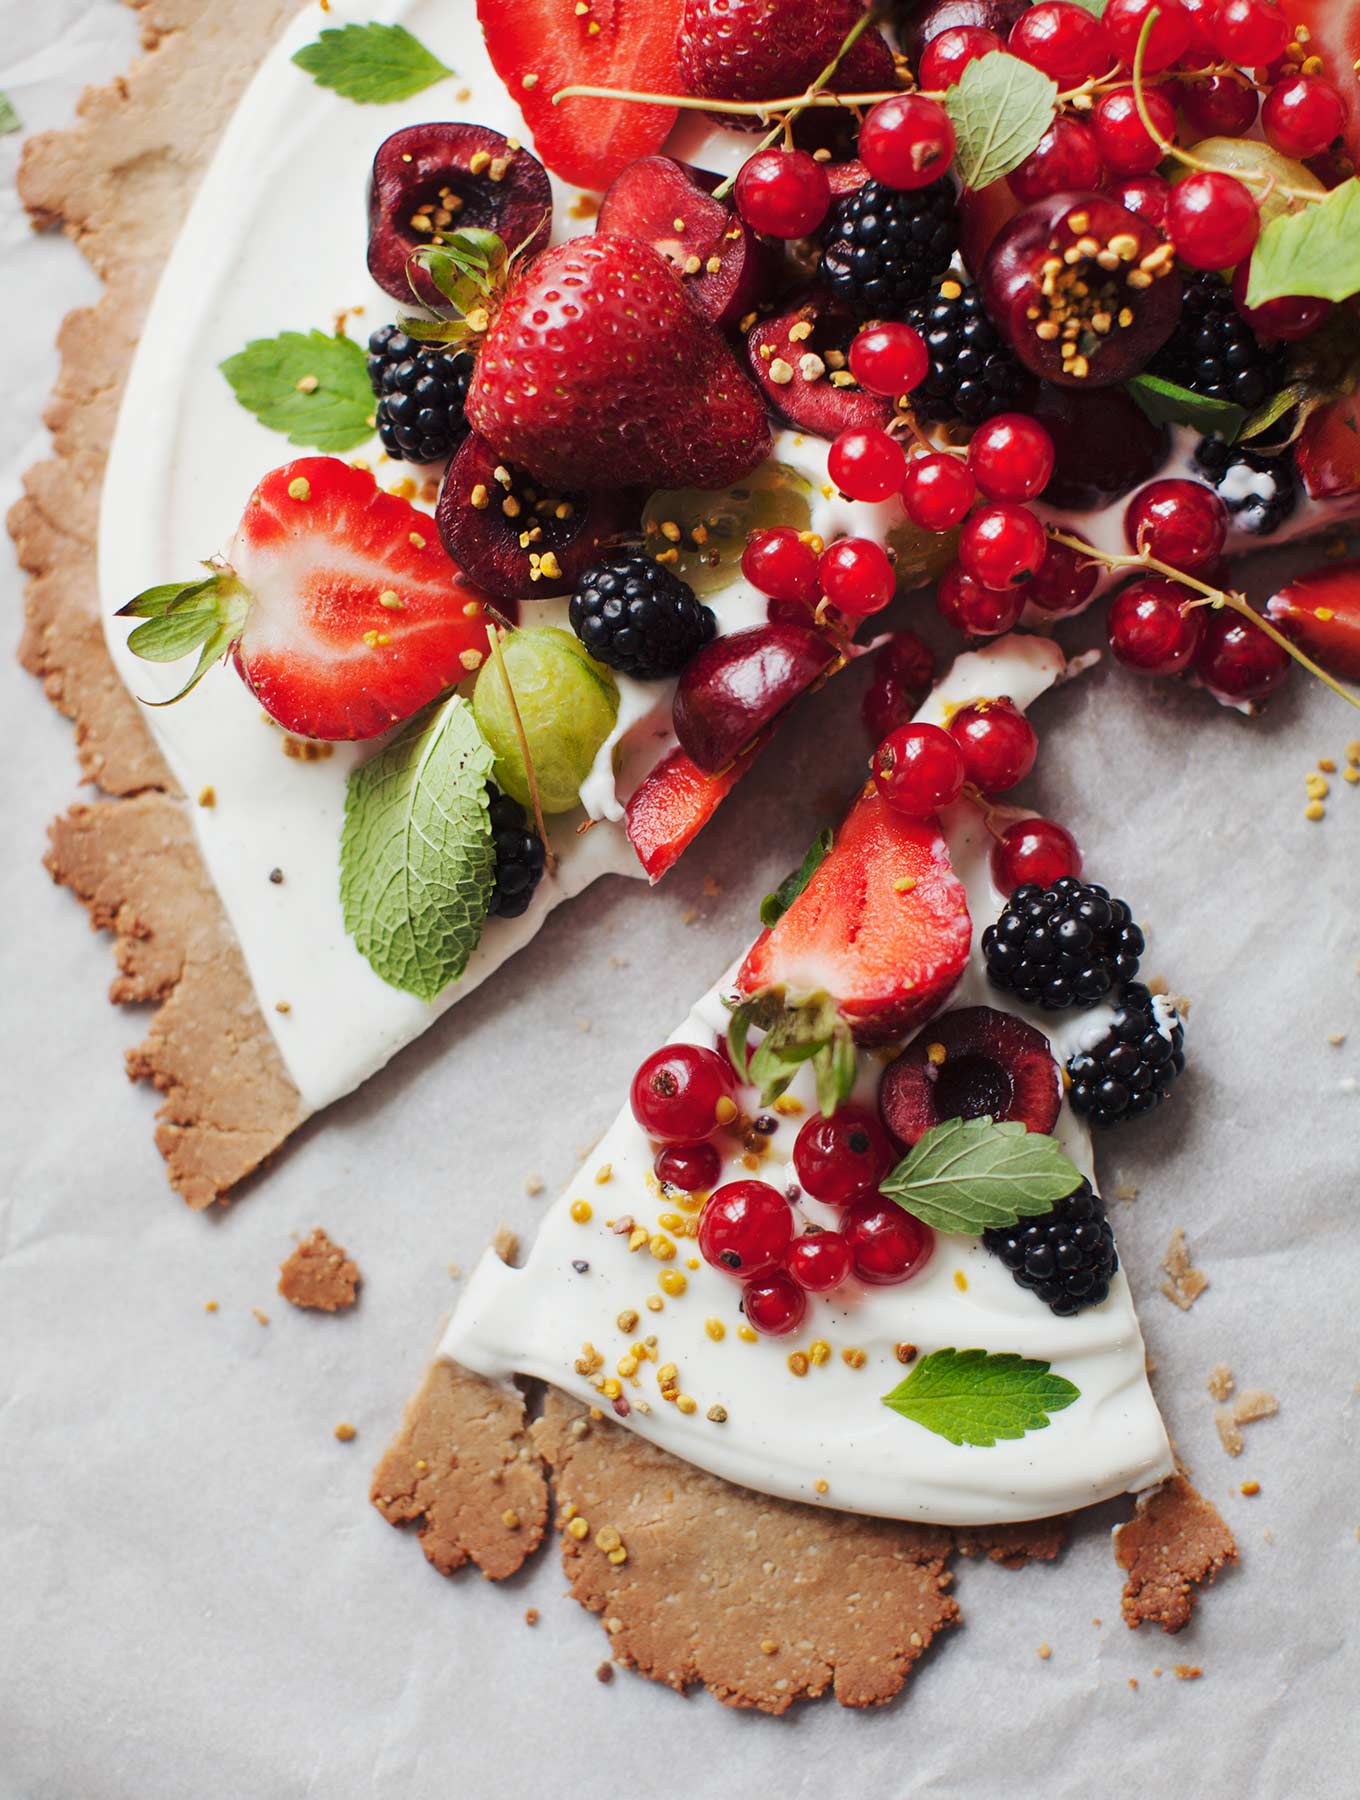
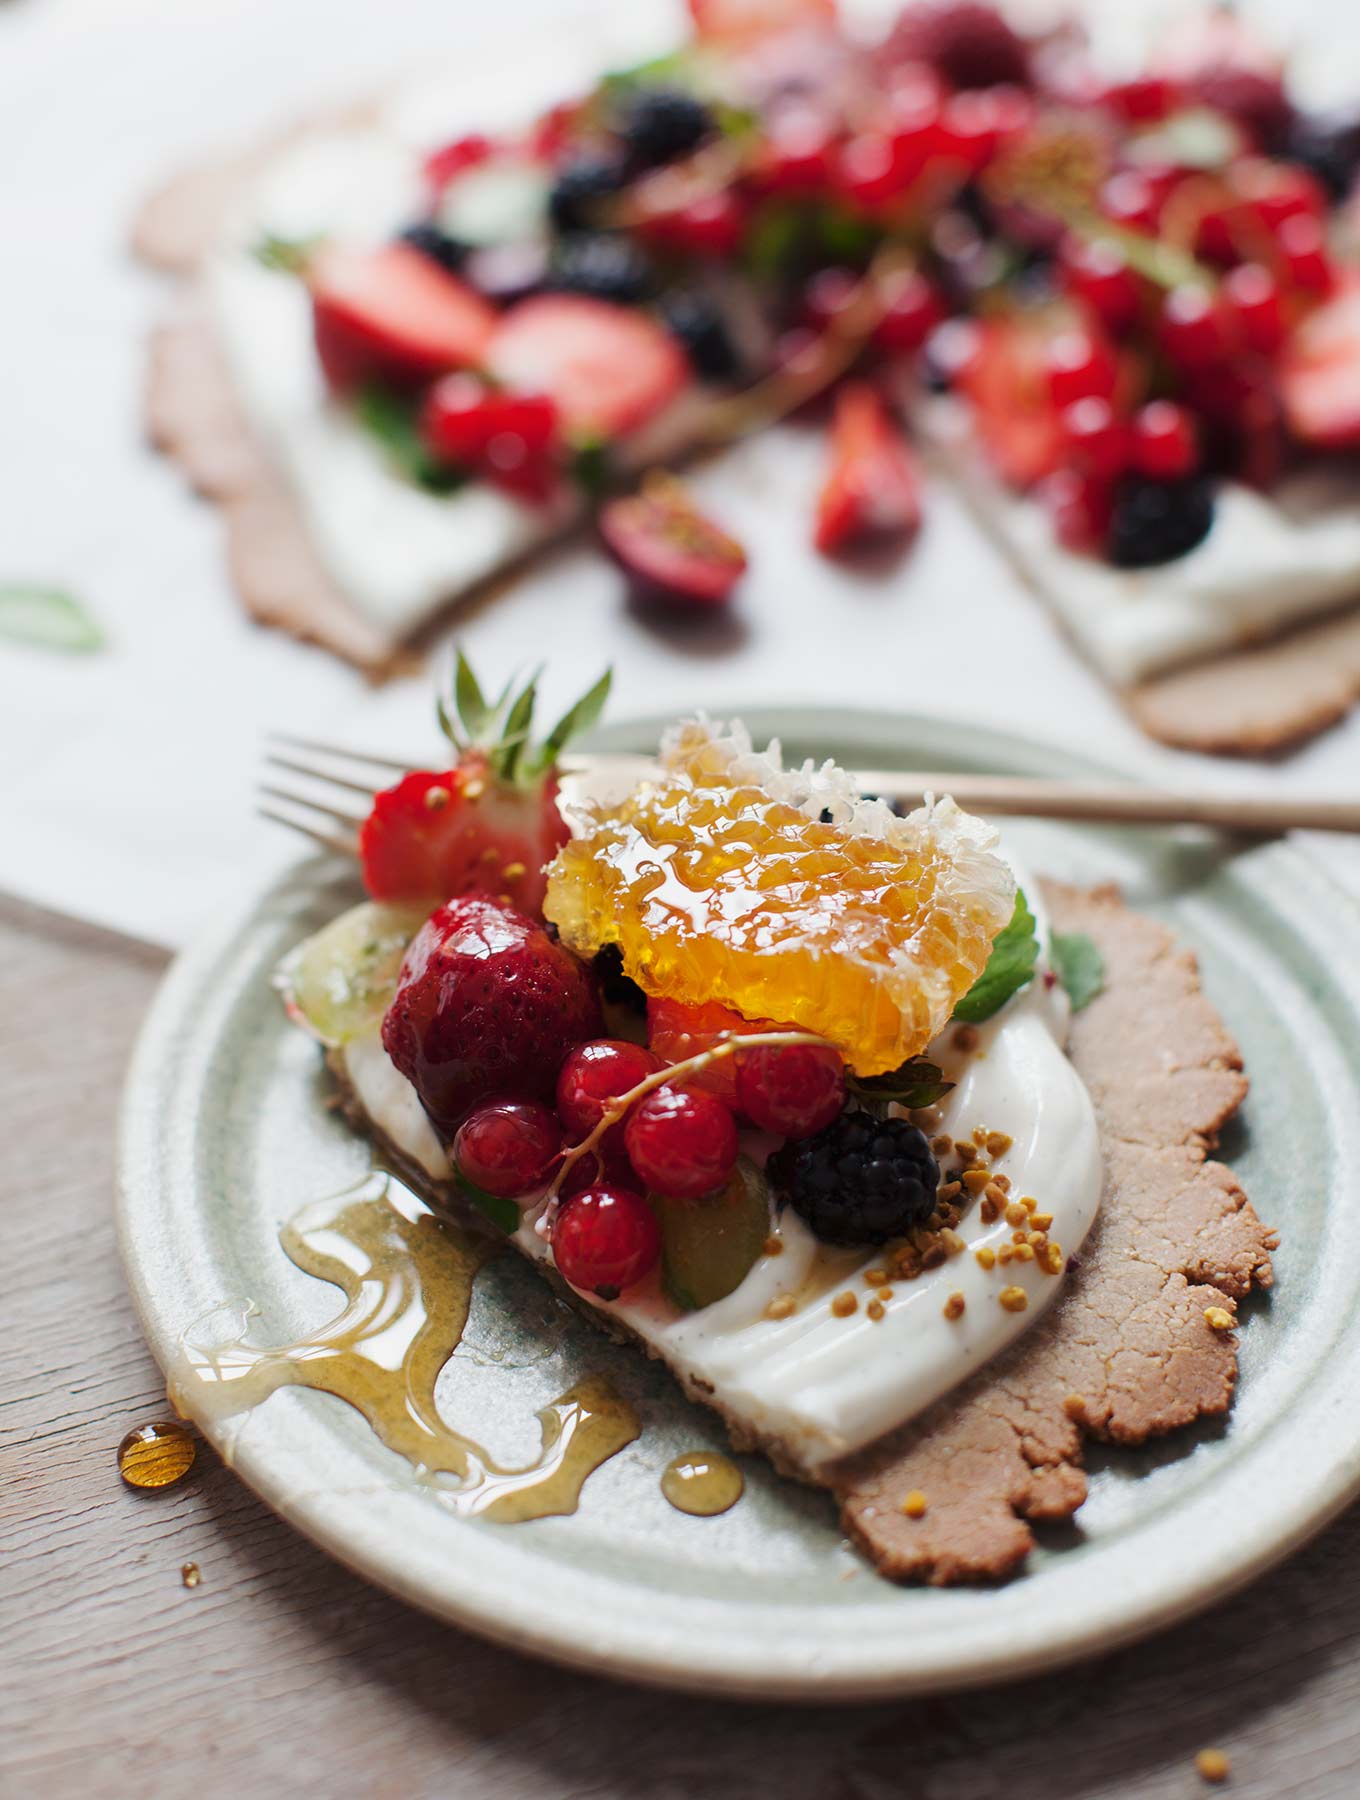
The crust is vegan and gluten-free, made with toasted sunflower seeds and buckwheat flour, with a touch of lemon for zing. It is a good, all-around pastry base that can also be pressed into a tart form if you’d like a more tidy-looking dessert. I like the un-fussiness and rusticity of just rolling out the dough (and because I’m lazy). With its tattered edges and uneven shape, it looks like we all should in summer: loose, wild, and free!
For a big time saver, I’ve opted to use yogurt for the topping instead of making a cashew cream. If you would prefer a non-dairy option, try the cashew cream recipe from this post. It would be smashing on this tart!
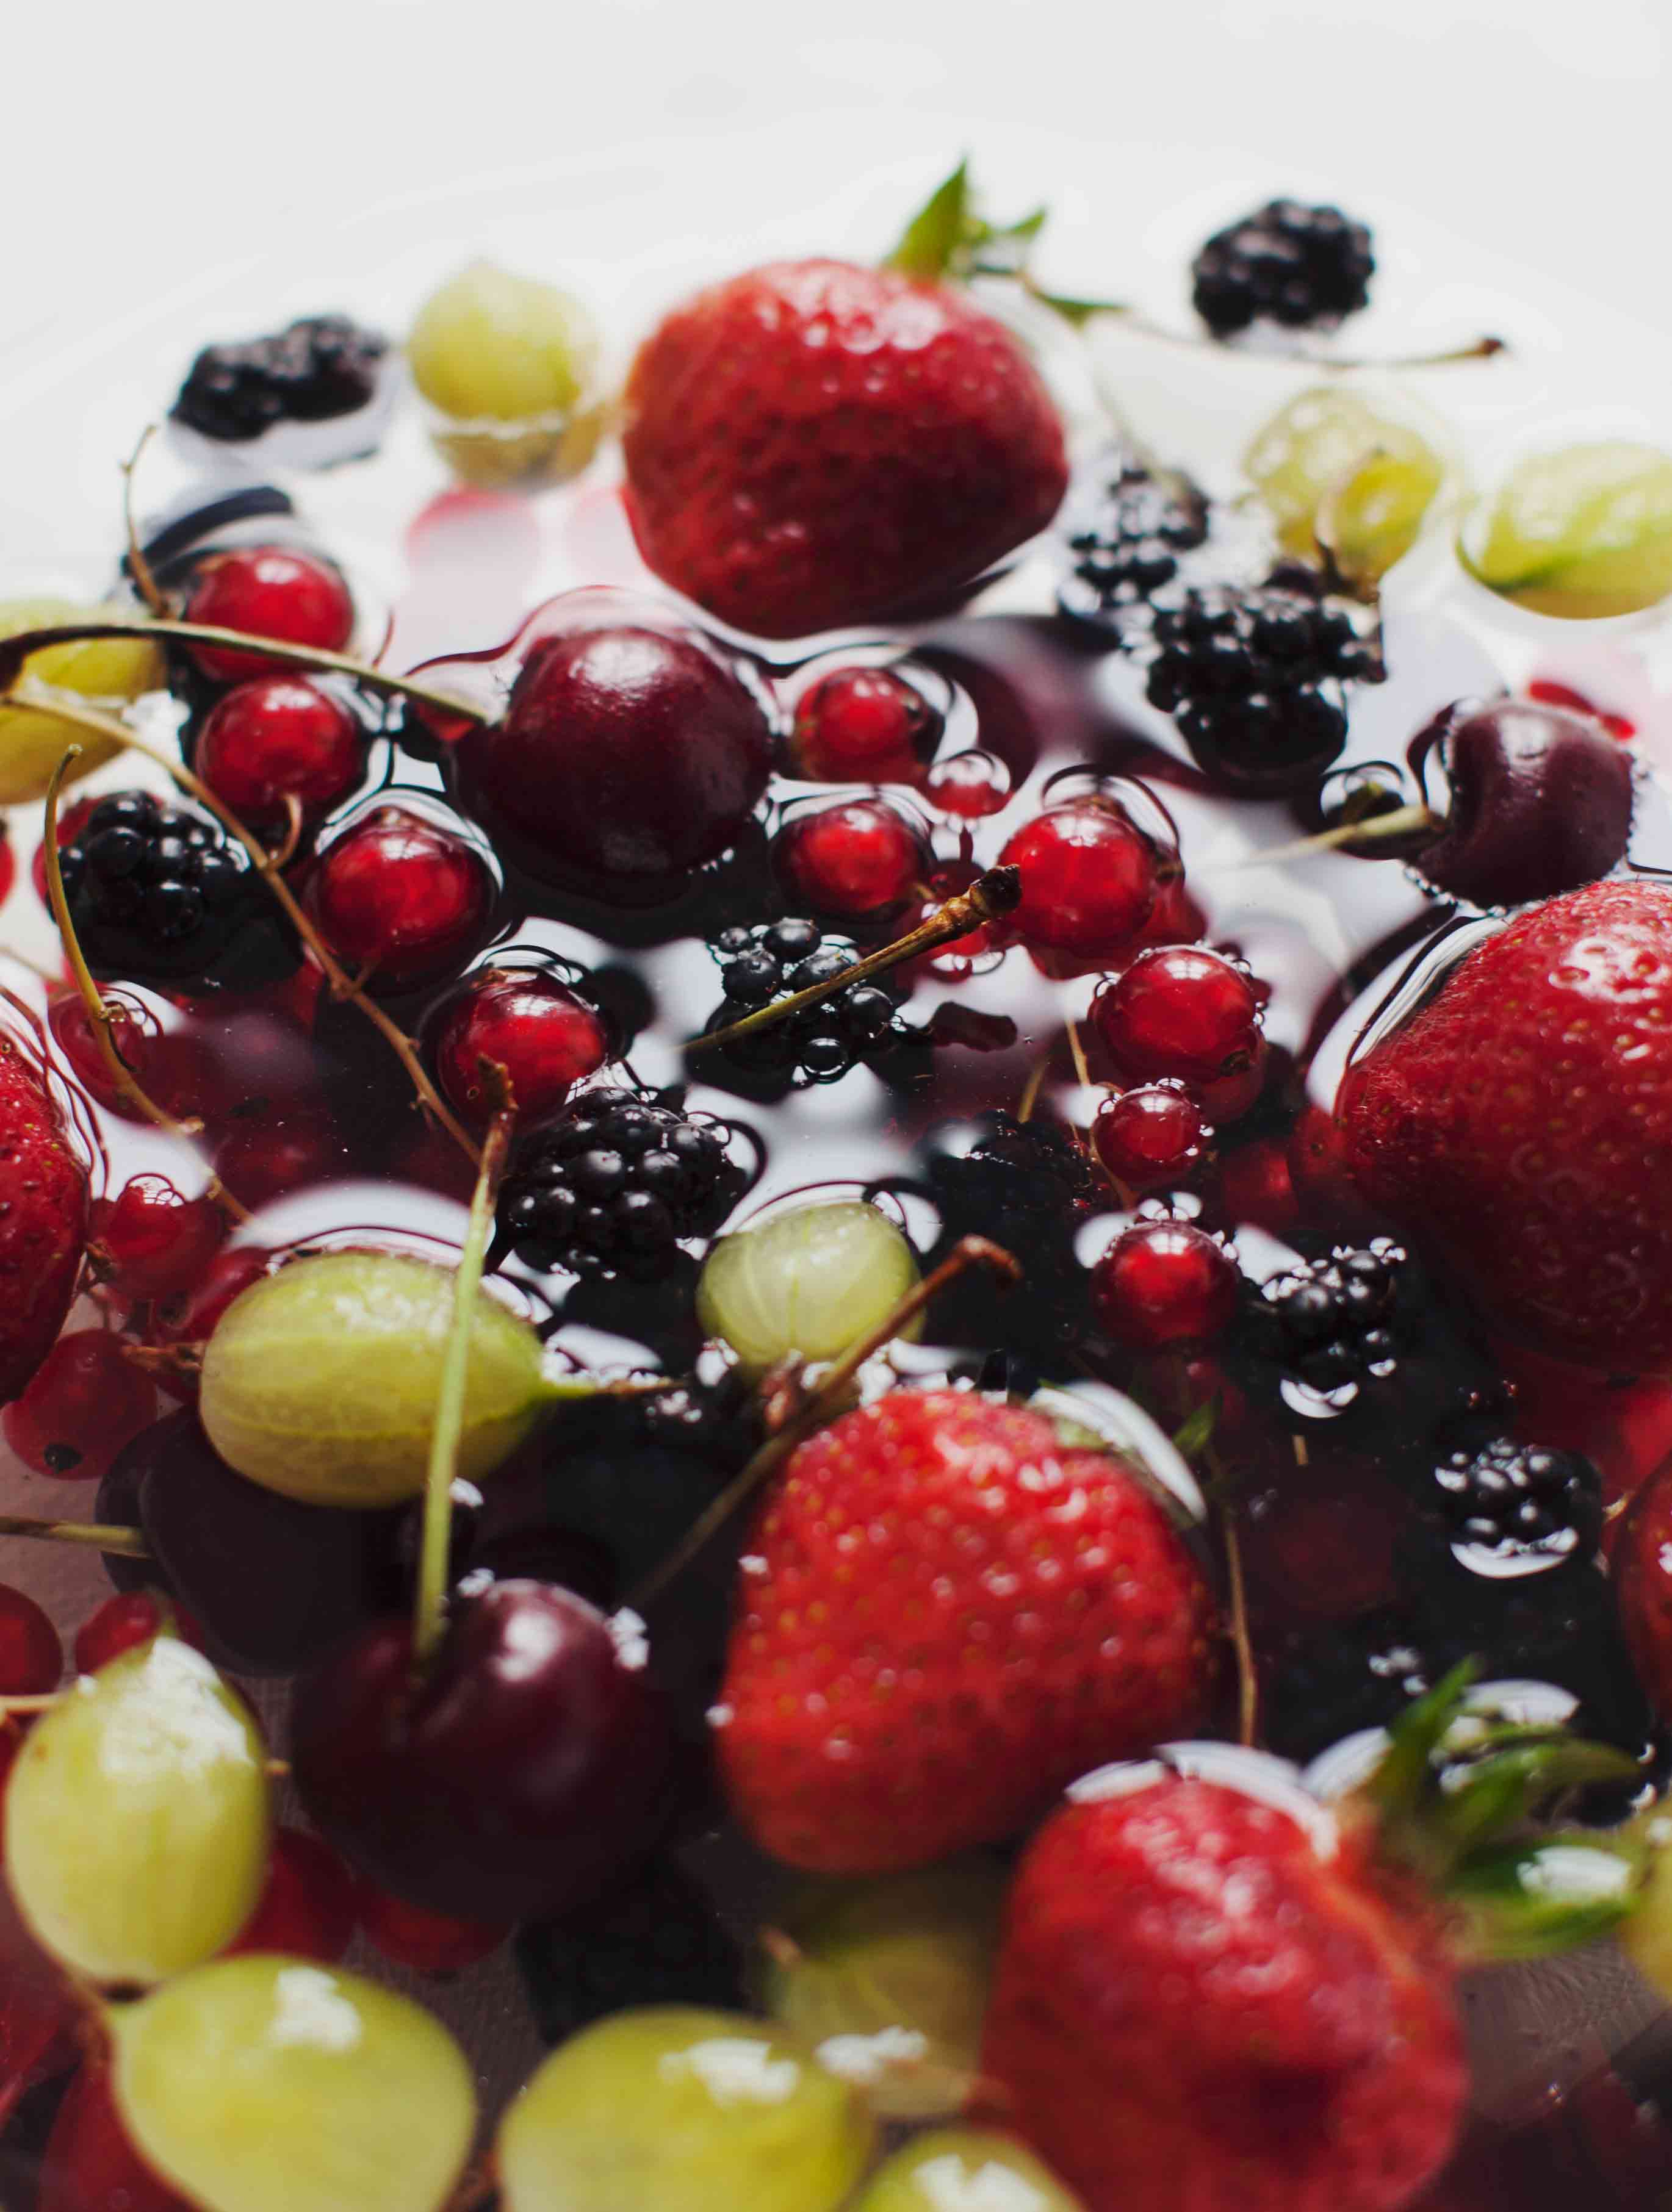
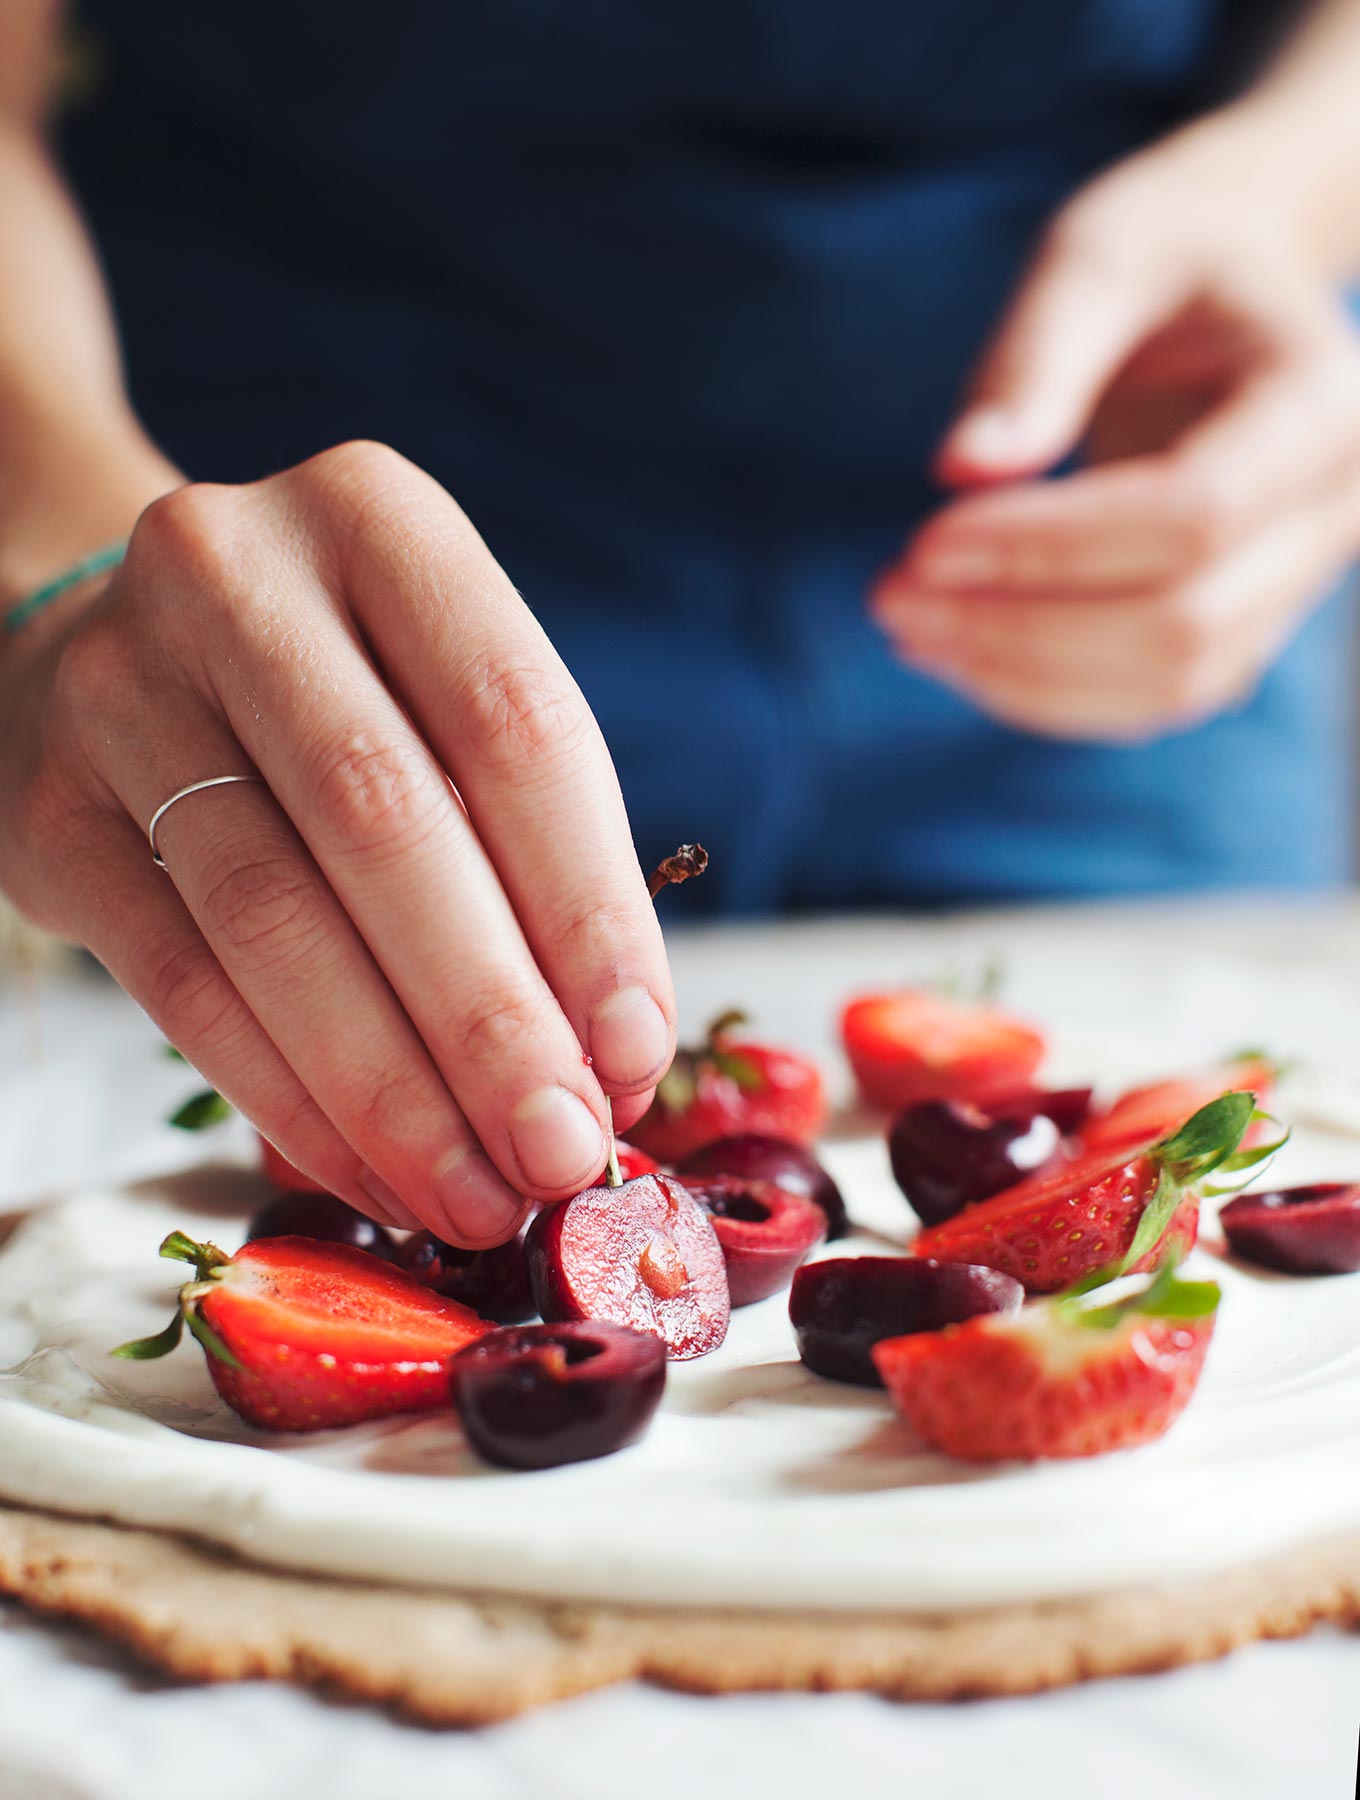
The fruit is also your call, just use whatever is in season around you. We are finally enjoying the annual berry explosion here in Denmark, the one I wait for the entire year, and this recipe is truly a celebration of the juicy abundance, sumptuous colours, and bright flavours all around. Toss on a combination of favourites, or go for a solo fruit that you really want to highlight. This tart can carry itself well into the autumn as well, using plums, pears and figs as well.
As for garnishes, although they aren’t totally necessary, this tart is really delicious with the addition of a few extras. I tossed on a small handful of fresh herbs; peppermint and lemon balm, because I happened to have them on hand, but what a difference they made! Verbena would be so delicious too, or spearmint, bergamot, or even chocolate mint. And because I am obsessed with bee products, I couldn’t resist sprinkling the tart with pollen and topping each slice with a good chunk of honeycomb. Nothing is bad with honeycomb on top. Ever.
With that, I leave you with the recipe, and sun-drenched love wishes to all of you out there romping around and being wild little bunnies. Big hugs and fruit tarts, Sarah B
Summer Celebration Fruit Tart Serves 4-6
Sunflower Buckwheat Crust Ingredients: 1/3 cup / 45g sunflower seeds 1 cup / 160g buckwheat flour pinch sea salt zest of 1 lemon 3 Tbsp. coconut oil, very cold 1 ½ Tbsp. pure maple syrup 1-3 Tbsp. ice water, as needed
Topping: 1 cup Greek-style, plain yogurt (preferably from goat or sheep’s milk) seeds from ½ vanilla bean 1 Tbsp. pure maple syrup or honey a few handfuls of seasonal fresh fruit (I chose cherries, strawberries, red currants and gooseberries) fresh herbs (I used mint and lemon balm) bee pollen + honeycomb, if desired
Directions: 1. Preheat oven to 375°F / 190°C. 2. In a dry skillet over medium heat toast sunflower seeds, tossing frequently, until fragrant and golden, 3-5 minutes. Remove from heat and let cool. Place seeds in a food processor and pulse until they resemble sand. Next add the remaining crust ingredients, except the ice water. Pulse to bring everything together and incorporate the oil. With the motor running, dribble in the water, one tablespoon at a time until the dough is no longer crumbly – do not add more than you need. 3. Empty the dough onto a large piece of parchment paper. Gather it into a rough ball, then place a sheet of parchment paper on top and using a rolling pin roll out into a circle about 12” / 30cm in diameter. Slide crust onto a baking sheet and place in the oven to bake until golden, about 20-25 minutes. Remove from oven and let cool completely. 4. While the crust is baking, combine the yogurt, vanilla seeds, and maple syrup. Set aside. Wash all fruit and slice if desired. 5. Assemble tart right before serving (otherwise the crust will get soggy) Spread yogurt onto the crust, and top with fruit. Garnish with fresh herbs, bee pollen and honeycomb if desired. Enjoy immediately.
There’s nearly a foot of snow on the ground as I write this and the sky doesn’t look like it’s fixing to quit time soon. Erin Brockovich, my favorite movie of all time is playing and I’m perched on the windowsill by the fireplace waiting for a certain Elk that I know lingers around the house to make an appearance.
Loveliness and prettification has NEVER been my schtick, and I hate that the summary of my morning sounds like an Eddie Bauer catalog or one of those instagram accounts that are all leather goods and falling leaves –– BUT life out here does feel good. For all the confused looks we got for making this leap, there is nothing I’ve felt so sure about, next to marrying Shaun. We definitely didn’t know how life would change when we waved goodbye to the city, but we knew it would, and that it would for the better. They say “wherever you go, there you are,” which is true. We brought our same soggy hearts and issues and questions up the canyon with us, but… yeah… and HERE we are, choosing the front row to our own lives and experiences, away from that which no longer serves. I think the “there” can hold more water than we care to admit. But I’m biased. The mountains are my church. It’s impossible to not step outside, breathe deep, and get hit with this rush of perspective. For the first time in a very long time, I think I recognize the sound of my heartbeat again.
There’s this pull-apart bread I’ve been sitting on a while, though. I made it a month ago, the last shoot in the old place. I was feeling that sort of manic-compulsive desire to bake and make a wholly sticky mess of a half-packed kitchen (pro tip: wine bottles make A+ rolling pins). I’m the kind of person who turns to baking when things feel totally psychedelic and out of control. Unlike throwing together something grainy, herby, green-ish, crunchy, tangy in a bowl and calling it a masterpiece, baking requires a high degree of rule-following that tends to turn me off on most days (in the kitchen, and in life). But I appreciate the precision. The requisite patience. The attention to detail. I crave it when everything else in the world feels topsy turvy. I promise the pay-off is big on this one, guys.
Fig + Anise Pull-Apart Bread
For the dough (slightly adapted from The Pioneer Woman):
2 cups milk
1/2 cup butter
1/2 cup white sugar
2-1/4 tsp active dry yeast
4 cups AP flour
1/2 cup (additional) AP flour
1/2 tsp baking powder
1/2 tsp Baking Soda
dash of salt
Filling:
2 cups dried mission figs, soaked + softened
2 Tbsp ground anise seed
10 Tbsp butter, melted
1 cup packed brown sugar
1/4 cup white sugar
2 tsp cinnamon
Preheat oven to 350’ F.
Start with the dough. Combine milk and butter in a small sauce pan. Heat until just beginning to steam. Turn off and remove from heat. Stir in yeast and 1/2 cup sugar. Let sit for 5 minutes. In a stand mixer with a bread hook or in a large bowl with wooden spoon, stir together liquid with 4 cups of flour. Wait an hour for the dough to rise, then add 1/2 cup additional flour, baking powder, baking soda, and salt.
Place figs in a bowl of warm water to soften for 20 minutes. Strain, dry, and place in the basin of a food processor or a immersion blender. Add anise, melted butter, sugar, and cinnamon. Blend until a sticky paste forms. Add more butter or a bit of milk to thin if necessary. Set aside.
On a floured surface, roll out dough into a large rectangle, about 1/4” thick. Spread fig/anise paste evenly until it covers all of the dough. WARNING: the next phase is extremely messy. It’s unavoidable. Just have fun with it. Cut the dough into 6 to 8 strips, then stack all the strips into one stack. Cut the stack of strips into 6 slices. Place the stacks sideways into a buttered bread pan. If you’re me, you will probably feel the need to shove things in the holes… Dee recommends against this, but hey… it doesn’t always have to be pretty to taste good.
Cover with a dish towel and allow to rise for 20 minutes. Bake for 30 minutes and then check to make sure the top is not browning. Test the center… are things still gooey in there? Cover with tin foil and continue to bake for 10, 15, 20 minutes.
Alex and I love crazy, inventive dishes and exotic flavors, but when it comes down to it, simplicity reigns in our style of home cooking. So it was no surprise that this creamy marinara pasta caught our eye when we received the new cookbook Yogurt Culture by our friend Cheryl Sternman Rule. We don’t eat pasta often, but a slow-simmered tomato sauce combined with creamy yogurt and topped with peppery basil sounded enticing.
The book is dedicated entirely to yogurt, and while that might sound overwhelming, the recipe ideas are varied and inventive: fruit compote toppings, savory Mediterranean yogurt dips with olive oil and lemon, lamb kebabs, mocha cupcakes–everything from sweet to savory to in between. I read a lot of cookbooks, so it’s meaningful when I say I truly enjoyed immersing myself in the pages of this book. What surprised me was the significant use of yogurt in Mediterranean dishes (my favorite cuisine), which for whatever reason I was not expecting, thinking a yogurt cookbook might simply be a list of granola and fruit toppings. Cheryl’s writing voice is clear and comforting, and her instructions are thoughtful. Even from this simple pasta recipe, you can sense her culinary finesse, for example choosing to temper the thick yogurt with a bit of the warm marinara sauce before mixing it all together.
This pasta was fabulous; it’s a bit like a vodka sauce without the vodka. It coated the pasta perfectly with just the right amount of creaminess, which we admire after ending up with many dry pastas after failed recipe attempts. We had a long list of other recipes from the book to make, but kept coming back to this one. It’s perfect for a summer evening on the patio – and our leftovers even managed to reheat well (a feat with pasta!).
I was also able to catch up with Cheryl about the book, who as lovely and kind in person as she is in her book. I’m a huge fan of her writing and inventive recipes, so it was a pleasure to have a little Q&A about cooking, health and yogurt! The interview is below. And if you’re interested in more yogurt recipes, Cheryl has started a site with a compilation of yogurt recipes and information: head over to Team Yogurt. Thanks again to Cheryl for her time, friendship, and a truly inspiring book.
Sonja: So, an entire cookbook on yogurt! What inspired you to dedicate a book to this ingredient?
Cheryl: The original idea came from my agent, Jenni Ferrari-Adler, who had an inkling it might be a good fit for me. What she may not have realized, though, was just how perfect a fit it really was. I’ve been an avid yogurt-eater my entire life. I made yogurt all the time when I served in the Peace Corps. And I have a fascination with global food traditions. This one ingredient tapped into all those realms. It was, and continues to be, a dream topic for me.
Sonja: Is yogurt considered “healthy”? What makes it a healthful food?
Cheryl: Absolutely, yes. At its core, yogurt is simply milk and good bacteria. (Of course, you can make and buy non-dairy yogurts, but I’ll talk about dairy here.) Yogurt is a great source of protein, calcium, and probiotics, plus it contains B vitamins, vitamin D, potassium, magnesium, and zinc. I always hesitate to list out that long list of nutrients because they’re not really my focus. Yogurt’s just one of these foods that’s all-around great for you. That said, calcium, protein, and probiotics really do have substantial health benefits, so people who are motivated by cleaning up their diets or introducing nutrient-dense foods would do well to eat lots of (plain) yogurt.
Sonja: What’s a good way to flavor yogurt at home, instead of buying artificially-flavored brands?
Cheryl: The first chapter in Yogurt Culture is called Flavor. I created those recipes specifically to flavor plain yogurt in interesting ways with easy-to-make compotes and mix-ins. So whether you’re making strawberry-rhubarb compote or roasted blueberry compote or burnt-sugar apricots, you can keep these homemade flavorings in a jar in the fridge and mix and match them with plain yogurt.
And, of course, I provide savory options as well, relying on things like olive oil, spices, garlic, and salt, to name just a few. The rest of the book gives 115 recipes for what to do with plain yogurt. I really want to inspire people to use this incredibly accessible, versatile food in new ways.
Sonja: We love your recipe style of home cooking with flavorful whole foods. How did you become interested in cooking this way?
Cheryl: Once I really, really learned to cook (I went to culinary school in 2002-2003), I pretty much lost my taste for convenience foods. It was easy to just start building my food writing career at that point based on whole foods because that’s what I was cooking for myself and my family.
Sonja: What’s your favorite recipe from the book?
Cheryl: Probably the Greek Yogurt with Lemon Vinaigrette. It’s assertive, refreshing, surprising, beautiful, and takes less than five minutes to make. I love recipes that pack a flavor punch with such minimal effort!
28-ounce can tomato puree (we used San Marzano variety)
Kosher salt and freshly ground pepper
½ cup plain whole-milk Greek yogurt, at room temperature
Crushed red pepper
1 pound bucatini pasta
Torn fresh basil leaves, for garnish
What To Do
Make the sauce: In a large saucepan, warm 2 tablespoons of the oil over medium-low heat. Add the onion and cook, stirring occasionally, until soft and translucent, 8 to 10 minutes. Toss in the garlic and cook, stirring constantly, until fragrant, about 30 seconds. Pour in the tomato puree and season generously with salt and pepper. Bring to a bubble, then reduce the heat and maintain a low summer so that the flavors can fully develop, 30 to 40 minutes, giving a stir when you think of it. Remove from the heat and let cool for about 10 minutes.
Temper the yogurt: In a small bowl, whisk the remaining 1 tablespoon oil into the yogurt. Whisk in ½ cup of the warm sauce to temper the yogurt. Scrape the yogurt mixture back into the saucepan whisking to incorporate fully. Taste, adding more salt and pepper, and the crushed red pepper.
Serve: Boil the pasta in plenty of salted water according to the package instructions. At the end of cooking, set aside ½ cup of the pasta water. Using a slotted spoon or tongs, slowly transfer the hot pasta to the tomato sauce, tossing to coat. Drizzle in a tablespoon or two of the reserved pasta water, or more if desired, to loosen. Server hot, garnished with the basil.
Notes
Reprinted with permission from Yogurt Culture by Cheryl Sternman Rule
It’s Wednesday lunch as I’m writing this text and I am fully aware that this probably is an exceptionally badly timed blog post. Being right in the middle of the week, you probably have your work jive going strong and a chocolate cake in your web browser stands the risk of messing all that up. So, instead of scrolling down to see the rest of the images and read this interesting little recipe, we simply suggest that you stop reading right away and close this window. Because if you continue, we plan to tell you that the filling is made from black beans and that might really get you out of focus. There is a risk that you will start thinking about what the beans does to the texture and how they affect the flavour.
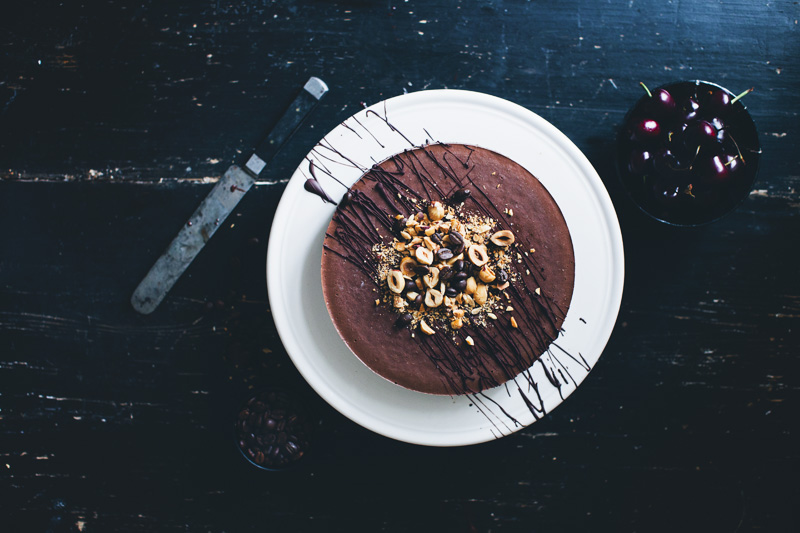
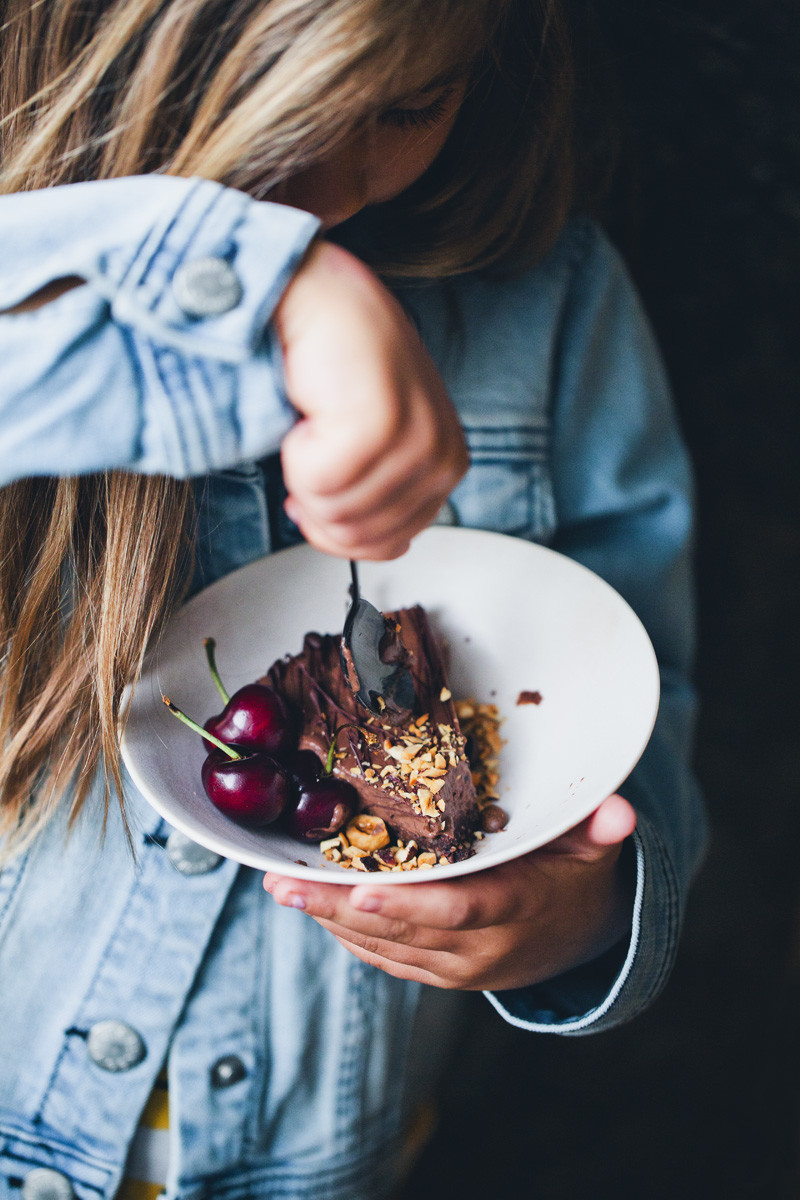
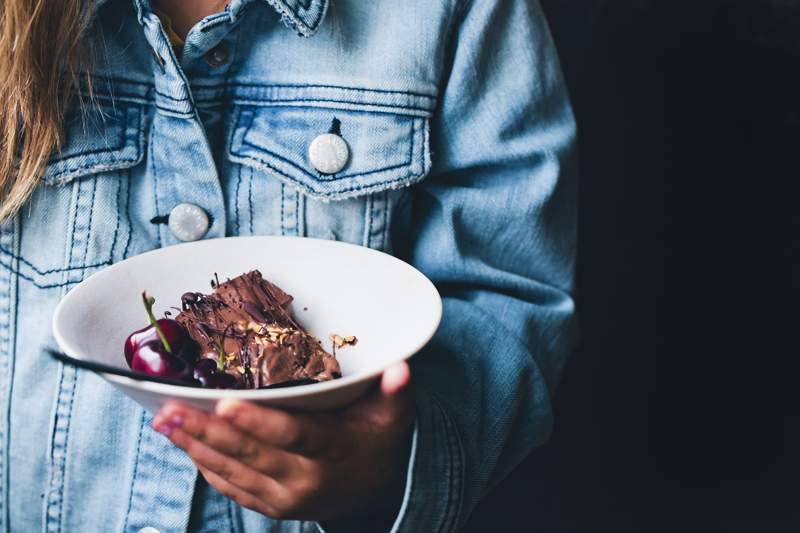
Well, since you obviously already are thinking about it: The texture is very smooth and creamy, and you can’t really taste the flavour of the beans at all. Instead this cake tastes of coffee. As it turns out, coffee, black beans and chocolate is an unexpectedly terrific combo. The cake can be served frozen, like an ice cream cake. Or thawed, as a creamy mousse cake. I prefer eating it while it’s quite firm but Luise likes it to be more creamy and have that lush mousse consistency.
Come to think of it, this must be one of the easiest cakes in our repertoire. It’s entirely vegan and gluten free, the ingredient list is conveniently short and you can throw everything together in more or less 15 minutes. Although it needs about two hours in the freezer before it can be devoured.
Normally, I am the one making most of our desserts but this cake is entirely Luise’s creation. She didn’t even tell me about it at first, just went: “I’ve got a little cake in the freezer in case you want to take some photos of it”. So I did. And then we ate it. We got the inspiration for the drizzled chocolate decoration from one of Linda Lomelino’s beautiful cakes.
We have made this cake twice since that first time and I suspect that we will be making it a few times more this summer. You should really try it. It’s different and it’s damn delicious. And if you would like to trick your kids or partner to eat more legumes, this is probably your best chance ever.
A few things to consider before trying this recipe:
• This recipe is perfect for an 8 inch / 20 cm springform pan, if yours is bigger we recommend increasing the measurements, or the cake will be too thin.
• As usual with our desserts, this is not overly sweet but more balanced in flavour. If you know that you have a sweet tooth, go ahead and add a few more dates to the filling.
• If you don’t like coffee, you can substitute it with 1/4 cup of plant milk. Or nut butter, which also could be an interesting flavouring idea for the filling, it would probably taste fantastic together with chocolate and black beans.
Mocha & Black Bean Mousse Cake Serves 8
Crust 1 cup / 125 g hazelnut 10 fresh and soft dates (100 g / 3,5 oz), pitted 3 tbsp cacao powder 1 tbsp coconut oil 1 pinch sea salt
Filling 1 1/2 cups / 200 g cooked black beans (equivalent to 1 can drained and rinsed beans) 5 dates, pitted 1 tbsp coconut oil 2 shots / 1/4 cup / 60 ml strong coffee 1/3 cup / 80 ml plant milk of choice (like rice, oat, soy or almond milk) 3,5 oz/ 100 g dark chocolate (70%)
Toppings 1/2 cup / 65 g toasted hazelnuts 50 g / 2 oz melted dark chocolate
Start by making the crust. Place hazelnuts in a food processor and pulse a few times until they have a pebbled texture. Add the rest of the ingredients and mix until everything is combined. Line the bottom of a 8 inch / 20 cm spring pan with parchment paper and pour the date and hazlenut mixture into it. Use your hands to firmly press down the mixture evenly. Place the spring pan in the freezer and continue on with the filling.
Add beans, dates, coconut oil and coffee to the food processor an pulse on high speed for about a minute. Place a small sauce pan on low/medium heat. Add the milk. Break up the chocolate into smaller pieces and add to the milk. Use a spatula to stir around and take the sauce pan off the heat just as the chocolate starts melting. Keep on stirring until you have a smooth and thick chocolate mixture. Add the melted chocolate to the food processor and mix until you have a smooth chocolate filling. Pour the filling into the spring pan on top of the crust and place it back in the freezer for 2-3 hours. You can also leave it in the freezer for weeks, just make sure to thaw the cake for at least 30 mins if it is deep-frozen.
Decorate the cake before serving. You can either just use a lot of berries, or as we have done here, drizzle with melted chocolate and toasted hazelnuts. You can store the cake in the fridge for a few hours if you prefer it to be creamier, just remember to remove the sides of the springform pan while it is still frozen. Enjoy!
How about a life-y things type update? It’s been a while! I’ll start, and you can fill me in on what’s new with you, if you’d like. Don’t mind the occasional blurry iPhone photo below (they secretly kill me).
1. June Challenge
For the month of June I challenged myself to 1 smoothie a day and 1 salad a day. So far it’s going strong and I’m packing in more veggies and fruit (check out the slew of smoothies, smoothie bowls, and parfaits taking over my Instagram lately). And chocolate for good measure. Want to join me? This smoothie bowl below is going in the next cookbook. Adults and kiddos alike are going nuts over it. I’m having so much fun coming up with summer breakfasts lately…
2. May fun.
May was a fun and busy month! There was my first Mother’s Day and birthday celebration, a visit from my mom, another visit from my mom and stepdad, celebrating my Grandparents 50th anniversary (!), and a lot of baby milestones in between (we now have a crawler on our hands!).
3. Morning Sing Songs
As it turns out, Adriana loves to sing when she’s in a good mood. Check out this video I shared on Instagram last week (turn on the volume). I have no idea how she hits some of those notes! I certainly can’t (a reality she knows all too well). We’ve had some challenges with teething and other developments this month, so these sweet, happy moments are all the more appreciated! I may or may not watch this video before bed every night…girl kills me.
An easy way to get more veggies into your diet? Support a local CSA (community shared agriculture). We just had our first delivery yesterday. I had forgotten how exciting it is when the loot arrives! It takes all of my restraint not to tackle the delivery person. Since we don’t have a veggie garden in our current backyard, I figure this is the next best thing. It’s already helping me break out of cooking ruts. Random question – what would you make with this loot? The first thing I did was sauté the mushrooms and throw them over a salad. The second thing I did was make collard wraps (SO GOOD). A new obsession has formed…
5. Kitchen Adventures
The state of my kitchen lately (on a good day). Note: only one drawer is open Eric! I’m currently wrapping up the recipes for my next cookbook over the next month or so. The kitchen reno that we did last summer is definitely being put to good use! It’s easily the most used, loved, and enjoyed room of the house.
I feel like I could write an essay on this topic, but I’ll save that for another day.
7. A couple press things
I recently found out the University of Guelph (where I pursued my undergrad studies) included me in their alumni spotlight. See: University of Guelph Alumni feature
The Oh She Glows Cookbook was #1 on the Globe and Mail Bestseller list (Food and Cooking) again last month. Thank you all so much for your continued support! It’s making me all the more excited for cookbook #2 in 2016. There are so many awesome recipes I’m dying for you to try (I seriously think I’m going to have to host a big kick-off party with all my fav recipes or something).
8. Updated blog header + pictures
You might have noticed an updated blog look for the summer (or until I get bored of it again). Eric took a couple updated photos of me and I added those to the sidebar, About page, and Before and After page. It feels like just yesterday when our photographer Dave Biesse shot my last headshots for the cookbook, but as it turns out, that was 2 years ago already. Slow down time!
So there’s a random update. Much more to share, but this is a good start.
Ok, tell me about your plans for June and this summer. Any exciting work/personal projects or travels on the horizon? Also, what would you make with my CSA loot?
Peach season is upon us, and I would be remiss if I didn’t mention my mom’s peach pie. It’s become a tradition in my family to enjoy juicy, summer peaches in this decadently creamy dessert. Unlike most of the recipes you’ll find here, it’s not a particularly healthy food, but it’s a summer tradition that’s as important to us as eating healthy the other 95% of the time. The pie has a family history of its own, which my mom tells in last season’s post about the best peach pie.
The season for peaches is short in Indiana, so now’s the time to make all those summery recipes you’ve been waiting for! Our favorite this season has been Peach, Heirloom Tomato and Burrata Salad. Here’s a list of some of our favorite peach recipes on A Couple Cooks, as well as some tasty links from around the web. Happy eating!
“ We do not grow absolutely, chronologically. We grow sometimes in one dimension, and not in another; unevenly. We grow partially. We are relative. We are mature in one realm, childish in another. The past, present, and future mingle and pull us backward, forward, or fix us in the present. We are made up of layers, cells, constellations. ” — Anais Nin
Shaved & Curried Cauliflower Salad
1 extra-large head of cauliflower
1 cup cooked garbanzo beans
1/2 cup dried apricots, quartered
1 cup celery leaves
1 cup flat leaf parsley leaves
1/2 cup mint leaves
1 orange, for juice and zest
1 shallot, minced
2 Tbsp preferred curry powder
Red pepper flakes
Olive oil
Salt
Preheat the oven for 400′ F. Using a mandoline slicer, shave the cauliflower into large pieces. Place on a baking sheet and coat with olive oil, curry powder, juice of half an orange, and orange zest. Bake for 20-30 minutes until the edges brown and crisp. Remove from heat and allow to cool.
In a large bowl, combine celery leaves, parsley, mint, shallots, and apricots. Mix in warm cauliflower and dress with additional orange juice, a lug of olive oil, and a bit of salt to taste. Serve warm or at room temperature.
My parents made my lunch every day that I was in school from the time I was barely old enough to hold a brown paper bag, right up until my last days of high school. It was always exactly the same format, with slight variations: sandwich, juice box, granola bar, piece of fruit. Pretty standard fare for most of my peer group if I remember correctly, and I never complained about it. That is until the day I peered over my bologna-on-a-bun to see Alexis at the popular kids’ table in the junior high cafeteria slurping over what looked like a rather foreign and intriguing styrofoam cup of something hot and tasty.
“Oh, that’s Mr. Noodles”, my best friend Julie said, and went on to explain that all you had to do was pour boiling water into the cup and wait a few minutes before eating the noodle soup-like meal. I looked down at my cold, relatively flavourless, pedestrian food and felt left out. Not only was I totally un-cool, but suddenly my lunch was too. Could life get any worse?!
I ran home and told my mom about the cup noodles and begged her to buy some at the store, promising her that this could not only save her time, but most importantly, my lunchroom reputation. “Don’t you want me to be popular?!”, I wailed. Convinced this was my ticket to the promised land of spin-the-bottle and weekend shopping mall hang-outs, I persuaded her to invest the fifty cents on a couple trials and see what all the fuss was about. When she came home I had the kettle boiled and ready to get down to business.
Folding back the paper lid, I spotted a magical little package of flavoured powder inside, which I read was meant to be emptied into the cup before adding the water. A couple shriveled, token peas fell out amongst the dust and my mom looked pleased to see green. The boiling water was added, I closed the lid again and waited – the longest four minutes of my life thus far. But oh, what ceremony! What rapture! The timer on my ironman wristwatch beeped, I stirred the cup, and dug in.
It was salty. Very salty. That’s about all I can recall. The noodles, semi-cooked and crispy in parts were underwhelming and bland, while the broth, if I can all it that, was shockingly saline. But none of that mattered. I would have eaten cow dung if it meant sitting next to Alexis. I finally had the answer to the question of cafeteria coolness.
Needless to say, eating ramen did not initiate me into the popular crowd, nor did it inspire a great love of this ubiquitous, cheap eat canonized by hung-over college kids everywhere. Until very recently this had been my only experience with ramen. But when yet another ramen recipe request landed in my inbox, I knew it was time to revisit this famous dish.
It needs to be said that instant ramen is a far cry from its traditional roots of noodles in broth, which when prepared properly with care and intention, can be utterly delicious. I suppose it’s like most things that go from revered, regional dish to the freezer section of the gas station’s grocery aisle, or worse. Shouldn’t these things receive a different name or label in respect to the original recipe? It’s somewhat maddening, but I surrender to the fact that there is only so much I can change in this world.
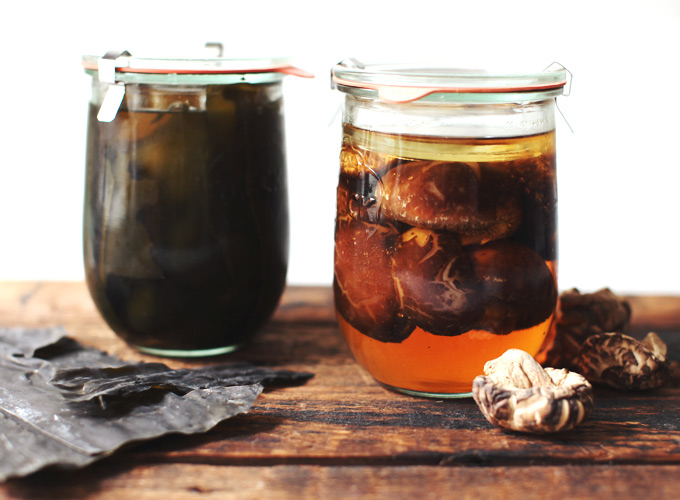
The backbone of all ramen is the broth, or dashi. Dashi is a clear stock that is traditionally made using kombu, Japanese sea kelp, and katsoubushi or bonito, dried fish. Other dashi bases can include shiitake mushrooms, and because my recipes are plant based, I’ll be showing you how to make this variety and the kombu one today. Once you have this base, you can spike your dashi with shallots, garlic, ginger, miso, etc. but today we’re keeping things simple and I leave the fun and improvisation to your ramen-hungry minds.
Toppings vary widely, but vegetarian ingredients can include noodles (obviously), mushrooms, strips of nori or other tasty sea veggies, greens, spring onions, shredded cabbage, kimchi, garlic, and the ever-so-popular soft-boiled egg. If you are vegan, simply leave this ingredient out – it’s the only animal product in the recipe and still delicious without it. The one thing I love about ramen is its versatility and infinitely customizable combinations to suit every season, taste, and budget.
On Salt, Sodium and Finding a Balance The big bad deal with packaged ramen and its accompanying powdered broth or “flavour packet” is the incredibly high sodium content, some brands containing an entire day’s worth in just one serving! On the flip side, making your own dashi allows you to control the sodium level and provide you with balanced saltiness for overall wellbeing.
Sodium is not only important to us, our survival depends on it. Its role in the human body is to work in conjunction with potassium to maintain cellular fluid levels, acid/alkaline balance, and keep the nerves and muscles functioning properly. Sodium plays a role in hydrochloric acid production in the stomach, and is used during the transport of amino acids from the gut to the blood.
Because sodium is needed to maintain blood fluid volume, excessive sodium can result in increased blood volume and elevated blood pressure, especially if the kidneys are compromised in any way and unable to clear it efficiently. Hypertension and premenstrual problems are more frequent in people who have a high salt intake, especially when there is a relatively low level of potassium in the diet to counteract it. Virtually all whole unprocessed plant foods contain more potassium than sodium. Grains, legumes, fruits and vegetables, especially leafy greens, offer ten to several hundred times more potassium, and yet the average American is said to be deficient in potassium. Although there is no standard ratio of sodium to potassium to recommend, eating a balanced, whole foods diet (surprise!) is the best way to achieve equilibrium.
So how much sodium should be eating in a day? First it needs to be established that sodium and salt are two different things. The salt we consume is in fact a combination of two ions, sodium and chloride, in percentages of roughly 40% and 60%. Most nutrition experts agree that sodium intake on a daily basis should not exceed 2 grams per day. This amount is equal to 5 grams of salt, or 1 teaspoon. Yup. That’s it. Put into those terms, it’s easy to see how one could overdo it…by lunch hour.
To avoid excess sodium intake, limit processed foods. As I mentioned above, a little recon revealed that some instant ramen brands cover the daily sodium base in just one serving. Yikes! Sodium lurks in some very unexpected places, so be savvy and read labels. To be extra cautious avoid high-salt foods such as commercially-prepared pickles, olives, and saurkraut, canned and instant soups, processed cheese, condiments like ketchup, barbeque sauce, gravy, alfredo sauce, salad dressings, mayonnaise, soy sauce, snacks foods like chips, salted peanuts and pretzels, crackers, and boxed breakfast cereal. Remember, cooking for yourself is the only way to know exactly what you are getting in your food.
There are a few things that need to be mentioned about this recipe.
First, you need to start the process the night before (or the morning of) by simply soaking the dashi ingredients in water and set in the fridge. This is how you make the broth. You can hurry the process by cooking the ingredients in hot water if you’re in a rush, but the results are better if you follow this slower method (plus, your fridge does all the work). I will also say that traditional dashi is delicate and mild-flavoured, unlike the instant dashi that is saltier and stronger due to the addition of artificial, chemical flavour enhancers. When you try the dashi for the first time, try not to compare it to the ramen broth you’ve had in the past – this is the real deal. Appreciate its clean, pure taste and it subtlety, and add tamari or miso only as needed to enhance the natural flavour.
Second, you can make and enjoy the dashi bases separately if you like, or combine the two for a more complex flavour. I really like the combination of the kombu and shiitake dashi together. They both contain good amounts of umami, so united they deliver a deep, multifaceted taste experience without the meat.
Third, get organic ingredients if you can. Sea vegetables and mushrooms are both like little sponges in their respective environments so finding the cleanest and highest quality you can is a good idea.
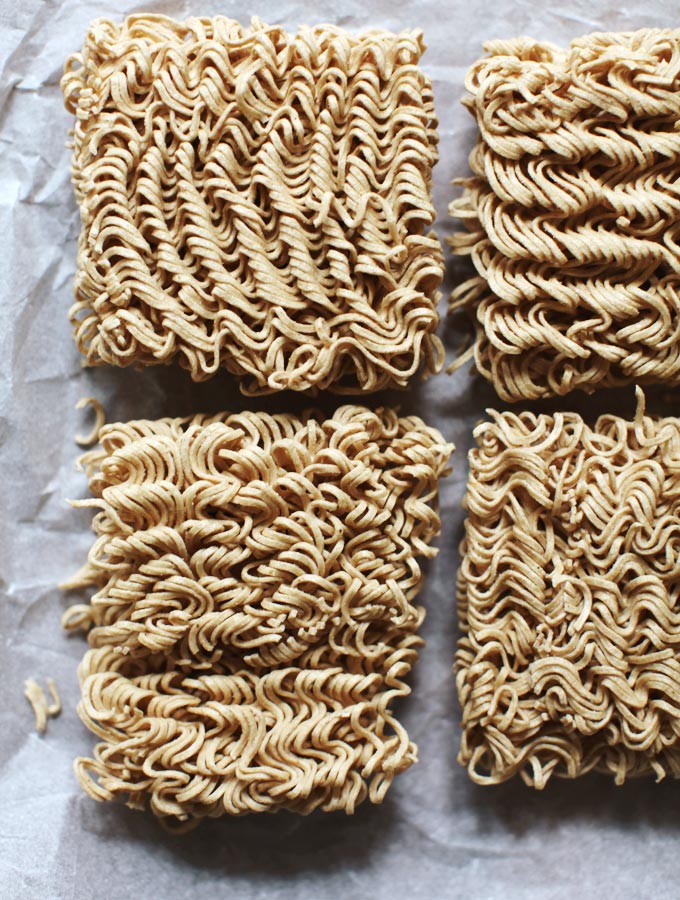
Finally, purchase the most high-vibe ramen noodles you can find. The other reason I was inspired to write this recipe and post was because of all the incredibly awesome ramen I’ve seen at the health food store. Made with whole grains, some of them even gluten-free, I couldn’t say no! Now, you could make your own noodles if you like (this is an art I greatly admire) but in the interest of saving a smidgen of time, buy yourself some noodles and get to the ramen even faster.
Ramen Revisited + How to make Dashi Serves 4 (each dashi recipe below serves 2)
Dashi 4 cups / 1 liter water : 60g dried shiitake mushrooms (do not use fresh) 4 cups / 1 liter water : 20g kombu
Directions: For the kombu dashi, place .7oz / 20g of kombu in 4 cups / 1 liter of water overnight in the fridge. In the morning, discard the kombu, strain the remaining liquid and warm it in a pot on the stove until just barely simmering. Serve.
For the shiitake dashi, remove any dirt or debris from the dried mushrooms and place in 4 cups / 1 liter of water. It is important to submerge the mushrooms, so place something on top of them, such as a smaller glass lid, and set them in the fridge overnight. In the morning, remove the mushrooms, squeezing out as much liquid from them as you can. Set the mushrooms aside, strain the remaining liquid and warm it in a pot on the stove until just barely simmering. Serve.
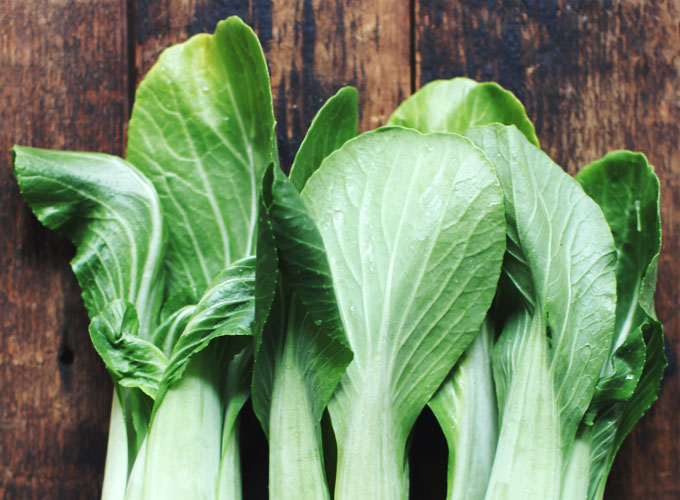
Ramen 3-4 bunches baby bok choy, quickly stir-fried in a little shallot and garlic 2 carrots, julienned 2 spring onions, sliced 2 soft-boiled or medium eggs (to suit your taste) (optional) 1 pack whole grain ramen noodles (gluten-free, if desired)
To serve dried or fresh chilies tamari or miso, to taste (use discretion!)
Directions: 1. Prepare all the ingredients: stir-fry the bok choy or other greens, julienne the carrots, slice the spring onions, slice the rehydrated shiitake mushrooms, soft boil the eggs. 2. Bring a pot of water to the boil. Add the noodles and cook according to the package instructions. 3. While the noodles are cooking, ladle the broth into the bowls. Add the hot noodles and all other ingredients. Take a moment to arrange the food in a pleasing way, sit, and enjoy.
* * * * * *
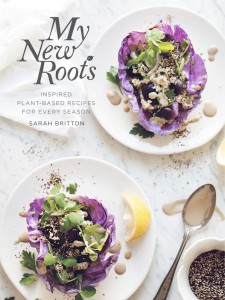
Hey everyone! Mybook comes out today!!! I am so ridiculously excited to see this day arrive and the book arrive in your homes and kitchens. The reviews have been so positive so far and for that, I thank you. Please note that although most stores in North America that are carrying the book should have it in stock today, some may take a few days to longer. If you want to purchase the book online, there are many retailers listed here.
I would like to take this time to acknowledge the couple of misprints in the book. During the editing process the following mistakes were made: on page 21, the ghee recipe is labeled vegan. On page 241-242 buckwheat and spelt switched places so that buckwheat is in the gluten-containing section of the grains chapter, while spelt is in the gluten-free section.
In other news, my Vancouver tour datesand events have been confirmed! Here is where and when you can find me in Van city (this will be my first time there, can you believe it?!). Click the links for more details and ticket information.
I’ve made it no secret that I love Mexican food. So much so, in fact, that the night I went into labor with Mack, I was making enchiladas (I probably should have been at the hospital but since I wasn’t sure, I made dinner instead.) I love the flavor combinations and it’s a cuisine that so easily lends itself to the vegetarian side of things.
In terms of tacos, I could come up with a new variation for each day (365 days of tacos- sounds like a cookbook idea right there, ha!) I have my favorites (like these sweet potato/guac ones– years later and I still love them) but that doesn’t stop me from experimenting. I think it’s easy to overlook roasted red peppers as a main ingredient but they can be so handy (and really delicious- especially when you roast/grill them yourself!) This red pepper relish is great for these tacos but could easily be used in a myriad of ways. I’ve swapped out the cotija cheese for feta and used as a salad topping, stuffed this mixture in a quesadilla, and mixed with grains for lunch.
On top of the red pepper relish, I’ve decided to take the plunge with an idea that’s been in my head for some time. I know there are things on this site that seem easy to me but can easily seem daunting when just starting out and so, I’ve decided to start a video series that shows how-to’s on somewhat tricky items. I already have a video on on how to make corn tortillas with a press but I wanted to create a short, 60 second video on how to ‘roll’ out tortillas with a bowl and hand roller (do you have one of these in your kitchen- I use it more than my rolling pin!) So, without further ado, more corn tortillas: See the Recipe + Video.
My sister and family are here visiting this week and they brought us about 10 pounds of freshly picked cherries from my brother-in-law’s parent’s house (they have about 7 cherry trees…jealous!). It was like Christmas morning when this loot arrived. I’m eating these beauties by the fist full. Adriana is going wild over them. It’s a good, ahem berry good, week. We pitted and froze a bunch to make 1-ingredient cherry sorbet in the Vitamix (my nephews loved it) and I’m dreaming up other ways to use them before they go bad!
This gorgeous Cherry-Strawberry Chia Seed Fool is a festive dessert I came up with for Canada Day tomorrow. I actually thought of it in the middle of the night last night and by some stroke of luck I remembered the idea this morning. In lieu of heavy dairy cream, I used full-fat coconut cream and whipped it with a touch of cane sugar and vanilla bean powder. So incredibly simple and delicious. For the berry part, I made a cherry-strawberry chia seed jam with maple syrup (does it get anymore Canadian?), vanilla bean, fresh lemon juice, and a secret ingredient – a teaspoon of finely grated beet for a bolder red color (but that’s totally optional). It turned out so lovely layered in parfait glasses. Many traditional fool recipes that I came across fold the berries into the cream until it’s pretty uniform in color, but I prefer the layered look so I did it my way. Then you can swirl it all together as you eat it. Total bliss! I also added some toasted sliced almonds and flaked coconut on top for some crunch. A little lemon zest would be nice too.
A vegan twist on the classic berry fool! I used whipped vanilla bean coconut cream and paired it with a delightful cherry-strawberry chia seed jam with lemon and vanilla. This dish requires some advance preparation so be sure to put the cans of coconut milk in the fridge the day before so the coconut cream can solidify. The jam also requires cooling, so you’ll need at least 2 hours to chill it in the fridge before layering the dessert.
1/4 teaspoon pure vanilla bean powder or 1 vanilla bean, seeded
For the Cherry Strawberry Chia Seed Jam (makes 2 1/3 cups)
2 heaping cups fresh or frozen strawberries (hulled if using fresh)
3 cups fresh or frozen sweet cherries (pitted if using fresh)
3-4 tablespoons pure maple syrup, to taste
2 tablespoons chia seeds
pinch fine sea salt
1 teaspoon pure vanilla extract or 1/2 teaspoon pure vanilla bean powder
1-2 teaspoons fresh lemon juice, to taste
1 teaspoon peeled and finely grated red beet (I use a microplane lemon zester), adds bolder red hue
Optional garnishes:
Toasted sliced almonds
Coconut Flakes
Lemon Zest
Fresh cherries
Directions:
Chill the cans of coconut milk in the fridge for 12-24 hours so the coconut cream can solidify before use.
For the chia seed jam: Add the berries and maple syrup into a medium saucepan. Stir to combine. Increase heat to medium, and simmer until the berries release their juices and soften, about 10 minutes. After the berries release water you can increase the heat even more to cook off the water. Watch closely and stir frequently. When the berries look a bit soft, stir in the chia seeds. Keep cooking over medium heat until the chia thickens the mixture slightly, about 5-10 more minutes. Reduce heat if necessary to avoid burning. Remove from heat and stir in the salt, vanilla, lemon, and optional grated beet. Pour into a glass container and let it cool on the counter for at least 30 minutes before covering and chilling in the fridge for at least 2 hours, preferably longer.
Chill a medium bowl in the freezer (this helps the coconut cream stay thick while whipping).
Open the chilled cans of coconut milk and carefully scoop off the white coconut cream from each can and place it into a medium bowl. You should have 1.5-2 cups worth of cream. You can reserve the leftover coconut water for another use, such as a smoothie or you can freeze it into coconut water ice cubes (also great in smoothies).
With electric mixers or a whisk, beat the cream and the cane sugar in the chilled bowl until smooth. Whisk in the vanilla.
Layer the coconut cream and the chia jam in parfait glasses. Top with optional toasted sliced almonds, flaked coconut, lemon zest, and a cherry on top! Enjoy immediately or cover and transfer to the fridge until ready to serve. The chia seed jam will keep for up to a week in the fridge in an air-tight container, and I expect the coconut whipped cream will keep for at least 5 days.
Tip: If for some reason your chia seed jam didn’t thicken enough after chilling (this might be the case if the water wasn’t cooked off enough), stir in another tablespoon of chia seeds and chill it for another hour. That should do the trick!
I’m keeping this short and sweet today because I have a big cookbook deadline looming. Thank you so much for your patience with my infrequent blog posts lately. I am dying to get back into it!
Wishing my fellow Canadians a very happy Canada Day tomorrow. Also, happy 4th of July to our friends south of the border. (By the way, you can easily turn this into a red, white, and blue dessert by adding blueberries.) I hope you have a fun and safe week filled with all the goodness summer has to offer!