Penne Pomodoro with Vegan “Tuna”

Vegan_tuna_pasta_1

I have crawled up in a rusty canopy swing with the computer in my lap, spiderweb from the canopy tangled up in my hair, Mr Bojangles on repeat (I always write with a single song on repeat in my ears) and Elsa balancing on my legs. We are spending a few days at my dad’s summerhouse and while Luise is drawing with Isac, I wanted to tell you about this pasta dish that we cooked and photographed the other day.

I’m trying to formulate my thoughts into words. How soaked sunflower seeds almost magically get the texture of canned tuna when mixed in a food processor. But it’s not easy. Elsa is using every muscle in her body to steal my attention from the computer screen. Her mouth is forming words (that I can’t hear because of the earplugs), her head is jumping from side to side while her eyes are actively seeking mine. She is smacking her hands together right in front of my face and she grins when I finally look up from the computer and pull out the earplugs.

– Do you know what this means on sign language? She asks me with giggle in her voice while she keeps smacking her hands together and then pointing at herself.

– No, tell me.

– I want a saaaaandwich!

– Are you hungry?

– No, I’m just teaching you sign language.

– Ok, nice. But I’m working right now. Maybe you can teach me more later?

– Ok. Just one more. Do you know what this is? [Taps her forehead with her hand and pulls it away in a half circle.]

– Ehm, maybe a unicorn?

– Nooo stupid, it means thank you. Actually, I think I want a sandwich.

– Maybe you can ask mom to help you?

– Okaaaaaaay.

She jumps down and runs into the house. Earplugs back in. I’m guessing that I have approx 5 mins to write this. Here we go.

Vegan_tuna_pasta_4

It’s not often that we create dishes that mimics meat. In fact, we often do the opposite by letting the vegetables shine in all their glory. I don’t remember eating tuna a lot before I became a vegetarian, but after having seen a few vegan sunflower seed “tuna” recipes on the web (especially this beautiful Tuna Tartine from Faring-Well) I suddenly got this weird craving for it. So we decided to give fake-tuna a try. By pulsing soaked sunflower seeds in a food processor together with salty capers, shallots, oil, apple cider vinegar, lemon and nori sheet, you actually get something that looks weirdly similar to canned tuna with a crumbly, moist texture and a flavour that reminds me of salty seas and umami.

Most recipes we’ve seen use this sunflower seed tuna as a spread or as a tuna salad (often with the addition of celery and herbs) but we instead added it to a tomato sauce and served it with penne, creating a classic Italian poor mans dish. The vegan “tuna” adds a nice texture to the sauce and it improves the flavour as well. The kids loved it! It is a simple recipe if you are on a budget and it is a tad more special than your basic pasta pomodoro. So go put your sunflower seeds in water and pretend they are a fish.

I can see Elsa eyeballing me from the window now so I better round this up. I have got a class in imaginative sign language up ahead with my favourite teacher.

Vegan_tuna_pasta_2Vegan_tuna_pasta_3

Penne Comodoro with Vegan “Tuna”
Serves 4

It’s important to soak the sunflower seeds to achieve the right texture so don’t skip that step. If you’ve got some white wine opened in the fridge, you can add a glug of that for extra depth and flavour.

Vegan Tuna
1 cup raw sunflower seeds, soaked in water for 6 hours or overnight
1 small shallot or red onion, minced
3 tbsp capers + brine

1 tbsp lemon juice
1 tbsp cold-pressed olive oil (coconut oil, ghee or butter)

1 tsp apple cider vinegar
1/2 tsp sea salt

1/2 sheet of nori (the seaweed you use for sushi), cut into tiny pieces (optional)

Pomodoro Sauce
1 onion

2 cloves of garlic
2 tbsp olive oil
3 x 400 g / 14 oz cans of chopped tomatoes
1 handful fresh basil or 2 tsp dried

sea salt
freshly ground black pepper

Serve with
Pasta of choice (we use wholegrain penne or a gluten free version made from dried beans)
1/2 cup large capers
fresh parsley, finely chopped
ruccola

To prepare the “tuna”, simply add all ingredients to a food processor. Pulse a few times until it you have a coarsely textured mixture. Taste and add more salt, lemon juice or vinegar. Pulse again and scoop the mixture into a bowl.

Peel and finely chop the onion and garlic. Place a large sauce pan on medium heat and add olive oil. Sauté the onion and garlic for a few minutes until fragrant. Add tomatoes, basil, salt and pepper. Bring to the boil, reduce the heat and simmer for about 30 minutes. Taste and adjust the flavours throughout. Add a splash of water or white wine if it starts looking dry.

Meanwhile, cook the pasta according to the instructions on the package.

When the tomato sauce is ready, stir in 2/3 of the “tuna”, saving the rest for serving. Divide the pasta in 4 bowls, top with tomato sauce, capers, fresh parsley and a drizzle of olive oil.

Green Kitchen Stories

Vegan Carrot Waffles from The Love and Lemons Cookbook

Vegan Carrot Waffles from the Love and Lemons Cookbook

Beyond spring being a wonderful time of year due to weather and produce, it’s also a great time for new cookbooks. There are so many wonderful cookbooks coming out this spring that it’s hard to know what to share. However, The Love and Lemons Cookbook is one you should definitely add to your list. These carrot waffles are the creation of Jeanine and just one of the many recipes I have on my list to try from the cookbook. The waffles are crisp on the outside, tender on the inside, all without any dairy or eggs. Jeanine hit it out of the park with these waffles (and carrots were the featured produce ingredient in this week’s newsletter!) Read more and see the recipe.

The post Vegan Carrot Waffles from The Love and Lemons Cookbook appeared first on Naturally Ella.

Naturally Ella

Next Level Vegan Enchiladas

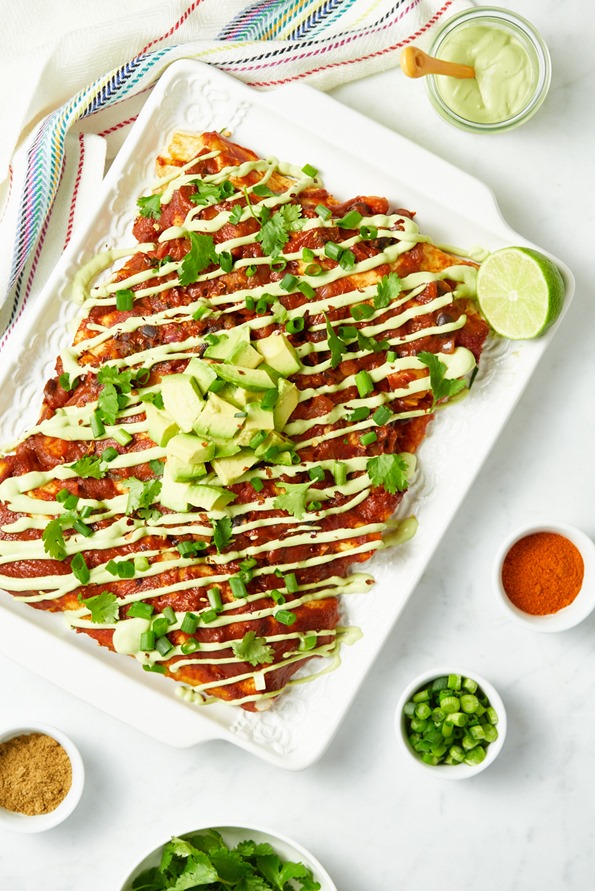
20160129 - Vegan enchiladas with cashew cilantro cream sauce (blog) 00756

Before I get to this insanely delicious recipe, I want to let you know what I’ve been up to this month! Some of you have seen on Snapchat that I’ve been behind the lens each day for a very special photography project—which includes shooting more than 60 brand-new recipe photos! It’s been pretty crazy around here and I haven’t had a day off in ages, but it’s really coming together beautifully. Eric even helped me create a dedicated photography space in our empty dining room and it’s been nice to have a set area to shoot (why did it take me so long to do this?). We’re gearing up to share this new project with you late winter, and I appreciate your patience as things will continue to be a bit slower around here as I complete the photography project this month. If you want to see all the behind-the-scenes action, follow along on Snapchat (username: angelaliddon).

I’m also happy to announce that we’re gearing up to kick off a brand-new newsletter! It’s going to be packed with all kinds of beautiful photos, recipes, life updates, tips/tricks, and sneak peeks/insider info (such as on the aforementioned project!). Since it has been so long since I sent out a newsletter (probably 1.5 to 2 years), we’re starting fresh and asking you to sign up again. This is because we want to make sure our subscribers truly want to receive our newsletter; the goal is to connect with you in a meaningful way — not to spam unsuspecting inboxes! I’m all about quality over quantity. Once you’ve signed up you will get an email asking you to confirm your subscription, and you’ll need to click the link to activate the fun. The first newsletter is expected to go out this month with a special Valentine’s Day theme (va va voom!), so keep your eyes peeled! Sign up here:

For those of you who have been asking if my next cookbook has a release date, I’m thrilled to tell you that it will release on September 6, 2016. Not too long to go now! You can now pre-order the book in Canada via Amazon.ca and Chapters/Indigo (many more retailers to come). We don’t have a cover yet, but of course I will share the preview with you as soon as I can!

As you can see there are a lot of fun things coming up in 2016. More on all of this very soon…

This recipe is honestly one of my favourite entrees in a very long time and I’m so excited to share it with you. This is the recipe to make when you want to blow your friends and family away. Trust me on this one. It’s a spin-off of my favourite vegan enchilada recipe from way back in 2011. Why the heck has it taken me so long to make another? Well, to be honest, I didn’t think I could improve upon that recipe, but I was wrong…very wrong. This version is even more flavourful, satisfying, and robust thanks to the addition of smoky roasted red peppers, umami-rich sun-dried tomatoes, and my favourite homemade enchilada sauce. I top it all off with a decadent cashew cream that’s flavored with cilantro, garlic, and lime. Yowza. This is winter comfort food at its best!

veganenchiladas

Next Level Vegan Enchiladas

Vegan, refined sugar-free, soy-free

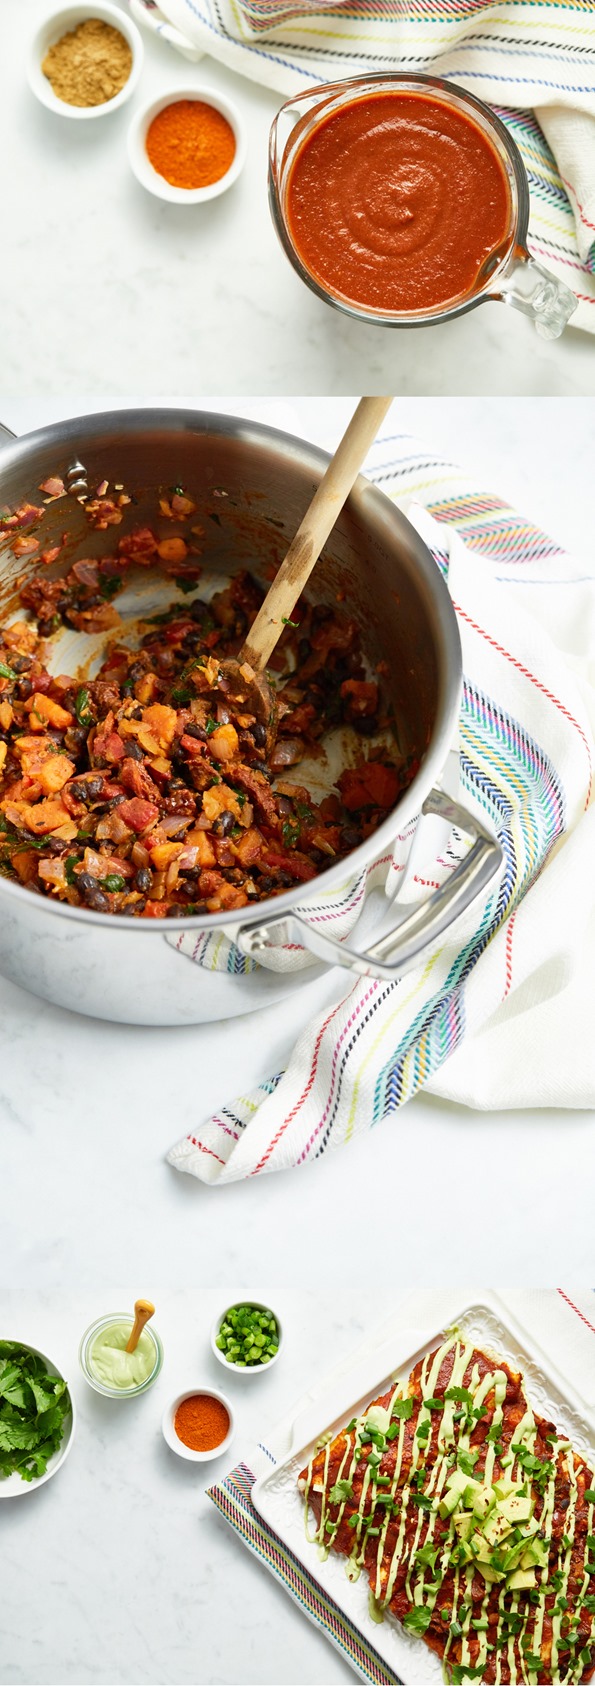
These mild to moderate heat enchiladas will change your life! A delicious homemade enchilada sauce smothers a sweet potato, roasted red pepper, sun-dried tomato, and black bean filling wrapped in soft tortillas. After baking, I top it all off with a decadent cilanto-lime-garlic cashew cream, green onion, cilantro, red pepper flakes, and chopped avocado. This dish will blow your taste buds away, I can promise you that! Please note that the prep time includes making the enchilada sauce and cashew cream in addition to the enchiladas. Yes, it’s a labour intensive recipe for sure, but you can save time the day of by prepping the cashew cream and enchilada sauce the day before.

Yield
5 to 6 enchiladas
Prep Time
1 Hour
Cook time
45 Minutes
Total Time
1 Hour, 45 Minutes

Ingredients:

For the enchiladas:
  • 2 cups peeled and chopped (1/2-inch dice) sweet potato (260g)
  • 1 tablespoon plus 1 teaspoon extra-virgin olive oil
  • 1 medium red onion, diced (2 to 2 1/2 cups)
  • 3 large garlic cloves, minced
  • 1 cup jarred roasted red pepper, drained and chopped
  • 1/2 cup oil-packed sun-dried tomatoes, drained and finely chopped
  • 2 cups baby spinach, roughly chopped
  • 1 (14-ounce) can black beans (about 1 1/2 cups), drained and rinsed
  • 2 1/2 cups Homemade Enchilada Sauce (1 batch)
  • 1 tablespoon fresh lime juice
  • 1 teaspoon chili powder
  • 1 teaspoon ground cumin
  • 1/2 teaspoon fine sea salt, or to taste
  • 5 to 6 medium/large soft tortilla wraps
For the toppings:
  • Cilantro-Lime-Garlic Cashew Cream
  • Chopped green onion, red pepper flakes, avocado, and cilantro

Directions:

  1. Prepare the Homemade Enchilada Sauce and soak the cashews for the Cilantro-Lime-Garlic Cashew Cream before you begin.
  2. Lightly grease a large rectangular baking dish (at least 8×12-inches). Set aside.
  3. Add the chopped sweet potato into a medium pot of water and bring to a boil. Reduce heat and simmer for 9 to 15 minutes, uncovered, until fork tender. Drain and set aside. You can also steam the potatoes until tender, instead of boiling.
  4. In a large skillet, stir together the oil, onion, and garlic and sauté over medium heat for around 3 to 5 minutes until the onion softens. Season with a pinch of salt and pepper.
  5. Preheat the oven to 350F.
  6. Add the chopped roasted peppers, sun-dried tomatoes, cooked/drained sweet potato, spinach, and black beans. Cook for 3 to 5 minutes over medium-high heat, until the spinach is wilted.
  7. Stir in 1/4 cup plus 2 tablespoons of homemade enchilada sauce, followed by the lime juice, chili powder, cumin, and salt. Adjust seasonings to taste, if desired.
  8. Add 3/4 cup of Enchilada sauce onto the bottom of your casserole dish and spread it out evenly.
  9. Scoop 3/4 cup of the sweet potato and black bean filling onto each tortilla. Roll up the tortilla and place it, seam side down, in the casserole dish. Repeat for the rest. If you have any leftover filling, you can spread it on top of the tortillas. Spread all of the remaining enchilada sauce on top of the tortillas until they are completely covered in sauce.
  10. Bake the enchiladas, uncovered, at 350⁰F for 20 to 25 minutes, until the sauce is a deep red colour and the enchiladas are heated through.
  11. While the enchiladas are baking, prepare the Cilantro-Lime-Garlic Cashew Cream.
  12. When enchiladas are ready to serve, add half of the cashew cream into a baggie, snip off the corner, and “pipe” the sauce all over the enchiladas. Alternatively, you can simply spread or dollop the sauce on top of each enchilada. Garnish with chopped cilantro, avocado, red pepper flakes, and green onion. Serve any remaining cashew cream on the side with a spoon.

Tips:

  • Make it kid-friendly: Omit the cayenne and red pepper flakes.

Oh She Glows

Homemade Nutella Hot Chocolate (vegan)

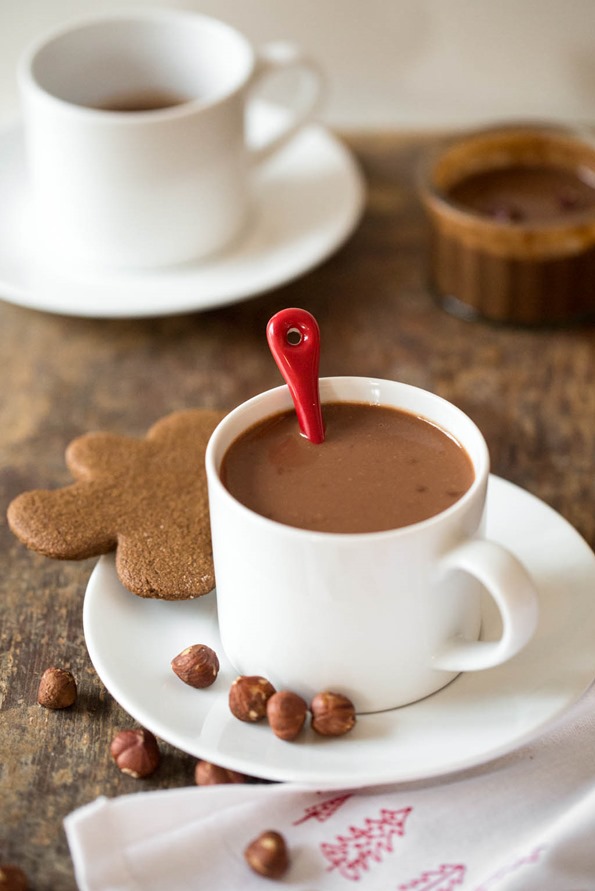
nutellahotchocolate-2989

How is the holiday season treating you so far? Hopefully great. I honestly can’t believe it’s December 11th. What a whirlwind season. I just finished another round of book edits and now I’m currently in the midst of planning next week’s photoshoot for my next cookbook. Some of you might remember in The Oh She Glows Cookbook, we had various lifestyle photos throughout the book. Well, the second cookbook is going to have all new photos so I’ve been planning around 15 unique shots, all the recipes that will be featured (and what I have to prep in advance, what needs to be made the day of, etc), and everything in between (such as, what the heck am I going to wear). It’s been a bit of a hot mess around here, but I’m so excited for next week’s shoot! Hopefully it’ll all come together. My dear cousin Alannah is coming to help on the shoot days, and I couldn’t be more grateful to have her help.

In other news, you can now find me on Snapchat! I used to think Snapchat was just an app for sharing questionable content among teens, but apparently it can be used for other things too. New techy things intimidate me and “for dummies” tutorials confuse me so the fact that I’m currently using Snapchat (and loving the heck out of it) probably means it’s not even cool anymore. But, I love how easy-breezy it feels. (After I finally figured it out, that is.) Want to write all over the picture and make a hot mess? Sure. Want to snap some random, poor lit shot? Go for it. It’s feels fairly real as far as social media goes, and it’s fun to get snaps throughout the day of someone’s day to day life. Oh, and I somehow got my mom to follow me. She’s hip, I tell ya! I think she’s just holding out for more Adriana pics though…

So, if you are down for some “riveting” behind the scenes footage over at casa OSG, then follow along. My username is angelaliddon. I’ll be sharing day to day things, cooking videos (so fun – yesterday I did my homemade nutella), behind the scenes blog stuff, travel, as well as some blog/book/life sneak peeks. Odds are you will probably see it on Snapchat first because it’s just so fast to share things.

Here are a few random things I posted over the past week:

Untitled-2

Like I said, hot mess.

Also, let me know if you are on it too!? I’m only following like 6 people right now which definitely makes me look a bit like a stalker. Ok, a lot like a stalker.

The second piece of news I have to share is to tell you that I’m back to shooting the photography on Oh She Glows! I know some of you have noticed this over the past month. The change is due to a couple reasons, one of which is that I miss shooting the photography greatly. I didn’t realize just how much I would miss this aspect of blogging after 8 years of doing the photography day in and day out. I still don’t have a proper photography set up and I rush through all my shoots since Adriana was born, but I hope to find a better system in the future. I will be bringing on a team member to OSG in the near future, and I hope that this will help me find a better balance with everything.

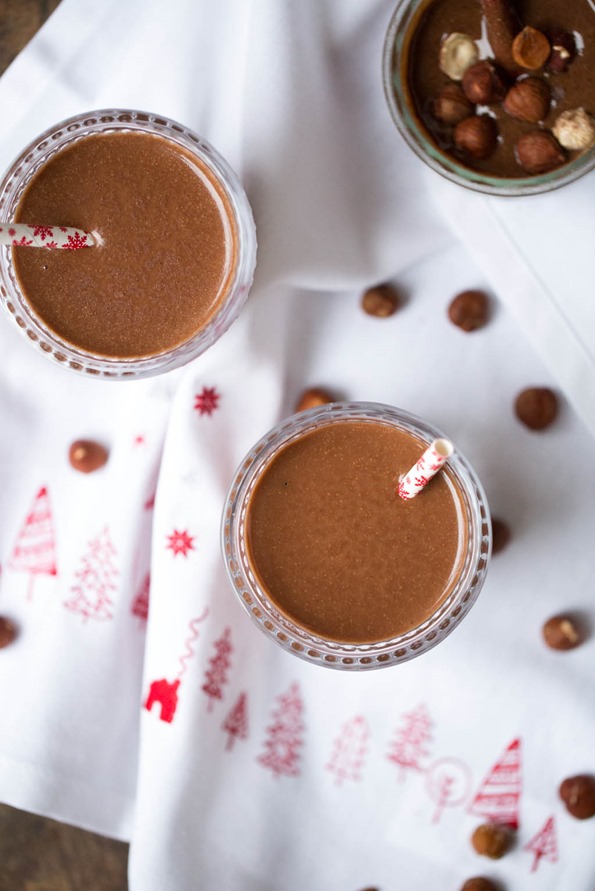
If you saw my snaps yesterday you probably spotted this hot cocoa in the making. It was all I could do not to bathe in this stuff, and it features my Homemade Mocha Nutella for a nutty twist on traditional hot cocoa! If you’re looking for a warming treat on a cold night, look no further.

nutellahotchocolate

Homemade Nutella Hot Chocolate

Vegan, gluten-free, grain-free, refined sugar-free

A nutty, plant-based twist on traditional hot cocoa. This recipe features my homemade nutella nut butter which makes this drink so creamy and decadent! I also love adding 55-60% dark chocolate into the mix for even more chocolate flavour. For a luxurious twist, try stirring in a bit of full-fat coconut cream into the hot cocoa, or serve it topped with some vegan marshmallows.

Yield
4 (1/2 cup) servings
Prep Time
25 Minutes
Cook time
5 Minutes
Total Time
30 Minutes

Ingredients:

  • 2 cups unsweetened almond milk (homemade or store-bought)
  • 50 grams 55-60% non-dairy dark chocolate
  • 1-2 tablespoons pure maple syrup, to taste
  • 1 tablespoon unsweetened cocoa powder
  • 1/4 cup Homemade Mocha Nutella (recipe linked below)
  • Dash fine grain sea salt, to taste

Directions:

  1. Prepare the Homemade Mocha Nutella.
  2. Break up the chocolate into chunks. In a medium pot, add the almond milk and chocolate pieces. Increase heat to medium-low. Whisk occasionally until all of the chocolate is melted.
  3. Whisk in the maple syrup, cocoa powder, nutella, and salt until super smooth. If you can’t get the hot cocoa smooth enough by whisking (this will depend in large part by how smooth your homemade nutella is) you can transfer it into a blender (with lid ajar) and blend until smooth.
  4. Adjust the sweetness to taste, if necessary. Serve and enjoy! Leftovers will keep in a sealed container in the fridge for 2 days or longer.

Tips: 1) For my Homemade Mocha Nutella recipe, see here. 2) For my Homemade Almond Milk recipe, see here.

nutellahotchocolate-2913-2

Oh, and if you are interested in a impromptu video on me making my homemade nutella, check out this video I uploaded to Instagram.

If you are looking for all my holiday recipes, see this link!

Oh She Glows

Mini Pumpkin Pie Tarts with a Sunflower Cookie Crust (Nut-free, Vegan)

veganpumpkinpienutfree (1 of 1)

A couple weeks ago, I received a reader recipe request. Let’s call him “Jason”. Jason asked if I could create a nut-free version of my Raw Pumpkin-Maple Pie with a Baked Oat Crust (found in my cookbook, page 247) because his wife can’t have cashews and pecans. Apparently, it was tormenting her not to be able to try this pie! He wants to surprise her next month with this dessert as a special thank you because “she’s the best wife and mom ever”.

He went on to write, “Angela, I have no clue where to begin and don’t want to mess this up like I usually do.”

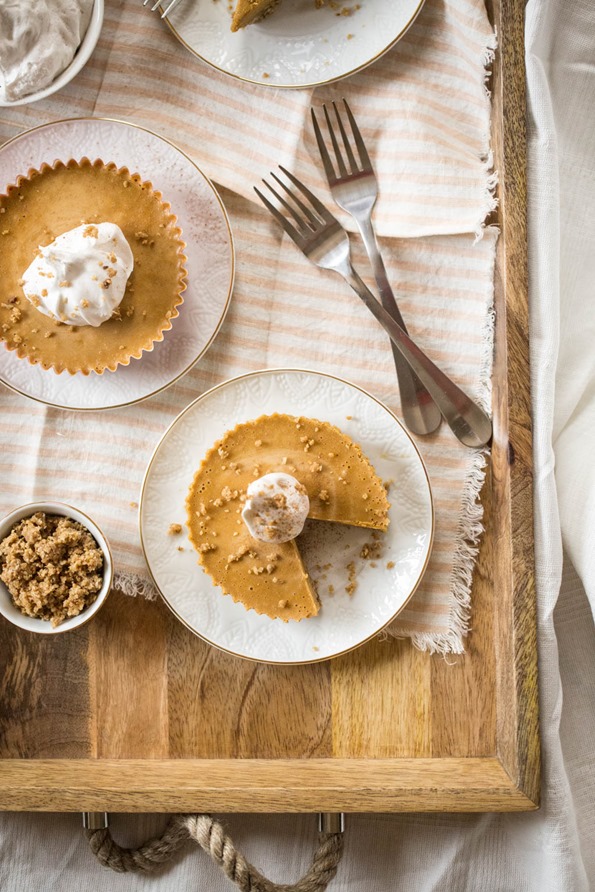
I immediately knew that I had to step up to the (pie) plate on this one (no pressure, no pressure!) because the world needs more love. And pie. Plus, I’ve always wondered how I could make this recipe without pecans or cashews, and now I have a nice option to share with you all. I tested multiple fillings and there was a clear winner that I’m sharing below. Spoiler alert – a combo of super luxurious full-fat coconut cream and sunflower seed butter worked so well as a replacement for cashews! It tastes so awesome.

I also paired it with a new toasted sunflower seed and oat “cookie” crust that’s a wonderful, crunchy compliment to the creamy and cool pumpkin pie filling. Pie crusts should never be boring or flavourless, and I love that this one is an easy “press-in” crust.

I meant to have this recipe up on Monday, but I ended up testing this pie about 7 times this week! I can’t sleep at night unless I’ve tested all of my options. Better late than never, I say. I’d rather not rush a recipe just to get it out on time. Anyway, I made this pie as a contribution to our Thanksgiving dinner later today (we’re in the US currently), and I’m so looking forward to the spread at my mom and stepdad’s. I hope those of you celebrating have a happy, fun, and safe Thanksgiving! And if you can’t make this pie today or this weekend, I hope you’ll include it on your holiday baking list.

Well, Jason (you know who you are) I hope this works out for you. If it doesn’t, I’d prefer that you not mention my name.

I’m joking! It’ll work out. Promise.

veganpumpkinpienutfreeglutenfree

Mini Pumpkin Pie Tarts with a Sunflower Cookie Crust (Nut-free)

Vegan, gluten-free, nut-free, refined sugar-free, soy-free

This is a luxurious and creamy nut-free version of my favourite Raw Pumpkin Pie from The Oh She Glows Cookbook. After many trials, I ended up using a combination of sunflower seed butter and full-fat coconut cream to replace the cashews in the original recipe, and it worked out so well! The pie has a light coconut flavour, but it’s balanced out nicely by the earthy sunflower seed butter. As a bonus, this filling doesn’t use any whole nuts or whole seeds so you don’t need a Vitamix (or other high powdered blender) to get the filling super smooth. I used 4 tart-sized (about 4-inches diametre) “freestanding” baking cups which I found at Target, but you can also use a standard muffin tin lined with paper liners (or simply greased well) to make mini tarts. I’d imagine a 7-9 inch springform cake pan would work well too. The dough is a bit difficult to shape into a traditional pie crust (with high sides) so that’s why I went with a flat crust for this recipe. If you don’t mind fiddly things, then by all means take a stab at the regular pie crust. Also, the paper liners are easily removed if you remove them while the pies are frozen.

Yield
8-10 servings
Freeze time
24 hours (chill can of coconut milk in the fridge) + 3-5 hours
Prep Time
30 Minutes
Cook time
12 Minutes
Total Time
42 Minutes

Ingredients:

For the crust:
  • 1/2 cup raw sunflower seeds
  • 1 3/4 cups rolled oats (use certified gluten-free if necessary)
  • 1/4 teaspoon fine sea salt
  • 1/4 cup coconut oil, melted*
  • 3 tablespoons pure maple syrup
  • 2 tablespoons smooth sunflower seed butter (pour off oil before measuring)
  • 2-3 teaspoons water, if needed to bind dough
For the filling:
  • 1/2 cup canned full-fat coconut cream**
  • 1 cup unsweetened pumpkin puree
  • 3/4 cup pure maple syrup
  • 1/2 cup coconut oil, melted*
  • 2 tablespoons + 2 teaspoons sunflower seed butter
  • 2 teaspoons pure vanilla extract
  • 1-2 teaspoons pumpkin pie spice, to taste***
  • 1/4 teaspoon fine sea salt
For serving:
  • Coconut Whipped Cream (I used So Delicious Coco Whip here)

Directions:

  1. Preheat oven to 350F. Grab four (4-inch diameter) baking paper cups, or 12 standard muffin paper liners and set aside. You can also use a 7-9 inch springform cake pan greased and lined with a circle of parchment paper.
  2. Add the sunflower seeds into a skillet and toast the seeds over medium heat for 5-8 minutes, until lightly golden and fragrant. Remove from heat.
  3. For the crust: Add the toasted sunflower seeds, oats, and salt into a food processor and process until finely chopped, resembling a coarse flour. Now, add the melted oil, maple syrup, and sunflower seed butter, and process until the mixture comes together into a heavy dough. The dough should stick together when pressed between your fingers very easily. If it’s still a tad too dry, add the optional water and process again until it comes together. I find that I always need 2 teaspoons of water, but it’ll depend on your ingredient’s moisture content.
  4. Divide the dough equally between the liners, crumbling it all over each base. (Note: I reserved about 1/2 cup of the dough for sprinkling on the pies when serving.) Lightly wet your fingers. Starting at the centre, press the dough into the base to form a crust. If the dough starts to stick to your hands at any time, lightly wet your hands and shake off the excess water. Once the crust is all pressed in, poke the base with a fork about 2-3 times to allow the air to escape while baking. I place the 4 liners onto a baking sheet so it’s easy to remove them from the oven.
  5. Bake the crusts for around 10-12 minutes until lightly golden around the edges. Place baking sheet on a cooling rack and cool the crusts for at least 15-20 minutes, or longer if you have the time.
  6. For the filling: Open the chilled can of coconut milk. Scoop off 1/2 cup of the white coconut cream only (not the water) and place it into a blender. (You can save the remaining contents of the can for a smoothie or other use.) Add the pumpkin puree, maple syrup, melted oil, sunflower seed butter, vanilla, pumpkin pie spice (to taste, I use 2 tsp), and salt. Blend, starting at a low speed and increasing the speed, until smooth.
  7. Divide the filling equally among the cooled crusts. Carefully, transfer the baking sheet (or muffin tin, if making 12 mini tarts) into the freezer on a flat surface. Chill until firm, about 3-5 hours. There’s no need to cover it.
  8. After the tarts are solid, carefully remove the paper liners. Here you can transfer the pies to the fridge for a mousse-like texture, but I prefer the texture when frozen after sitting on the counter for 5-10 minutes before serving.
  9. Serve with coconut whipped cream on top, if desired. This pie filling softens a great deal at room temperature, so it’s best not to leave leftovers on the counter. Return them to the fridge or freezer for best results.

Tips:

*A note about coconut: Health Canada classifies coconut as a “seed of a fruit” and not as a tree nut, however the U.S. FDA classifies coconut as a tree nut, so as you can see there is some confusion over classification when it comes to coconut. As always, if you think you might be allergic to coconut, be sure to talk to your doctor before consuming.

If you want to minimize the light coconut flavour in this pie, you can use refined (flavourless) coconut oil here rather than virgin.

**Be sure to chill a can of full-fat coconut milk for at least 24 hours before you begin this recipe. When ready, open the can and carefully scoop out 1/2 cup of the white coconut cream making sure not to use any of the coconut water.

***I used 2 teaspoons of Whole Food’s 365 Pumpkin Pie Spice since I’m currently away from home. You can also try my homemade Pumpkin Pie Spice Mix.

veganpumpkinpienutfree1

Oh She Glows

Pumpkin Gingerbread Muffins (vegan)

veganpumpkingingerbreadmuffins

I love to transform my favourite recipes into something new. Often, it’s not too far of a stretch to take a solid recipe base and create something different and fresh. Maybe I’m a baking nerd, but I just love the process of calculating measurements, swapping new ingredients for others, figuring out new baking times, and streamlining the method. My goal with recipe writing is to provide as many pertinent details as I can so you feel like I’m in the kitchen with you, but I also try to simplify and condense, too. It gives me great joy to refine and improve a dish and the written recipe itself over multiple trials.

Yup, I’m definitely a baking nerd. There’s no denying it.

My Pumpkin Gingerbread Loaf with Spiced Buttercream is a bit of a legend on this blog. I created the recipe for a blogging competition, Project Food Blog, five years ago (side note: my recipe writing style has clearly changed since then!). Despite being buried in the archives, this loaf has stood the test of time and remains popular during the fall and winter seasons. I’ve had requests for a muffin version – something a bit lighter and more wholesome that could pair with breakfast or an afternoon snack. (Wait a second. The original loaf with frosting doesn’t count as breakfast? I’ve been doing it all wrong.)

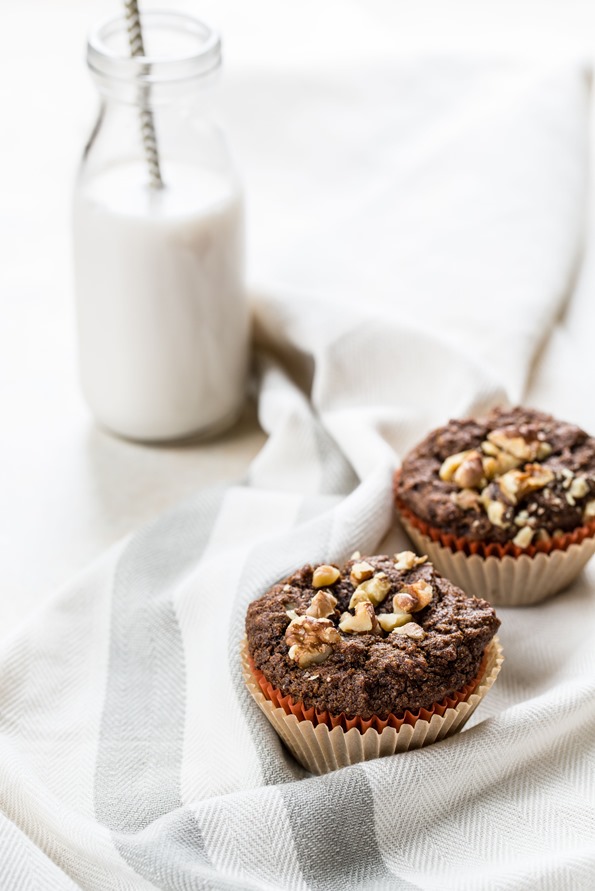
Joking aside, it’s a great idea. So maybe it’s a few years late, but I’m not a miracle worker! Ok, maybe I am. I made the original loaf more wholesome by using whole-grain spelt flour rather than all-purpose white flour. Despite using this heavier flour, I was astonished by how light and fluffy the muffins turned out! Spelt flour is incredibly tasty with a lightly sweet and nutty flavour that works so well in a muffin. Actually, I kept saying to Eric that these muffins taste a bit like a spiced bran muffin (in a very good way!). In just 1/4 cup of whole-grain spelt flour you’ll find 4 grams of protein and 4 grams of fibre, too. Look for whole-grain spelt flour in the natural foods or specialty section of grocery stores or you can find it online. Keep in mind that it’s not gluten-free so it won’t work for those with gluten allergies. You’ll also find pumpkin, blackstrap molasses (a great source of iron), pumpkin pie spice, maple syrup, and more. It’s like a big fall hug. Get ready, because your place is going to smell like a gingerbread house. No joke.

veganpumpkingingerbreadmuffins2

Pumpkin Gingerbread Muffins

Vegan, soy-free

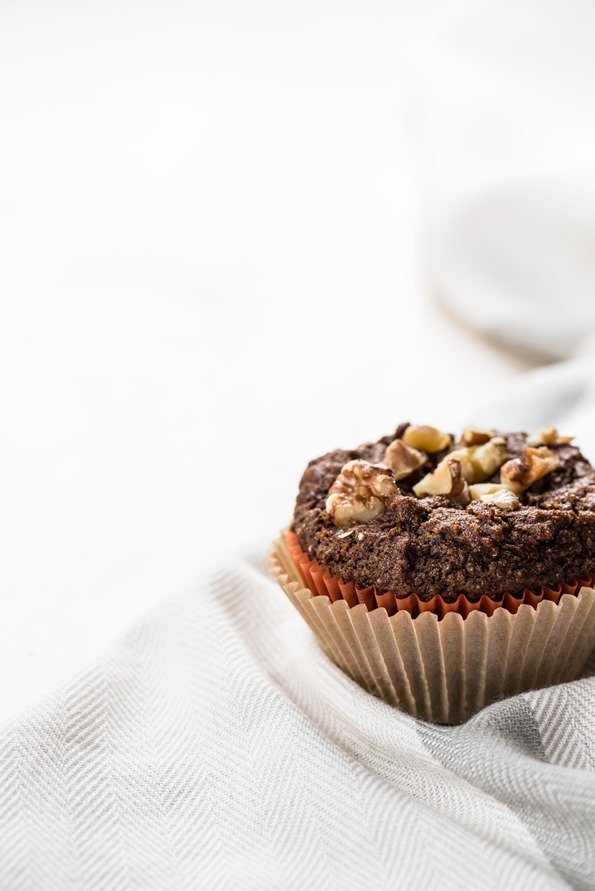
Despite using whole-grain spelt flour, pumpkin puree, and molasses, these muffins rise beautifully and they are so light and fluffy! I think you’re going to love them. They are perfectly spiced (not too strong and not too light) and great for fall and winter baking. You won’t believe how incredible these muffins will make your house smell, too. Throw a batch in the oven before company comes over and your entire place will smell like a gingerbread house! This recipe is adapted from a reader favourite recipe: my Pumpkin Gingerbread loaf with Spiced Buttercream.

Yield
1 dozen
Prep Time
15 Minutes
Cook time
22 Minutes
Total Time
37 Minutes

Ingredients:

For the wet ingredients:
  • 1 tablespoon chia seeds
  • 3 tablespoons water
  • 1 cup unsweetened pumpkin puree*
  • 1/3 cup grapeseed oil or melted coconut oil**
  • 3 tablespoons pure maple syrup
  • 1/2 cup packed brown sugar
  • 1/4 cup blackstrap molasses
For the dry ingredients:
  • 1 2/3 cups whole-grain spelt flour***
  • 1 tablespoon pumpkin pie spice (see tips below for link to recipe)
  • 1 teaspoon baking soda
  • 1 teaspoon baking powder
  • 1/2 teaspoon fine sea salt
  • Heaping 1/2 cup toasted chopped walnuts (optional)

Directions:

  1. Preheat the oven to 350F. Line a muffin pan with large paper liners. (this is my favorite brand as they never stick!)
  2. In a mug or small bowl, whisk together the chia seeds and water. Set aside for a few minutes to thicken.
  3.  In a large bowl, whisk together the dry ingredients (spelt flour, pumpkin pie spice, baking soda, baking powder, and salt).
  4. In a medium bowl, whisk together the wet ingredients until smooth (chia mixture, pumpkin puree, oil, maple syrup, brown sugar, and molasses).
  5. Add the wet mixture to the dry ingredients and stir until just combined. No patches of flour should remain. Be sure not to overmix the batter as spelt is a delicate flour.
  6. If using, stir in the chopped walnuts. You can also reserve some for garnish on top, like in the photos.
  7. Divide the batter equally between the 12 muffin liners. They should be about 3/4 full or a bit more. Add any reserved walnuts on top and gently push down (optional).
  8. Bake the muffins for 20-24 minutes until a toothpick comes out clean.
  9. Cool the muffins in the pan for 5-10 minutes, and then transfer each muffin onto a cooling rack until completely cool.

TIPS:

* If your pumpkin puree is a bit grainy, try throwing it into a food processor and processing it until smooth before making this recipe. Or you can beat it with electric beaters. This will simply prevent clumps in the dough.

** If using melted coconut oil, make sure that the rest of the wet ingredients are all at room temperature (do not use refrigerated milk, pumpkin, maple syrup, etc. as they will harden the coconut oil).

***I haven’t tried these muffins with any other flour yet, but I expect that regular all-purpose flour will work (like in the loaf recipe). If you try any different flours please leave a comment with what you used and how it worked out!

Here is the Homemade Pumpkin Pie Spice Mix recipe

Make it nut-free: Simply omit the walnuts.

pumpkinspicegingerbreadmuffinsvegan

Photography credit: Ashley McLaughlin Photography

Oh She Glows

Coconut-Cardamom Vegan Overnight Oat Parfait with Blueberry Chia Seed Jam

veganovernightoats-0100

Food photography has been sparse in my house these days (Now, if we’re talking baby photography on iPhones, well let’s just say I’m killing it.) Lately, I only have 15-20 minutes for food photoshoots, so I’ve learned to be super quick when it comes to snapping pictures. I used to be militant about using my tripod, but I haven’t pulled it out in months. I used to give photoshoots a bit of planning before diving in, but that rarely happens anymore. It’s taken me a while to realize that my expectations of how things should be done aren’t always practical for the stage of my life that I’m in. This applies to life in general too. I’m going to do what I can and try to be a bit easier on myself. Perfectionism kills creativity. It’s also the killer of fun! If I only have 10 minutes to snap some photos, so be it. I’d rather share a little bit than nothing at all.

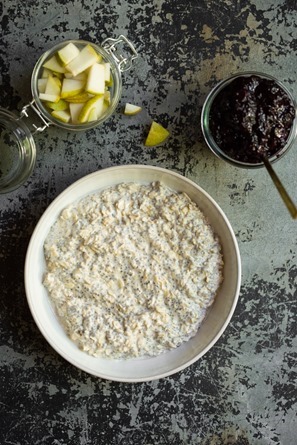
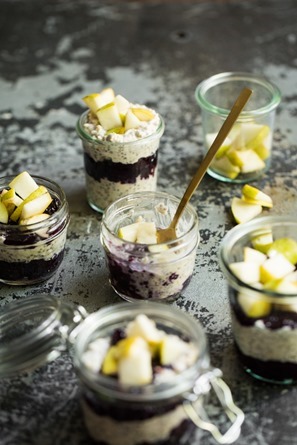
I started off this photoshoot using this darker background – it’s a scratched up piece of metal signage I found at an antique market last year (the front of the sign says “DO NOT ENTER”). I thought it was going to work perfectly, but I actually found it to be too moody for this recipe. It just looks too dark for the light, summery mood I was going for.

veganovernightoats-0041veganovernightoats-0049

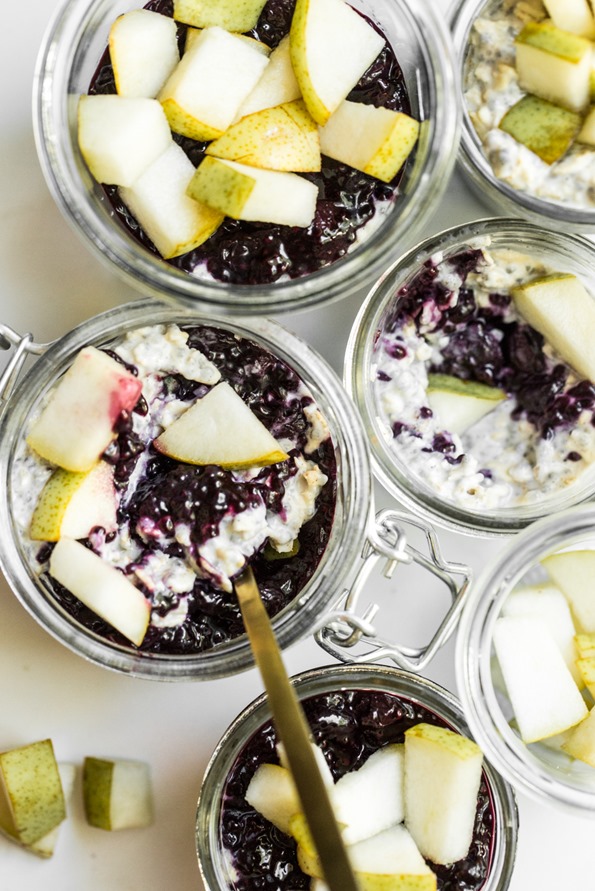
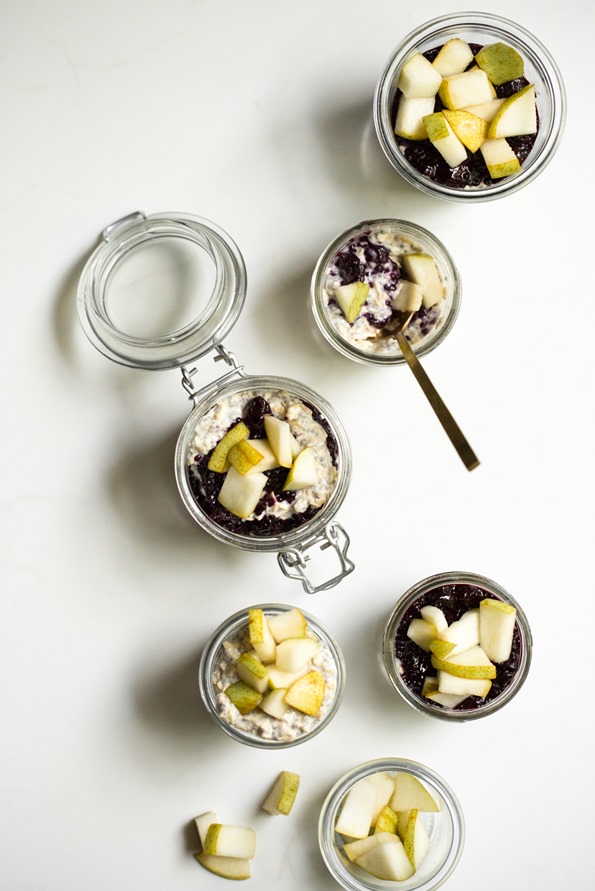
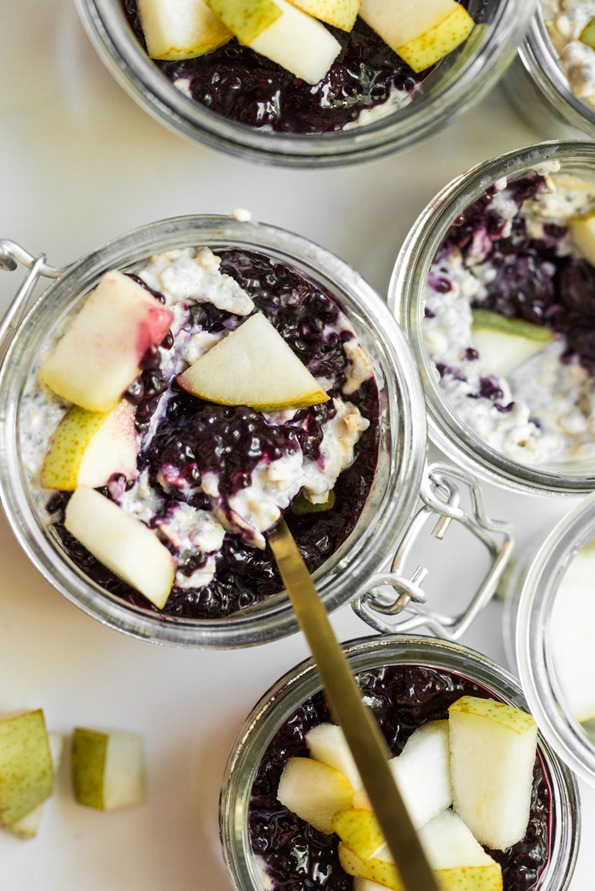
So I switched to my trusty slab of white quartz instead. It’s the surface I’ve used the most in the past year. It’s heavy as heck and I actually managed to dent the hardwood with it one day (*headsmack*). Anyway, I like this clean and fresh feel much better even though the lighting wasn’t the best because I shot at noon when the sun is overhead. The inspiration for the photo came from Ashley. She did a cool multi-jar shot with homemade milk for my cookbook. Too much fun!

veganovernightoatssquare-0059

In Lightroom, I made minor edits to the photo: increased clarity, exposure, whites, saturation, and removed blue and adjusted temperature. It took me about 30 seconds. There are things about the lighting I’m not super happy with and I probably blew it out too much, but oh well. Gotta pick your battles!

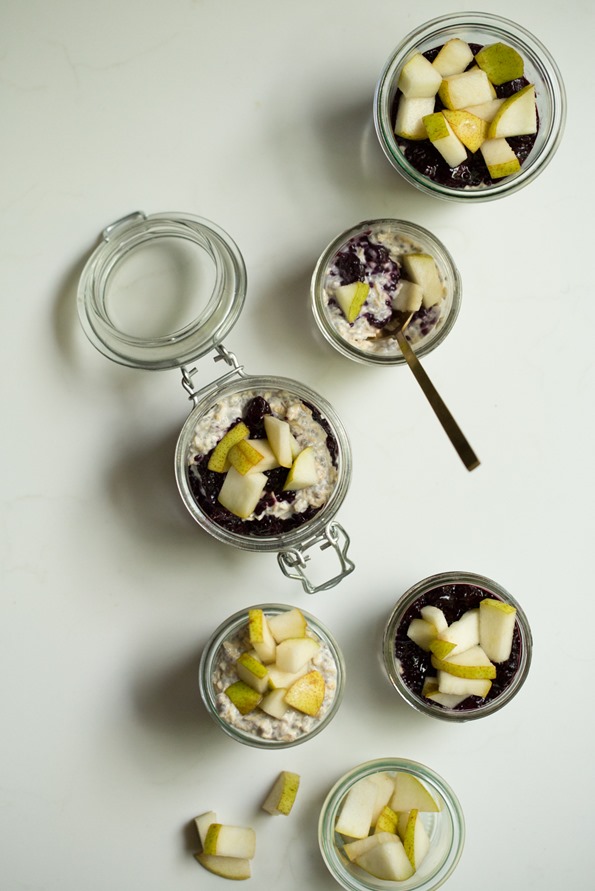
This is the same photo before editing…50 shades of grey!

veganovernightoatsnoedit-0059  

So that’s where my head is at with photography lately. I’d love to spend more time on it again, but right now I’m rolling with doing it under a time crunch. I’m beyond excited that Ashley is shooting the photography for my next cookbook. I honestly can’t imagine doing over 100 photos again with a baby crawling at my feet (and stealing the food). You guys are going to be blown away by the photos in the next book. We’ll have to show you some sneak peeks!

Now, finally onto the food. This is my newest overnight oat parfait creation. Six to seven years later, I’m still making vegan overnight oats on the regular. I’ll often make a large batch that lasts 2-3 days in the fridge. Or sometimes I eat it all in one day because I just can’t help myself. It’s so easy, perfect for the summer, and endlessly customizable. Make it parfait-style in portable jars and you’ll have snacks for days. Toss it in your bag and run out the door. Bring one for your friend and he/she will love you even more.

If you haven’t tried overnight oats layered with chia seed jam, you really must. It’s divine. This would be great with granola on top too.

veganovernightoatsohsheglows

Coconut-Cardamom Vegan Overnight Oat Parfait with Blueberry Chia Seed Jam

Vegan, gluten-free, nut-free, oil-free, refined sugar-free, soy-free

Overnight oats are getting fancy up in here! Coconut milk, oats, and chia seeds are mixed with ground cardamom, cinnamon, and maple syrup, and then layered with blueberry chia seed jam and sliced pear. You’ll want to eat this for breakfast, lunch, snacks, and dinner! Chia seeds don’t lie. Also, can I just say how awesome a layer of vegan ice cream or banana soft serve would be in this?

Yield
4-6 small jars
Prep Time
15 Minutes
Cook time
25 Minutes
Total Time
40 Minutes

Ingredients:

For the blueberry chia seed jam:
  • 550g frozen blueberries (about 4 cups + 2 tablespoons)
  • 1/4 cup pure maple syrup, or to taste
  • Dash fine sea salt
  • 3 tablespoons chia seeds
  • 1 teaspoon fresh lemon juice, or more to taste
For the vegan overnight oats:
  • 1 (15-oz) can full-fat coconut milk (yes you can use light, but full-fat is super creamy and delish)
  • 1 cup rolled oats (use gluten-free if necessary)
  • 3 tablespoons chia seeds
  • 1 tablespoon pure maple syrup
  • 1/2 teaspoon ground cardamom , or more to taste
  • 1/4 teaspoon cinnamon, or more to taste
  • 1-2 small ripe pears, diced (for layering)

Directions:

  1. Prepare the chia seed jam: In a medium pot, stir together the blueberries and maple syrup until combined. Add a dash of salt. Simmer over medium-high heat, uncovered, for about 8-10 minutes until softened (the berries will release a lot of water during this time).
  2. Add the chia seeds and stir until combined. Continue simmering and stirring frequently (reducing heat if necessary to avoid sticking) about 8-15 minutes longer, until most of the water cooks off and the jam reduces in volume. it will look thickened.
  3. Remove from heat and stir in the  lemon juice. Transfer the mixture to a bowl, uncovered, and into the fridge until cool, for at least a couple hours. For a quicker cooling method, pop the jam in the freezer, uncovered, for 45-60 minutes, stirring every 15 minutes, until cool.
  4. For the vegan overnight oats: In a medium container (with a lid) or in a medium bowl, stir together the entire can of coconut milk, oats, chia seeds, maple syrup, cardamom, and cinnamon until combined. Cover and chill for 1-2 hours, or overnight, until the oats soften and the mixture thickens. Stir to combine before using.
  5. Layer the chia jam, overnight oats, and diced pear into small jars. Secure lids (or cover with wrap) and store leftovers in the fridge for up to 3-4 days. The chia seed jam will keep in an air-tight container in the fridge for up to 2 weeks. Also, leftover jam can be frozen in plastic baggies and it thaws beautifully.

veganovernightoats-0096

PS – Thank you for your enthusiasm regarding my 2-Day Meal Plan! I’m so thrilled by your response and hope to do another in the future.

Oh She Glows