Friday FAQs: High-protein recipes, sunflower seed butter troubleshooting, freezing aquafaba, and more!

20160118 - App Smoothies 00591

This week was a bit of a grab bag and I’m pretty anxious to unwind this weekend. We had two random basement leaks (thanks to a water softener and laundry machine both bursting within days of one another), lots of work deadlines, and some setbacks with our renovation plans. There’s promise of a gorgeous weekend though, and I can’t wait to soak it up. I’ve made some fun Father’s Day plans, and we’re hitting up the St. Lawrence Market in Toronto too. I can’t recall the last time I went to the St. Lawrence Market—probably years and years!—so I’m anxious to check it out (let me know if there are any “must-see” vendors to visit). With any luck I’ll be able to find some plant-based foods to satisfy my non-stop hunger of late. I hope you all have a great weekend. Happy Father’s Day!

ps- My 25 weeks pregnancy update is now up on the Baby blog.

Q1. Angela—this mayo recipe looks really great! Have you (or any of your readers) had any luck freezing the chickpea liquid and then thawing and using it in your recipes? It seems I always open a can of chickpeas when I don’t need the brine, or need the brine when I have no cans of chickpeas. I’m hoping storing the brine (possibly as ice cubes?) for can-less days might be the solution. Any thoughts, anyone??

A. Hi Tia, I haven’t tried it personally yet, but I’ve read that you can in fact freeze aquafaba! Using an ice cube tray (I like using silicone ice cube trays because they’re so easy to pop out) is a great idea for storing, because then you’ll have easy-to-grab, ready-measured amounts available for use in recipes. (My advice is to measure how many tablespoons one cube holds so you know.)

Q2. Hi Angela, Can you recommend the best substitute for hemp in your Crowd-Pleasing Vegan Caesar Salad (specifically, the Nut and Seed Parmesan Cheese)? It’s actually illegal to ingest hemp in Australia (crazy I know…)!!!!!! thanks

A. Hi Alecia, Since the parmesan only calls for a couple tablespoons of hulled hemp seeds, I’d probably just swap it with a couple more tablespoons of cashews! Easy that way. 🙂

Q3. Angela, Thank you so much for this wonderful recipe! I just made your Golden Red Lentil Dal tonight and the flavors were unbelievable! I have also tried your Crispy Smashed Potatoes with Avocado Garlic Aioli and loved those too! May I ask something though? The dal dish had a slightly grainy texture when it was finished. I’m unsure if it was from the spices or something else. I prepared it exactly as the recipe stated and measured precisely. Any advice on how to fix that would be lovely! Again, wonderful blog and site! I look forward to trying many more of your recipes!

A. Hi Mandy, I’m so happy to hear you enjoyed these recipes! With respect to the dal, it sounds like you did everything right with the recipe! I think the texture you’re experiencing may just be the natural texture of the red lentils. Red lentils break down a lot when they cook. If you’re a fan of the dal’s flavouring but not so much its texture, you could try black or French green lentils, which hold up a bit better and don’t break down as much. I hope this helps, and thank you so much for the kind words!

Q4. Hi everyone, I’m not sure where my sunflower seed butter went wrong? Mine didn’t turn out anything like the pictures at all. I didn’t have coconut sugar so I used stevia. Please help!

A. Hey Jessica, Oh I’m so sorry that happened to you! I’m wondering what kind of food processor you use? I find some machines just can’t "butterize" nuts and seeds as they aren’t powerful enough. I absolutely love this machine. Also, I haven’t tested this recipe with stevia before so that could’ve been the culprit. It’s also very important that the sunflower seeds are roasted beforehand (I’ve had zero luck using raw sunflower seeds in this recipe). Lastly, did you use the coconut oil? That’s really important to help thin it out. I hope this helps, and let me know if you try it out again! It’s such a tasty alternative to nut butter.

Q5. Hi Angela! Big congrats to you and your growing family! My girls are 20 months apart (now 8 mos. and 2 1/2) and it is wonderful and chaos and all the things that make for a happy family. 🙂 I was wondering if you wouldn’t mind listing your favorite protein-packed recipes? I am getting back in the gym and trying to get some muscle definition back in my life and some extra protein is in order! Thanks so much!

A.  Hi Abbey, Thank you for the warm congrats! Getting back to the gym after time away can be such a challenge—but delicious, protein-packed foods can help make that transition so much easier. For a super quick post-workout option, an apple spread with 2 tablespoons of almond or peanut butter will pack in about 7 to 9 grams of protein. If you’re a green smoothie lover like me, I recommend checking out my Green Warrior Protein Smoothie. My Protein Power Goddess Bowl, Energizing Broccoli Dal, Spiced Red Lentil, Tomato, and Kale Soup, Chickpea Salad, and Glowing Spiced Lentil Soup are also filled to the brim with high-protein goodness, as are my Super-Power Chia Bread (page 229 of The Oh She Glows Cookbook) and roasted chickpeas (try the ones on page 220 of the cookbook and on the blog here, or Salt & Vinegar Roasted Chickpeas on page 221) for a “snackier” option. Alternatively, if you’re looking for a sweet snack to grab on the go heading to or from the gym, there’s my Super Seed Chocolate Protein Bites or Two-Layer Raw Chocolate Brownies (which have about 4 grams of protein per square…not bad for a dessert). Who doesn’t love a sweet treat after killing a workout? All the best to you and your family!

Comments of the week:

“Hi Angela! I started the shift toward a vegan diet almost a year ago and have been loving your blog for meal inspirations and recipes! I have your app and also your cookbook and have to say that I have never made one of your recipes that did not turn out fantastic. The rest of my family is not vegan at all and they also love every recipe of yours that I have made. I love making your dishes and sharing them with other people to show that a vegan diet can be delicious and satisfying. I have made this avocado pudding bowl three or four times now and absolutely love it! My most recent time making this recipe I whipped up some coconut whipped cream and mixed it with the pudding and it turned out as a chocolate mousse. I would definitely recommend this method as it worked very well. Thanks for doing what you do, I really look up to you!”

Hi Alexis, I’m so happy to hear that your shift to a vegan diet is going so well, and that you’re inspiring others with the recipes too! Your chocolate mousse spin-off sounds fantastic. I’m working on a mousse recipe that involves aquafaba (of all things, I know!) and hopefully I can share it on the blog if I can get it just right. Thanks for taking the time to write me such a lovely note.

“I’m enjoying all of your recipes so much, thank you! I was never one for working from a cookbook before, but you’ve got me inspired, and I’ve gifted your book several times over, all to very grateful recipients. I used to dance around the edges of a health food store, eager but mostly unsure about how to mix what with what… This weekend I’m headed to an enormous VegFest (a celebration of all things vegan, natural, joyful and healthy!) And Oh She Glows was my introduction. So, thank you. Your enthusiasm and work is appreciated – big time!”

Hi Janey, I’m so happy for you, and also super thankful for your support. It sounds like you’re having so much fun with this new lifestyle which is so, so important. Have fun at the Vegfest this weekend!!
Oh She Glows

Back To School: Luxurious Homemade Sunflower Seed Butter

sunflowerseedbutter-8823

Not only is it the month that my baby will turn one*, it’s also the time of year when my nut-free recipes are getting a lot more action. Yup, back to school season. After receiving a request from a blog reader recently, I decided to share this sunflower seed butter recipe that’s been raved about by my testers. It’s so creamy and delicious! (I recently heard that some schools are now banning seed butters too, so I realize this recipe won’t work for those schools.)

This blog post is also proof that I’m still alive! Not that you are waiting with bated breath for my next post or anything, but I wanted to apologize for my absence. My manuscript is due at the beginning of October and I’ve been working around the clock finalizing recipes, writing, and editing the introductory chapters and headnotes. I can’t believe I’m SO CLOSE to finishing the first draft. It feels amazing and I’m looking forward to getting back to a (somewhat) normal life again. Thanks for hanging in there with me.

*gentle sobs.

sunflowerseedbutter-8786

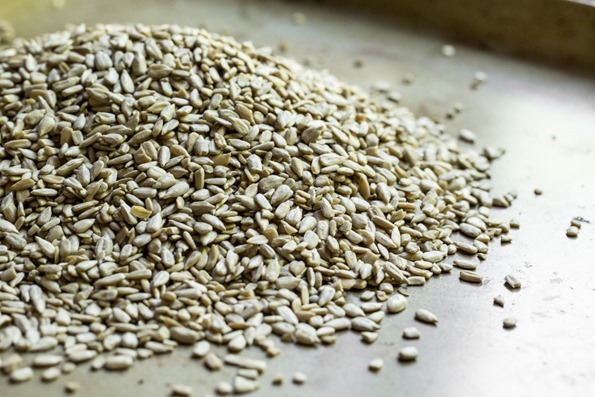
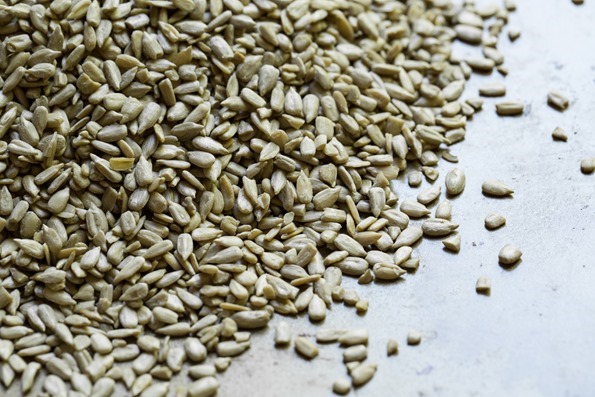
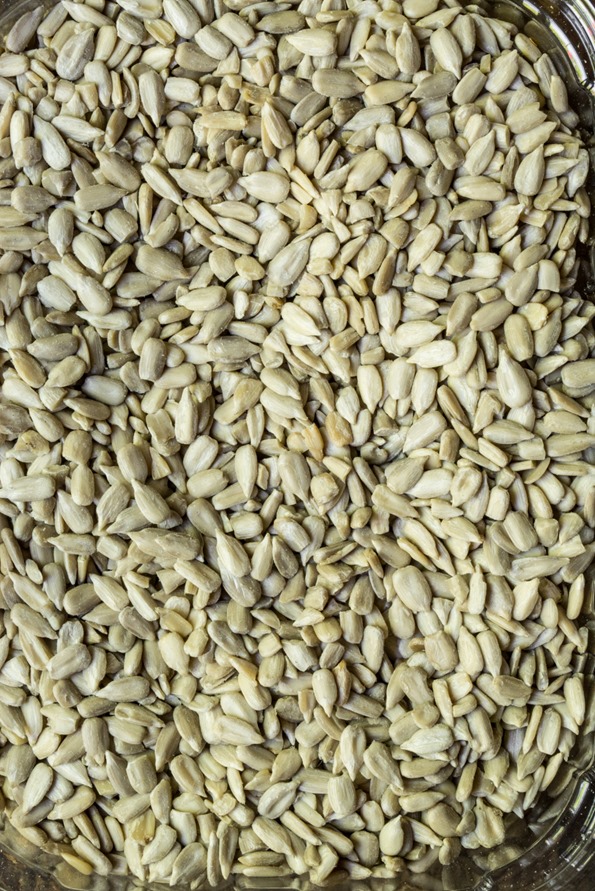
We start by roasting the sunflower seeds. For the love of everything nut/seed buttery, please do not skip this part. Not only does roasting give the seeds a nutty, toasted flavour, but it helps the seeds turn into butter much faster. I speak from experience because I once tried to make sunflower seed butter using raw sunflower seeds and I processed for like 30 hours and nothing happened except dust. It took me years to try it again after that experience!

sunflowerseedbutter-8797

Sunflower seed glam shots. Just cuz.

sunflowerseedbutter-8800

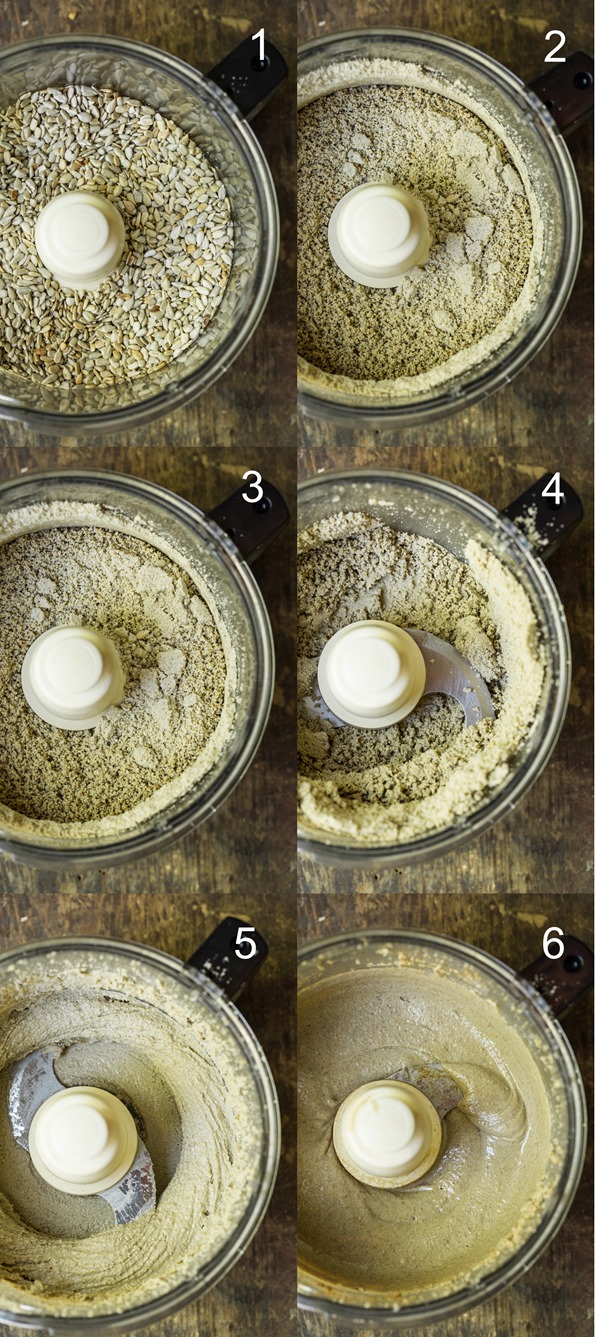
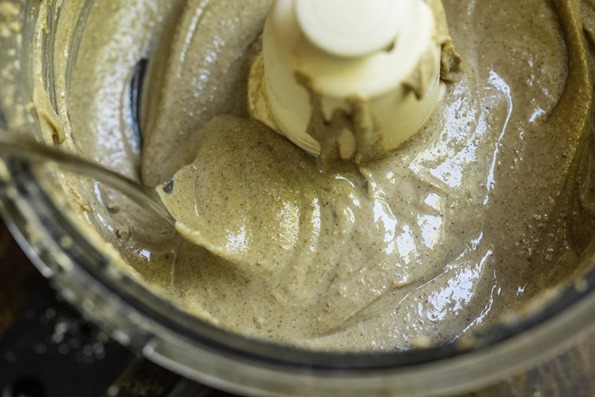
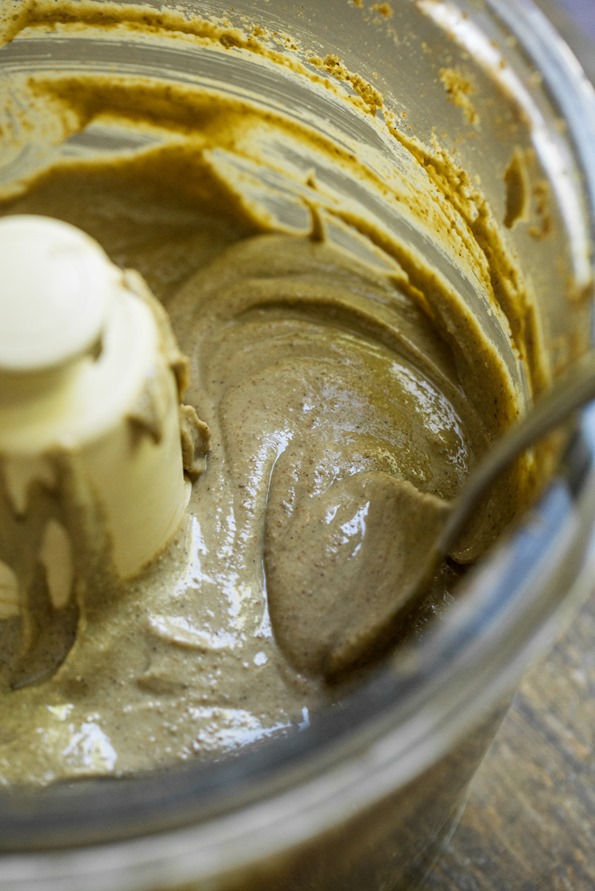
Here is a glimpse into the various food processor stages below. It takes me about 7-8 minutes in my processor. Keep in mind your own processing times will vary based on your food processor and its butterizing prowess. I recommend using a heavy-duty food processor (such as this model) to make nut or seed butter as smaller machines can overheat. You can also make nut and seed butter in the Vitamix, but I never do because I find the butter a huge pain to scrape out from the bottom of the Vitamix container. For me, the food processor for nut/seed butter is where it’s at!

homemadesunflowerseedbutter

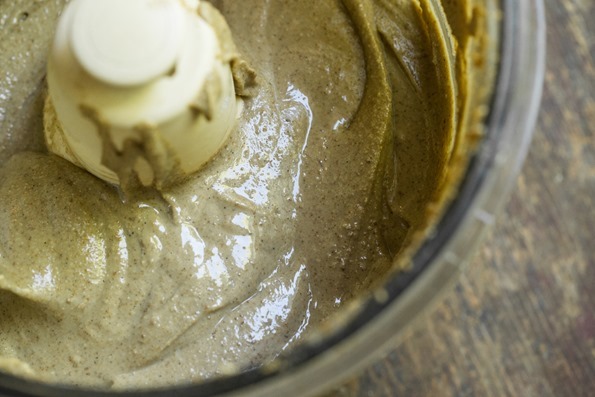
I always let it run a couple minutes longer than I think I should just to get it super silky and runny.

sunflowerseedbutter-8825

Luxurious Sunflower Seed Butter

Vegan, gluten-free, grain-free, nut-free, refined sugar-free, soy-free

Plain sunflower seed butter can taste quite bitter so I’ve improved its flavour by adding a touch of coconut sugar, cinnamon, and some virgin coconut oil to thin the consistency just a bit. The result is a sunflower seed butter you’ll want to add to everything, and eat by the spoonful. Even though it’s not the ever popular almond or peanut butter, you won’t feel like you’re missing out when you make this nut-free spread.

Yield
1 3/4 cups
Prep Time
15 Minutes
Cook time
10 Minutes
Total Time
25 Minutes

Ingredients:

  • 3 cups (about 400g) raw shelled sunflower seeds
  • 1/4 cup coconut sugar
  • 2 tablespoons virgin coconut oil, softened
  • Pinch of pink Himalayan sea salt or other fine sea salt, to taste
  • 1/2 teaspoon cinnamon, or to taste (optional)
  • 1 teaspoon pure vanilla extract
  • 1 vanilla bean, seeded or 1/4 teaspoon pure vanilla bean powder (optional)

Directions:

  1. Preheat oven to 325F. Line a large baking sheet with parchment paper and spread on the seeds in an even layer. Roast for 9-12 minutes, until some of the seeds are lightly golden. Cool the seeds for a few minutes before using.
  2. Meanwhile, add the sugar into a high speed blender and grind until a powder forms. Leave the lid on and set aside so the “dust” can settle.
  3. Spoon the toasted seeds into a heavy-duty food processor. (I like to spoon the seeds into my measuring cup and transfer them that way. When I have about 1/2 cup of seeds left on the pan I will use the parchment paper to “funnel” the remaining seeds into the processor.)
  4. Process the seeds for a few minutes, stopping to scrape the bowl every minute. It will look dry and powdery at this stage. (If you have a chute, you can leave it open to allow steam to escape.)
  5. Add the coconut oil and process for another couple minutes. The butter will clump together into a large ball and it’ll start rattling around for a bit. Then, the ball will eventually break down into butter again. Stop to scrape down the bowl as needed.
  6. Now, add in the ground sugar, salt, and cinnamon. Process for another few minutes until smooth. Now, slowly stream in the vanilla while processing. Add in the vanilla bean seeds, if using. You can add a touch more oil if you need to thin out the butter (but do not add water or liquid sweetener because it will seize). I like to let the machine run at least another 2 minutes to get the sunflower seed butter super smooth. I process for a total of about 8 minutes, but timing will vary based on your food processor and preference. Some machines may need to run for upwards of 15 minutes to get the seed butter smooth enough.
  7. Transfer the sunflower seed butter into an air-tight container. Chill in the fridge. Here it’ll keep for about 2 months and it will remain “spreadable” even when chilled.

Tips: 1) Do not skip toasting the seeds; it’s necessary for the seeds to break down in the processor. 2) The sweetener is added because sunflower seed butter is bitter; feel free to adjust the sweetener to your own taste. 3) If for some reason your seeds aren’t breaking down after the specified times, add a touch more coconut oil, a teaspoon at a time. Some machines just might need to run a bit longer though, so be patient!

sunflowerseedbutter-8826

And now some recipes to use homemade sunflower seed butter…

Quick and Easy No Bake Protein Bars

3-Layer Nut-Free Dream Cups

Flourless Thumbprint Breakfast Cookies

PS – 21 Allergy-Friendly Back To School Snack Recipes

Oh She Glows

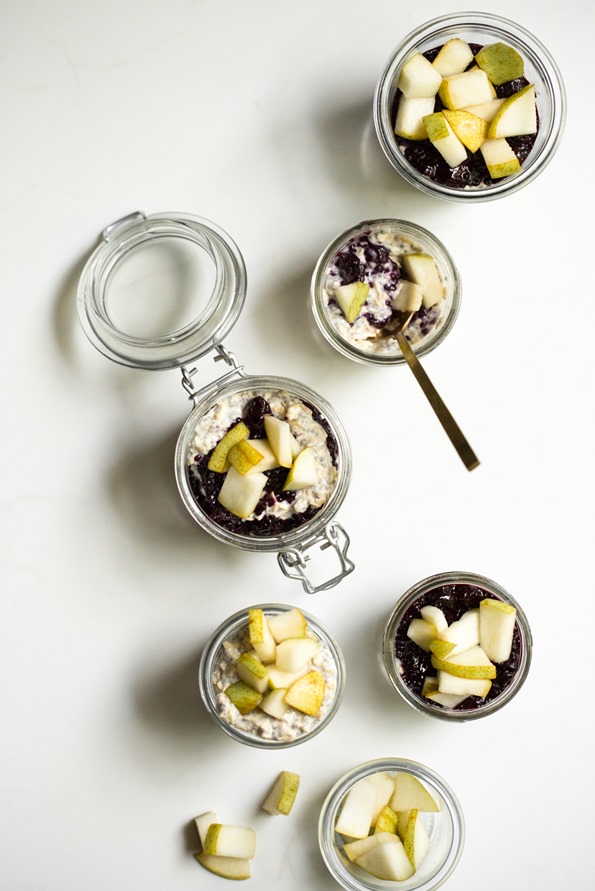
Coconut-Cardamom Vegan Overnight Oat Parfait with Blueberry Chia Seed Jam

veganovernightoats-0100

Food photography has been sparse in my house these days (Now, if we’re talking baby photography on iPhones, well let’s just say I’m killing it.) Lately, I only have 15-20 minutes for food photoshoots, so I’ve learned to be super quick when it comes to snapping pictures. I used to be militant about using my tripod, but I haven’t pulled it out in months. I used to give photoshoots a bit of planning before diving in, but that rarely happens anymore. It’s taken me a while to realize that my expectations of how things should be done aren’t always practical for the stage of my life that I’m in. This applies to life in general too. I’m going to do what I can and try to be a bit easier on myself. Perfectionism kills creativity. It’s also the killer of fun! If I only have 10 minutes to snap some photos, so be it. I’d rather share a little bit than nothing at all.

I started off this photoshoot using this darker background – it’s a scratched up piece of metal signage I found at an antique market last year (the front of the sign says “DO NOT ENTER”). I thought it was going to work perfectly, but I actually found it to be too moody for this recipe. It just looks too dark for the light, summery mood I was going for.

veganovernightoats-0041veganovernightoats-0049

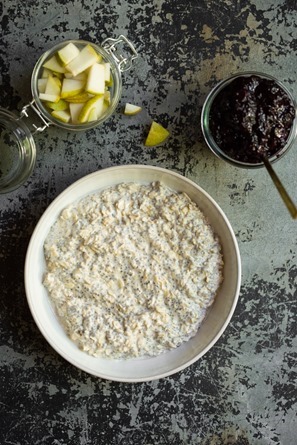
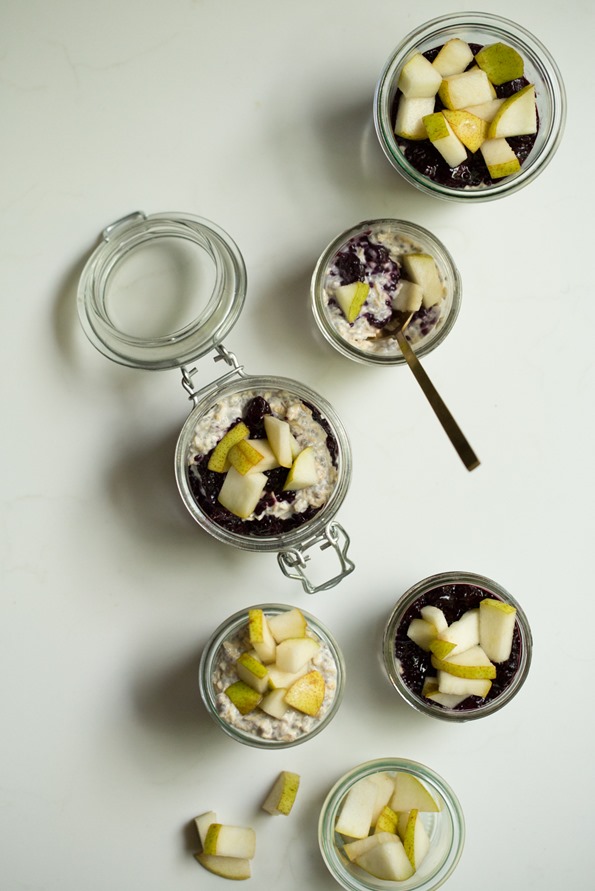
So I switched to my trusty slab of white quartz instead. It’s the surface I’ve used the most in the past year. It’s heavy as heck and I actually managed to dent the hardwood with it one day (*headsmack*). Anyway, I like this clean and fresh feel much better even though the lighting wasn’t the best because I shot at noon when the sun is overhead. The inspiration for the photo came from Ashley. She did a cool multi-jar shot with homemade milk for my cookbook. Too much fun!

veganovernightoatssquare-0059

In Lightroom, I made minor edits to the photo: increased clarity, exposure, whites, saturation, and removed blue and adjusted temperature. It took me about 30 seconds. There are things about the lighting I’m not super happy with and I probably blew it out too much, but oh well. Gotta pick your battles!

This is the same photo before editing…50 shades of grey!

veganovernightoatsnoedit-0059  

So that’s where my head is at with photography lately. I’d love to spend more time on it again, but right now I’m rolling with doing it under a time crunch. I’m beyond excited that Ashley is shooting the photography for my next cookbook. I honestly can’t imagine doing over 100 photos again with a baby crawling at my feet (and stealing the food). You guys are going to be blown away by the photos in the next book. We’ll have to show you some sneak peeks!

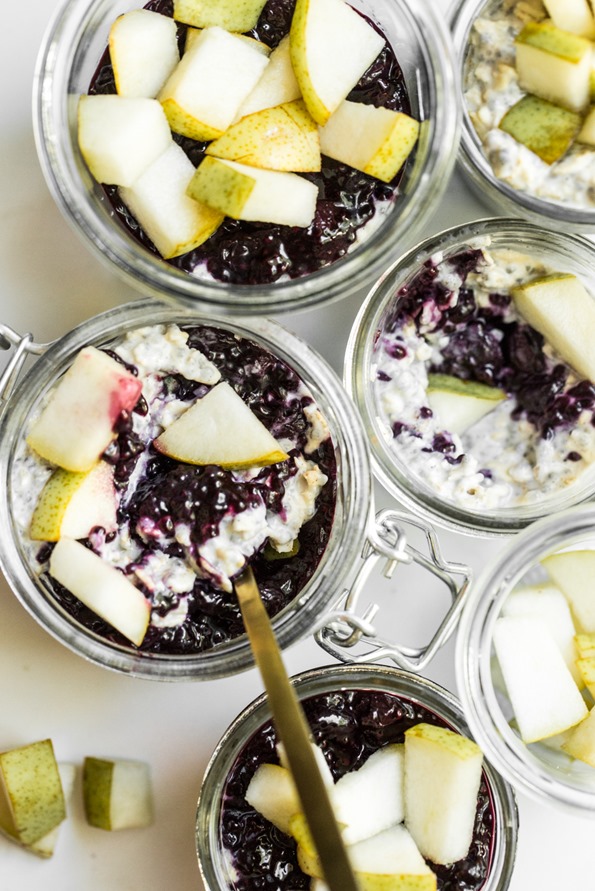
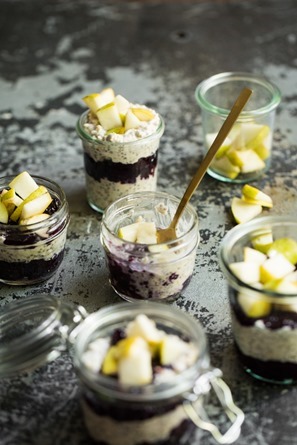
Now, finally onto the food. This is my newest overnight oat parfait creation. Six to seven years later, I’m still making vegan overnight oats on the regular. I’ll often make a large batch that lasts 2-3 days in the fridge. Or sometimes I eat it all in one day because I just can’t help myself. It’s so easy, perfect for the summer, and endlessly customizable. Make it parfait-style in portable jars and you’ll have snacks for days. Toss it in your bag and run out the door. Bring one for your friend and he/she will love you even more.

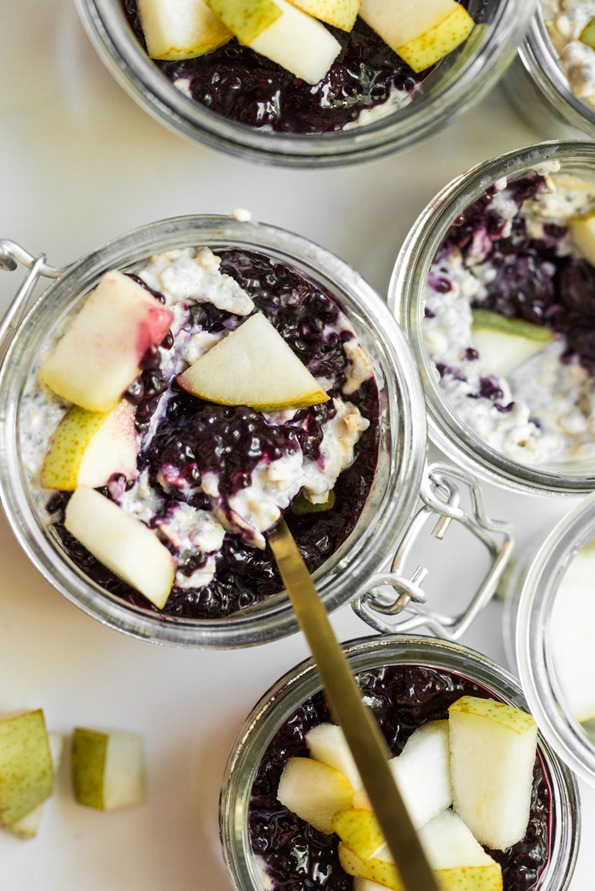
If you haven’t tried overnight oats layered with chia seed jam, you really must. It’s divine. This would be great with granola on top too.

veganovernightoatsohsheglows

Coconut-Cardamom Vegan Overnight Oat Parfait with Blueberry Chia Seed Jam

Vegan, gluten-free, nut-free, oil-free, refined sugar-free, soy-free

Overnight oats are getting fancy up in here! Coconut milk, oats, and chia seeds are mixed with ground cardamom, cinnamon, and maple syrup, and then layered with blueberry chia seed jam and sliced pear. You’ll want to eat this for breakfast, lunch, snacks, and dinner! Chia seeds don’t lie. Also, can I just say how awesome a layer of vegan ice cream or banana soft serve would be in this?

Yield
4-6 small jars
Prep Time
15 Minutes
Cook time
25 Minutes
Total Time
40 Minutes

Ingredients:

For the blueberry chia seed jam:
  • 550g frozen blueberries (about 4 cups + 2 tablespoons)
  • 1/4 cup pure maple syrup, or to taste
  • Dash fine sea salt
  • 3 tablespoons chia seeds
  • 1 teaspoon fresh lemon juice, or more to taste
For the vegan overnight oats:
  • 1 (15-oz) can full-fat coconut milk (yes you can use light, but full-fat is super creamy and delish)
  • 1 cup rolled oats (use gluten-free if necessary)
  • 3 tablespoons chia seeds
  • 1 tablespoon pure maple syrup
  • 1/2 teaspoon ground cardamom , or more to taste
  • 1/4 teaspoon cinnamon, or more to taste
  • 1-2 small ripe pears, diced (for layering)

Directions:

  1. Prepare the chia seed jam: In a medium pot, stir together the blueberries and maple syrup until combined. Add a dash of salt. Simmer over medium-high heat, uncovered, for about 8-10 minutes until softened (the berries will release a lot of water during this time).
  2. Add the chia seeds and stir until combined. Continue simmering and stirring frequently (reducing heat if necessary to avoid sticking) about 8-15 minutes longer, until most of the water cooks off and the jam reduces in volume. it will look thickened.
  3. Remove from heat and stir in the  lemon juice. Transfer the mixture to a bowl, uncovered, and into the fridge until cool, for at least a couple hours. For a quicker cooling method, pop the jam in the freezer, uncovered, for 45-60 minutes, stirring every 15 minutes, until cool.
  4. For the vegan overnight oats: In a medium container (with a lid) or in a medium bowl, stir together the entire can of coconut milk, oats, chia seeds, maple syrup, cardamom, and cinnamon until combined. Cover and chill for 1-2 hours, or overnight, until the oats soften and the mixture thickens. Stir to combine before using.
  5. Layer the chia jam, overnight oats, and diced pear into small jars. Secure lids (or cover with wrap) and store leftovers in the fridge for up to 3-4 days. The chia seed jam will keep in an air-tight container in the fridge for up to 2 weeks. Also, leftover jam can be frozen in plastic baggies and it thaws beautifully.

veganovernightoats-0096

PS – Thank you for your enthusiasm regarding my 2-Day Meal Plan! I’m so thrilled by your response and hope to do another in the future.

Oh She Glows

Gourmet Chia Seed Pudding (from scratch!)

chiaseedpuddingrecipe-8860

Your comments on my Kitchen Quirks story were quite hilarious. They also led to even more funny stories here at home and among our friends and family.

I got a text from a friend shortly after posting.

“I’m reading your kitchen quirks post aloud to my husband (because he is absolutely nuts about the dishwasher just like Eric is). I finish reading it to him and he goes, “Ugh, I wonder what some of Eric’s tricks are? Did he write specifics?”

There are many inquiring minds as to what Eric’s dishwashing tricks are, it seems. Eric is in the process of penning an e-guide for dishwasher enthusiasts. Ok not really, but I told him he can’t keep his secrets all to himself for ever! Plus, I need others to know what I’m going through.

When we were talking about the blog post, Eric decided to mention another one of my kitchen quirks. You know, aside from general “chaos”. Apparently, I have this annoying little habit of leaving kitchen cupboards/cabinets and drawers open while I’m baking or cooking. I’ve been doing it for years. Basically, since I started cooking.

In my eyes, leaving the drawers and cupboards open is efficient. I do it because I know I’ll probably go back to that cupboard later on in the cooking process so I see no need to close it every single time. See it’s not lazy; it’s practical! I’m all about efficiency.

One morning about 4 years ago when we were living in our previous house, I headed downstairs to the kitchen for breakfast. Eric was still upstairs getting ready for work. As I approached the kitchen I immediately noticed something was wrong…very wrong.

chiaseedpuddingparfait

Every single cupboard and drawer in the entire kitchen was wide open. Just picture your own kitchen with every cupboard door open and every drawer open. It’s freaky stuff, right?

I stopped dead in my tracks at the edge of the kitchen.

“OH… MY… GOD…”

I was absolutely horrified. Of course, I immediately assumed there was some kind of weird Poltergeist shit going on. Or some evil force taking over my kitchen. Or both.

I turned on my heels and BOOKED it upstairs. There’s no way I was going to wait around for the drawers to start spontaneously slamming or something!!

Eric started laughing uncontrollably. He then confessed that he opened every cupboard and drawer before bed to play a trick on me. What kind of sick person does that?

So it’s been 4 years since his prank and I’m long overdue for retaliation. I’m thinking it’s going to have something to do with his beloved dishwasher. I’m open to your suggestions, as always.

chiaseedpuddingrecipe-8839

chiaseedpuddingrecipe-8878

Gourmet Chia Seed Pudding (From Scratch!)

Vegan, gluten-free, no bake/raw, oil-free, refined sugar-free, soy-free

Creamy, rich, and thick chia seed pudding made from scratch! If you want to make the speedy version using store-bought almond milk and liquid sweetener, see the tip below. This is a large batch (3 cups or so), but I discovered that chia seed pudding freezes well and it thaws beautifully in the fridge. So there’s never fear of any going to waste. I like to freeze it in individual servings in freezer-safe zip bags or small glass containers, so I always have a healthy snack on hand. if you aren’t down with the tapioca-like texture of chia seed pudding, feel free to blend this pudding in your blender until smooth.

Yield
3-3.5 cups (serves 4-6)
Soak time
overnight + 2-3 hours
Prep Time
10 Minutes
Cook time
0 Minutes
Total Time
10 Minutes

Ingredients:

  • 1 cup raw almonds, soaked overnight
  • 3 cups filtered water
  • 1 vanilla bean, chopped into a few pieces (optional, but recommended)
  • 1/2 teaspoon pure vanilla extract
  • Small pinch Himalayan pink sea salt or fine grain sea salt
  • 3-4 tablespoons pure maple syrup or 1/3 cup packed pitted Medjool dates, or to taste
  • 1/2 cup chia seeds

Directions:

  1. Place almonds in a bowl and cover with a couple inches of water. Soak overnight or for 8 hours. If you are in a rush, soaking for 1-2 hours works in a pinch. Drain and rinse almonds after soaking.
  2. Place almonds in a high speed blender along with the 3 cups filtered water, chopped vanilla bean (if using), vanilla extract, and salt. Blend on the highest speed, for about 1 minute until the almonds and vanilla bean are pulverized.
  3. Place a nut milk bag (this is the new one that I use and love) over top of a large bowl and pour the almond milk into the bag. (You can also use cheesecloth placed over a fine mesh sieve, however a nut milk bag yields the smoothest result and is faster.) Squeeze the bag and press out all the milk. The pulp will remain in the bag/cloth (you should have about 1 cup of pulp).
  4. If using dates as your sweetener: Note: I only recommend using dates if your blender can pulverize them super smooth, otherwise use liquid sweetener. Rinse out the blender. Carefully pour the almond milk back into the blender and add the pitted dates. Blend on the highest speed until the dates are pulverized and the milk is super smooth. Add milk back into the bowl.
  5. Whisk in the chia seeds (and the maple syrup, only if not using the dates). Place in the fridge for 2-3 hours, until thickened and cold. Give the mixture a good stir every once in a while to redistribute the chia seeds.
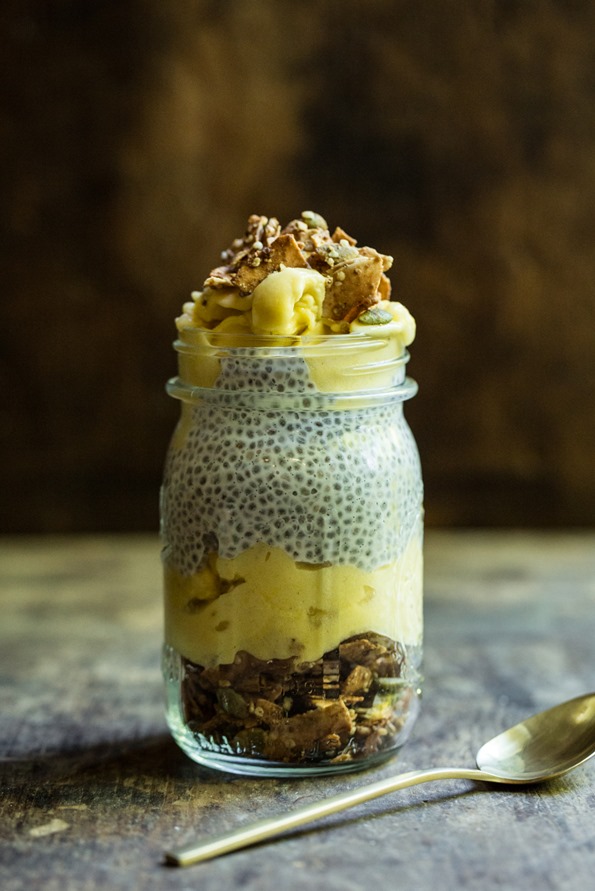
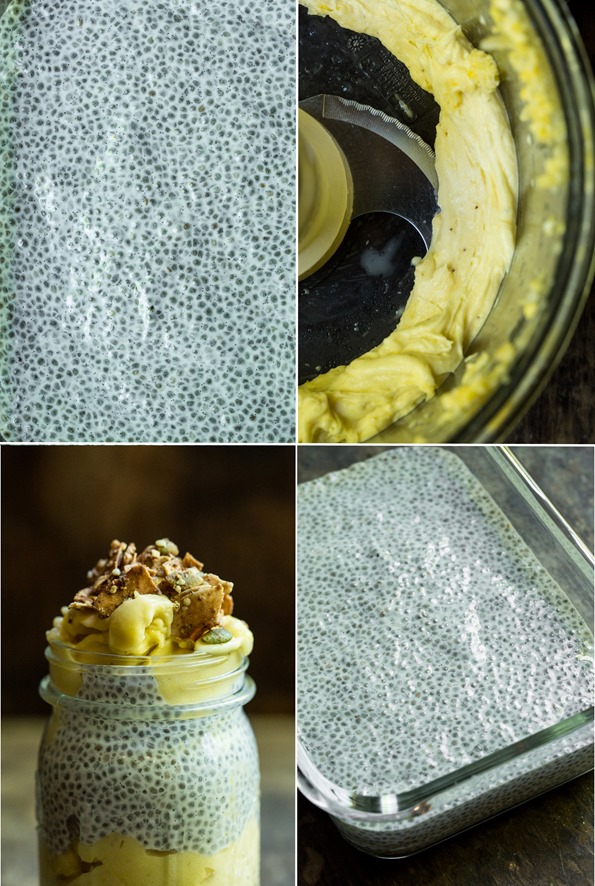
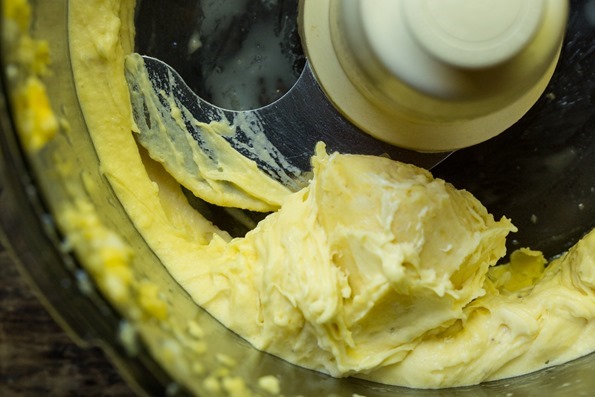
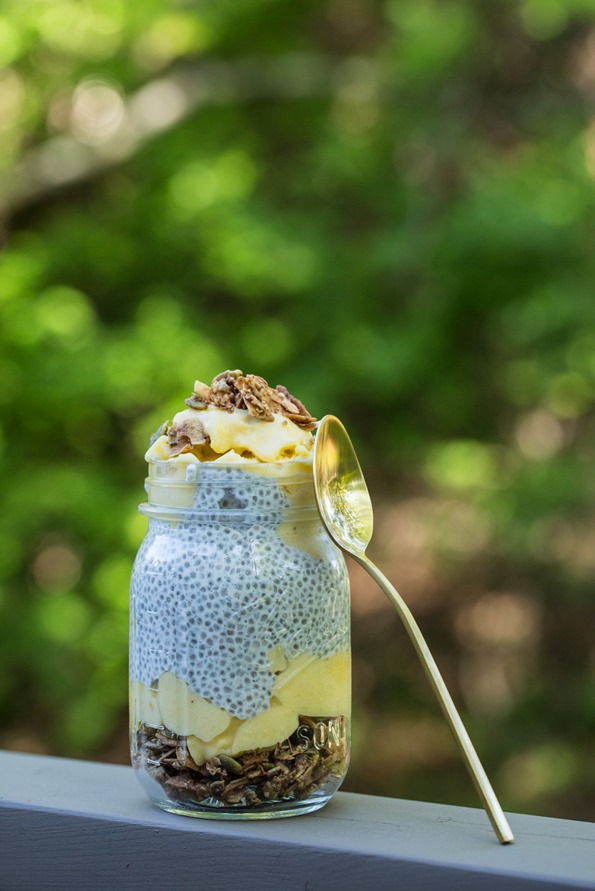
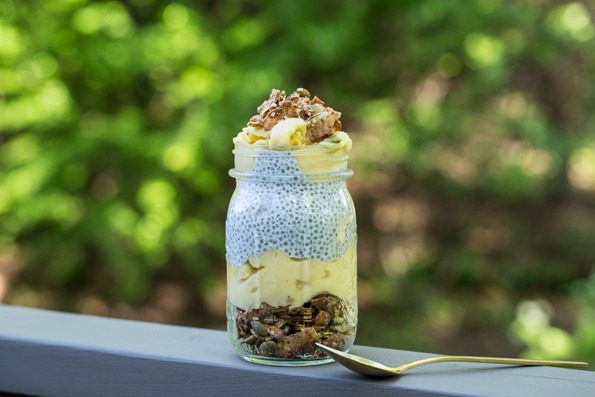
  6. I served this with granola (here is a recipe) and Banana-Mango-Lime soft serve (1 large frozen banana, 3/4 cup frozen mango chunks, squeeze lime processed in food processor until soft serve consistency). Chia seed pudding will keep in the fridge for up to 3-4 days. It freezes well too, just thaw in the fridge before ready to enjoy.

Tips: 1) For a quicker version, simply use 3 cups of store-bought unsweetened almond milk, 1/2 cup chia seeds, and 2-3 tablespoons of pure maple syrup. Whisk everything in a mason jar and chill in the fridge for 2 1/2-3 hours. 2)  Ideas for using leftover pulp: Spread it onto a baking sheet and dry it out by baking it at 300F for 25-30 minutes until lightly golden in some spots. Cool completely. Grind it in a food processor until a coarse flour forms. You can use the toasted pulp in granola recipes or any other baked goods you see fit.

chiaseedpuddingrecipe-8886

Oh She Glows

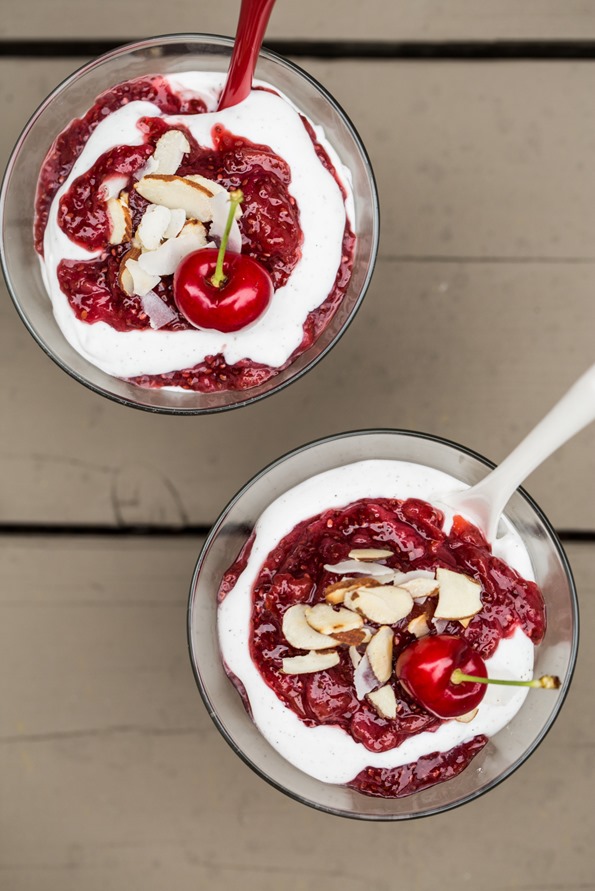
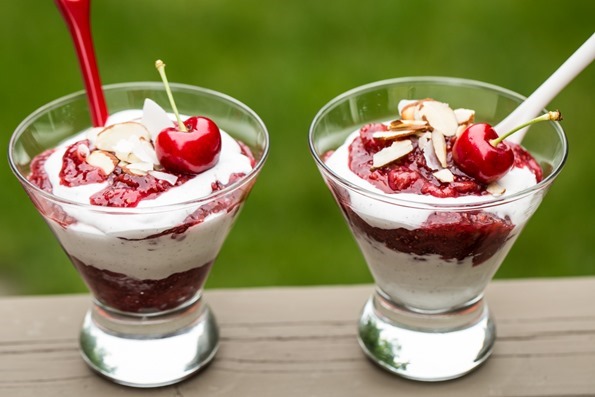
Cherry-Strawberry Chia Seed Fool with Vanilla Bean Coconut Whipped Cream

cherrystrawberrychiaseedfool-9660

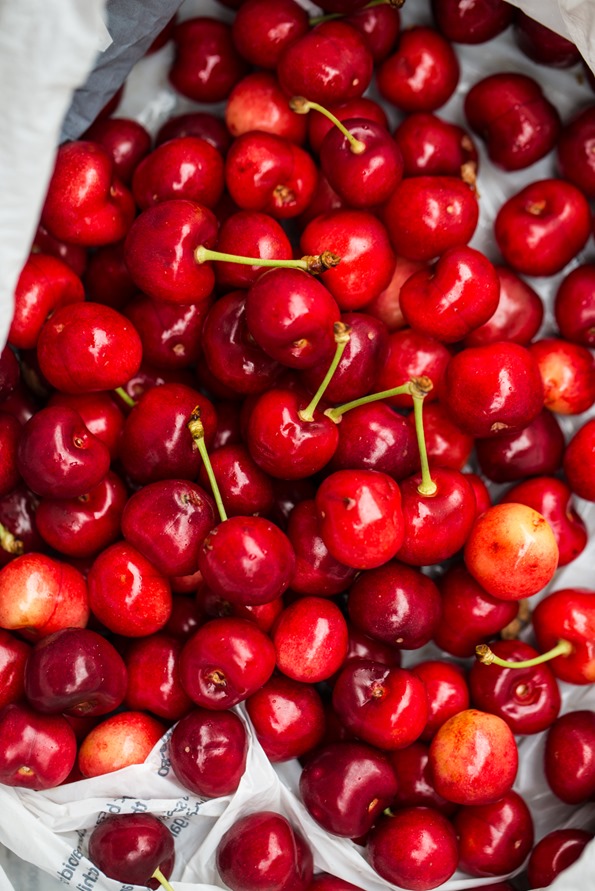
My sister and family are here visiting this week and they brought us about 10 pounds of freshly picked cherries from my brother-in-law’s parent’s house (they have about 7 cherry trees…jealous!). It was like Christmas morning when this loot arrived. I’m eating these beauties by the fist full. Adriana is going wild over them. It’s a good, ahem berry good, week. We pitted and froze a bunch to make 1-ingredient cherry sorbet in the Vitamix (my nephews loved it) and I’m dreaming up other ways to use them before they go bad!

cherrystrawberrychiaseedfool-9597

cherrystrawberrychiaseedfool-9608

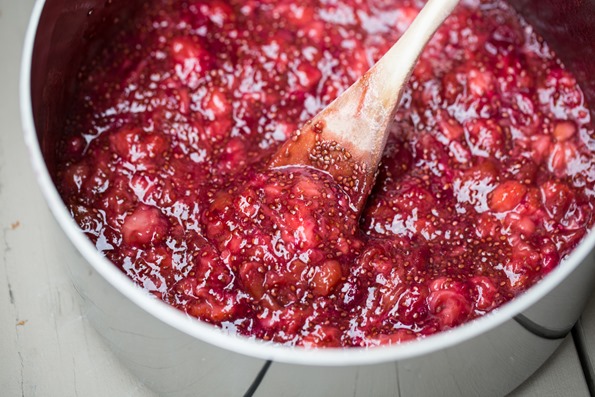
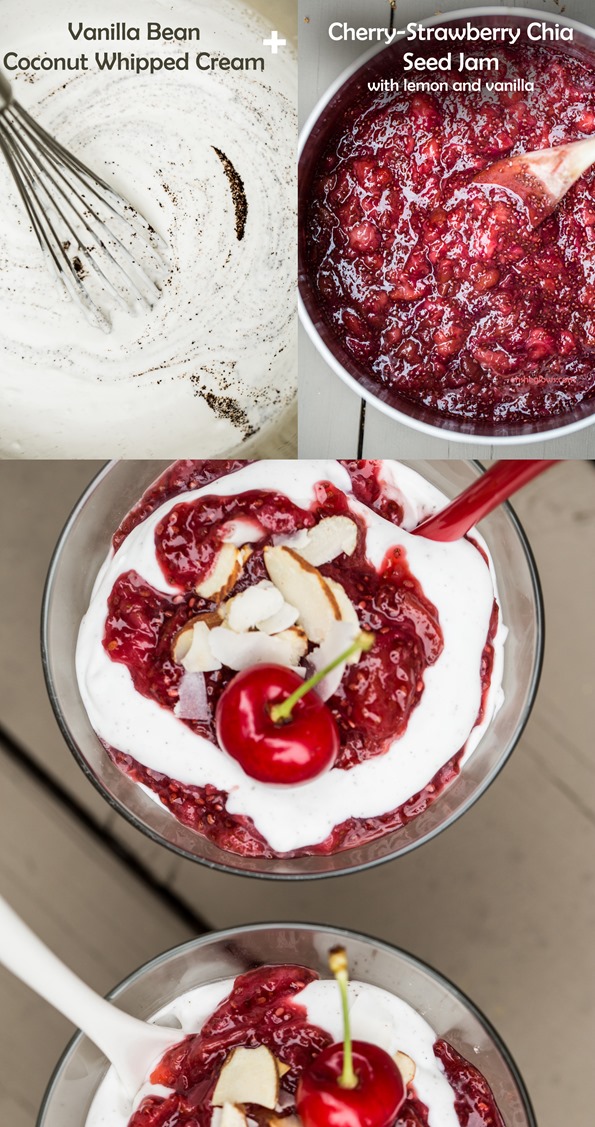
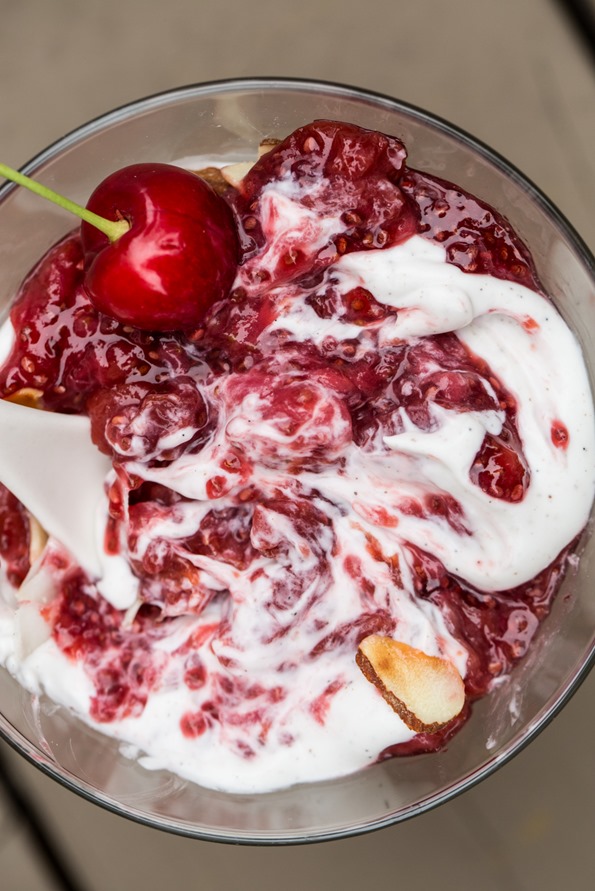
This gorgeous Cherry-Strawberry Chia Seed Fool is a festive dessert I came up with for Canada Day tomorrow. I actually thought of it in the middle of the night last night and by some stroke of luck I remembered the idea this morning. In lieu of heavy dairy cream, I used full-fat coconut cream and whipped it with a touch of cane sugar and vanilla bean powder. So incredibly simple and delicious. For the berry part, I made a cherry-strawberry chia seed jam with maple syrup (does it get anymore Canadian?), vanilla bean, fresh lemon juice, and a secret ingredient – a teaspoon of finely grated beet for a bolder red color (but that’s totally optional). It turned out so lovely layered in parfait glasses. Many traditional fool recipes that I came across fold the berries into the cream until it’s pretty uniform in color, but I prefer the layered look so I did it my way. Then you can swirl it all together as you eat it. Total bliss! I also added some toasted sliced almonds and flaked coconut on top for some crunch. A little lemon zest would be nice too.

strawberrycherrychiaseedfoolvegan

cherrystrawberrychiaseedfool-9659

Cherry-Strawberry Chia Seed Fool

Vegan, gluten-free, grain-free, oil-free, soy-free

A vegan twist on the classic berry fool! I used whipped vanilla bean coconut cream and paired it with a delightful cherry-strawberry chia seed jam with lemon and vanilla. This dish requires some advance preparation so be sure to put the cans of coconut milk in the fridge the day before so the coconut cream can solidify. The jam also requires cooling, so you’ll need at least 2 hours to chill it in the fridge before layering the dessert.

Yield
6 parfaits
Freeze time
overnight + 3 hours
Prep Time
20 Minutes
Cook time
20 Minutes
Total Time
40 Minutes

Ingredients:

For the Coconut Whipped Cream
  • 2 (15-oz) cans full-fat coconut milk, chilled overnight
  • 2 tablespoons natural cane sugar, or to taste
  • 1/4 teaspoon pure vanilla bean powder or 1 vanilla bean, seeded
For the Cherry Strawberry Chia Seed Jam (makes 2 1/3 cups)
  • 2 heaping cups fresh or frozen strawberries (hulled if using fresh)
  • 3 cups fresh or frozen sweet cherries (pitted if using fresh)
  • 3-4 tablespoons pure maple syrup, to taste
  • 2 tablespoons chia seeds
  • pinch fine sea salt
  • 1 teaspoon pure vanilla extract or 1/2 teaspoon pure vanilla bean powder
  • 1-2 teaspoons fresh lemon juice, to taste
  • 1 teaspoon peeled and finely grated red beet (I use a microplane lemon zester), adds bolder red hue
Optional garnishes:
  • Toasted sliced almonds
  • Coconut Flakes
  • Lemon Zest
  • Fresh cherries

Directions:

  1. Chill the cans of coconut milk in the fridge for 12-24 hours so the coconut cream can solidify before use.
  2. For the chia seed jam: Add the berries and maple syrup into a medium saucepan. Stir to combine. Increase heat to medium, and simmer until the berries release their juices and soften, about 10 minutes. After the berries release water you can increase the heat even more to cook off the water. Watch closely and stir frequently. When the berries look a bit soft, stir in the chia seeds. Keep cooking over medium heat until the chia thickens the mixture slightly, about 5-10 more minutes.  Reduce heat if necessary to avoid burning. Remove from heat and stir in the salt, vanilla, lemon, and optional grated beet. Pour into a glass container and let it cool on the counter for at least 30 minutes before covering and chilling in the fridge for at least 2 hours, preferably longer.
  3. Chill a medium bowl in the freezer (this helps the coconut cream stay thick while whipping).
  4. Open the chilled cans of coconut milk and carefully scoop off the white coconut cream from each can and place it into a medium bowl. You should have 1.5-2 cups worth of cream. You can reserve the leftover coconut water for another use, such as a smoothie or you can freeze it into coconut water ice cubes (also great in smoothies).
  5. With electric mixers or a whisk, beat the cream and the cane sugar in the chilled bowl until smooth. Whisk in the vanilla.
  6. Layer the coconut cream and the chia jam in parfait glasses. Top with optional toasted sliced almonds, flaked coconut, lemon zest, and a cherry on top! Enjoy immediately or cover and transfer to the fridge until ready to serve. The chia seed jam will keep for up to a week in the fridge in an air-tight container, and I expect the coconut whipped cream will keep for at least 5 days.

Tip: If for some reason your chia seed jam didn’t thicken enough after chilling (this might be the case if the water wasn’t cooked off enough), stir in another tablespoon of chia seeds and chill it for another hour. That should do the trick!

cherrystrawberrychiaseedfool-9674

I’m keeping this short and sweet today because I have a big cookbook deadline looming. Thank you so much for your patience with my infrequent blog posts lately. I am dying to get back into it!

Wishing my fellow Canadians a very happy Canada Day tomorrow. Also, happy 4th of July to our friends south of the border. (By the way, you can easily turn this into a red, white, and blue dessert by adding blueberries.) I hope you have a fun and safe week filled with all the goodness summer has to offer!

Oh She Glows

Inspirational Sunflower Seed Risotto

risotto2

Inspiration is a perplexing creature. As someone who relies on a constant stream of ideas to do what I do, having an endless supply is rather essential.

Of all the questions I am asked, the most common of them all is where my inspiration comes from.

The funny thing about this is, I can’t really give a straight answer because I get ideas from everywhere. Literally. Yes of course there are the obvious places like cookbooks, the farmer’s market, my vegetable garden, but I’ve had ideas strike me like lightening while listening to music, smelling a certain scent wafting on the breeze, the colours in a particular vintage dress. My main motivation for writing a cookbook actually came from a postcard I found randomly, which pictured a faceless girl picking wildflowers. Nothing to do with food. At this point I’ve learned that the most important thing for me is to put myself in the way of beauty as often as possible, keep an open mind, and not do discount any sources or ideas as weird, because the best things most often come out of the seemingly strange.

I will say that one thing that consistently brings me a lot of inspiration, is just talking to other people who really love food. Sometimes getting out of my head and into someone else’s, or at least hearing about their experience with a particular dish or special ingredient can help jumpstart a flood of ideas. For instance, the last time I was in Amsterdam teaching cooking classes, one of the attendees came up to me at the end of the day and told me about a very exciting meal she had eaten in Copenhagen, of all places. It was a risotto made out of sunflower seeds. Sunflower seeds! At first this sounded totally bizarre, but then again, I haven’t been able to stop thinking about this seriously inspiring idea ever since. I knew that sunflower seeds were about the same size and shape as grains of rice. They were nearly the same colour. But how would they taste? How would they become creamy? What is it like to boil them?

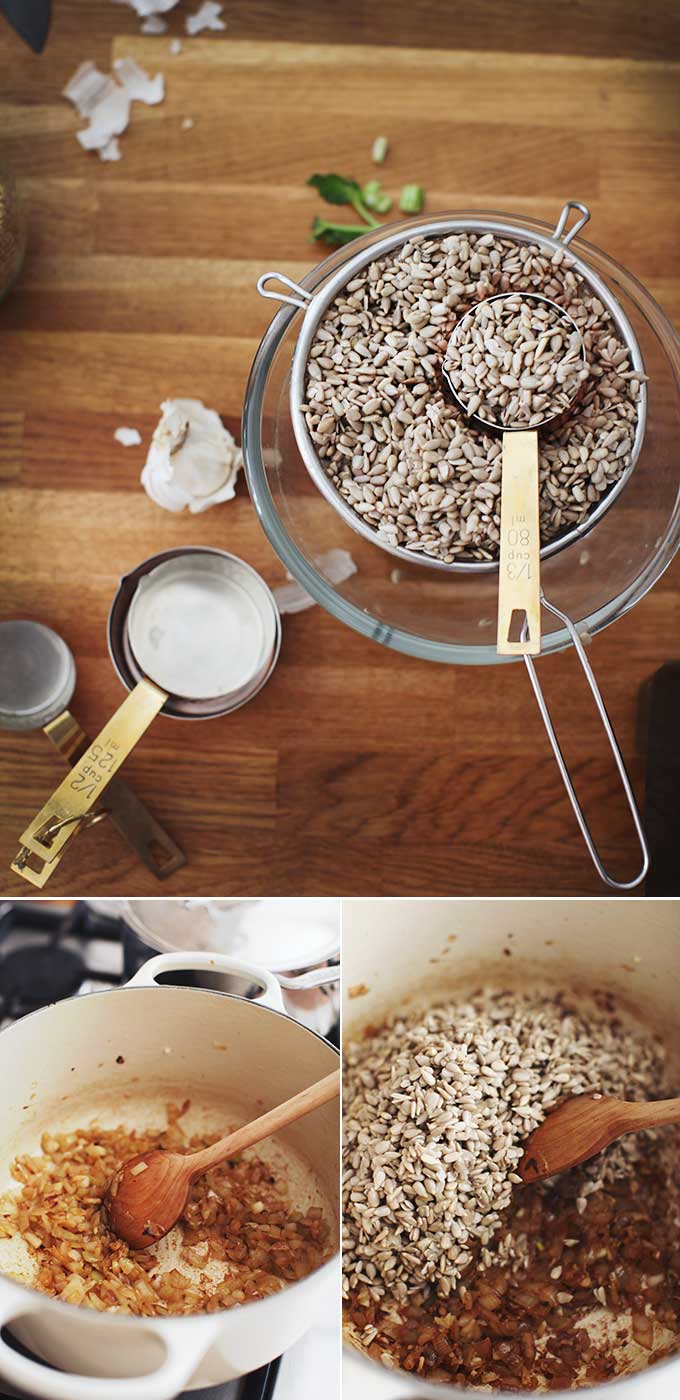
When I googled it, all the recipes called for a pressure cooker, which makes sense for those that aren’t familiar with the awesome power and health benefits of soaking. I knew that that spending the day in a warm bath would make the sunflower seeds totally relaxed and willing to tenderize in a sultry spa of caramelized alliums for dinner that evening. Also, I don’t own a pressure cooker.

So setting out to make this, I anticipated a week’s worth of trial-and-errors, a pile of dirty dishes and a lot of semi-edible sunflower seeds. But I treated the seeds very much like I would treat rice in a risotto and after one (one!) attempt, it was pretty darn near perfect. And pretty darn inspiring.

risotto4
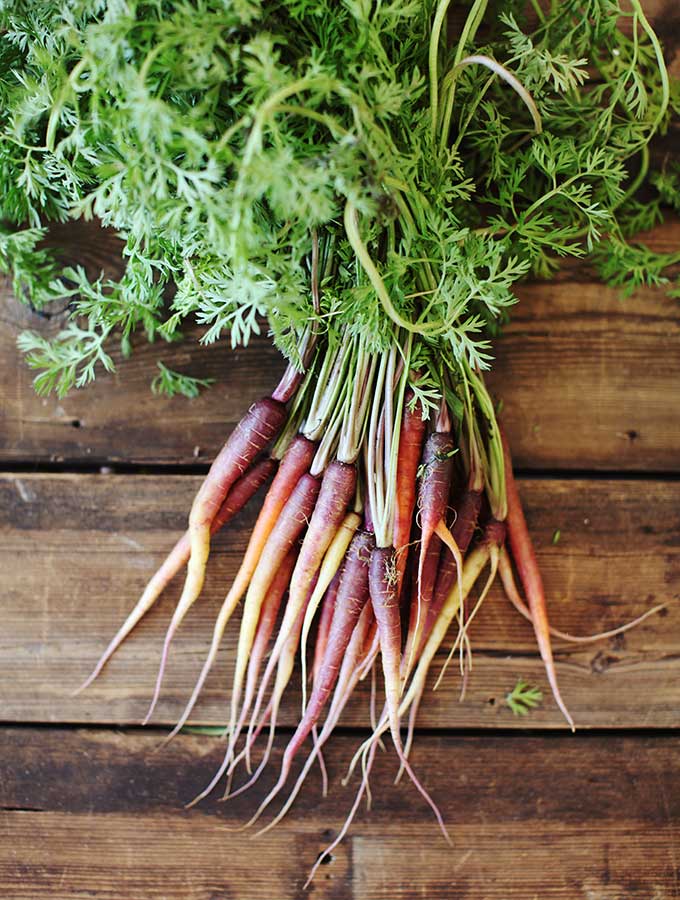
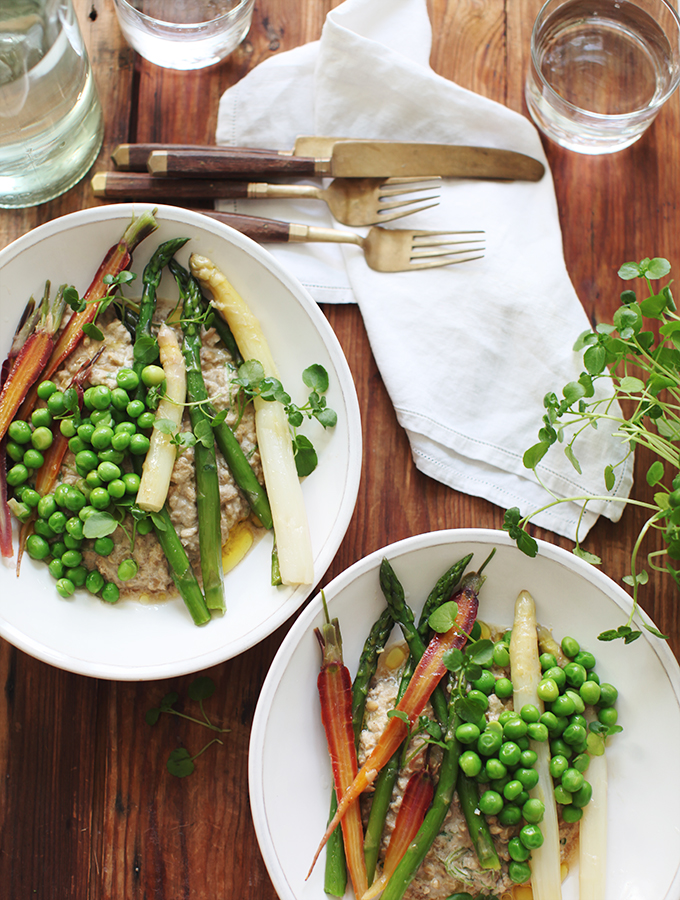
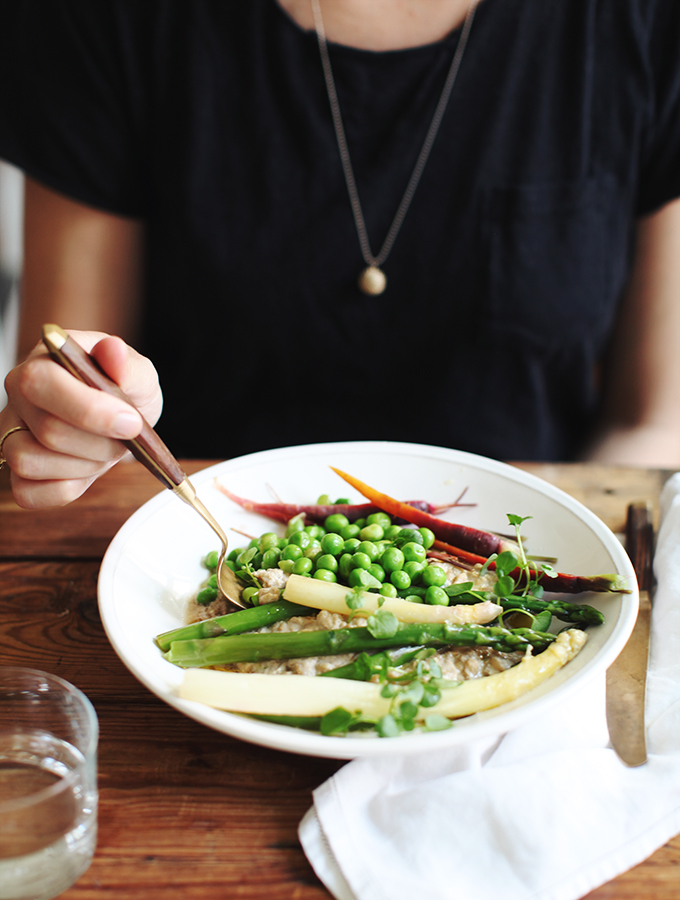
To say that this recipe is totally surprising is an understatement. The sunflower seeds are tender and chewy, with just the slightest bit of tooth still left – not unlike the real deal. It’s remarkably simple to make with just a few common ingredients, truly delicious and deeply satisfying. You can make it suit any season as the seeds create a foundation to build upon no matter what time of year you’re enjoying. Since we are finally getting some lovely fresh spring produce here in Denmark, I chose to go that route. I found some beautiful young rainbow carrots, peas in their pods, white and green asparagus and some super fresh watercress. This would be equally lovely with sautéed mushrooms, roasted root vegetables, pumpkin or squash.

I am sure you’re wondering how the seeds get creamy from cooking, and the truth is they don’t – you’ll need to help them out a little. When cooking a rice-based risotto, starch emerges from the grains as they cook, and magically melds with the broth to create a velvety texture. To mimic this I simply blended some of the soaked seeds with equal parts water and added it back into the mix at the end of cooking, the results astounding. This makes the risotto rich and creamy without any starches or carbohydrates.

But what shocks me most of all is how darn flavourful the dish is with such minimal ingredients. The caramelized onions and garlic are really all you need (in this dish, as well as life, I wager) although herbs would be a welcome addition; dried ones during cooking or fresh ones stirred in at the end. My version uses watercress as a finishing touch and is totally lovely with its peppery bite, but I will leave the brilliant blank canvas for you project your own inspiration on to.

risotto5

Everyone Loves the Sunflowers
Easy-to-find, inexpensive, and nutrient-rich, sunflower seeds are one of my favourite additions to a number of dishes that I make, from breakfast to dinner and snacks in between. They are delicious toasted or soaked, blended up into seed butter or even milk!

Sunflower seeds are one of nature’s highest sources of vitamin E, the body’s primary fat-soluble antioxidant. Vitamin E is important for overall health, as it functions as a free-radical neutralizer and prevents damage to fat-containing structures and molecules, such as brain cells, cholesterol, and cell membranes. When the fats in cell membranes become damaged, the function of the cell itself can be compromised. This is why researchers have studied whether diets low in Vitamin E are associated with many diseases associated with aging.

Sunflower seeds are so high in vitamin E, that just one serving of this risotto contains over 100% of your daily recommended intake!

Because sunflower seeds have such a high (and healthy!) fat content, it is best to store them in a tightly sealed glass container in the refrigerator. Keeping them cool will help preserve their delicate, nourishing oils, which can then in turn nourish you! They will also last much longer stored this way. If you purchase shelled sunflower seeds in bulk make sure to sniff the bin first: it should smell fresh and nutty, without any traces of sourness, which can indicate that the fats have become rancid. And always have a good look at the seeds to ensure that they are not discoloured or damaged.

risotto1

risotto3

Where do you get your inspiration from? How does it come to you? What have you been inspired by lately? Tell me! Especially if it’s about food…

Wishing you an inspired day! Love always,
Sarah B


My New Roots