Mini Pumpkin Pie Tarts with a Sunflower Cookie Crust (Nut-free, Vegan)

veganpumpkinpienutfree (1 of 1)

A couple weeks ago, I received a reader recipe request. Let’s call him “Jason”. Jason asked if I could create a nut-free version of my Raw Pumpkin-Maple Pie with a Baked Oat Crust (found in my cookbook, page 247) because his wife can’t have cashews and pecans. Apparently, it was tormenting her not to be able to try this pie! He wants to surprise her next month with this dessert as a special thank you because “she’s the best wife and mom ever”.

He went on to write, “Angela, I have no clue where to begin and don’t want to mess this up like I usually do.”

I immediately knew that I had to step up to the (pie) plate on this one (no pressure, no pressure!) because the world needs more love. And pie. Plus, I’ve always wondered how I could make this recipe without pecans or cashews, and now I have a nice option to share with you all. I tested multiple fillings and there was a clear winner that I’m sharing below. Spoiler alert – a combo of super luxurious full-fat coconut cream and sunflower seed butter worked so well as a replacement for cashews! It tastes so awesome.

I also paired it with a new toasted sunflower seed and oat “cookie” crust that’s a wonderful, crunchy compliment to the creamy and cool pumpkin pie filling. Pie crusts should never be boring or flavourless, and I love that this one is an easy “press-in” crust.

I meant to have this recipe up on Monday, but I ended up testing this pie about 7 times this week! I can’t sleep at night unless I’ve tested all of my options. Better late than never, I say. I’d rather not rush a recipe just to get it out on time. Anyway, I made this pie as a contribution to our Thanksgiving dinner later today (we’re in the US currently), and I’m so looking forward to the spread at my mom and stepdad’s. I hope those of you celebrating have a happy, fun, and safe Thanksgiving! And if you can’t make this pie today or this weekend, I hope you’ll include it on your holiday baking list.

Well, Jason (you know who you are) I hope this works out for you. If it doesn’t, I’d prefer that you not mention my name.

I’m joking! It’ll work out. Promise.

veganpumpkinpienutfreeglutenfree

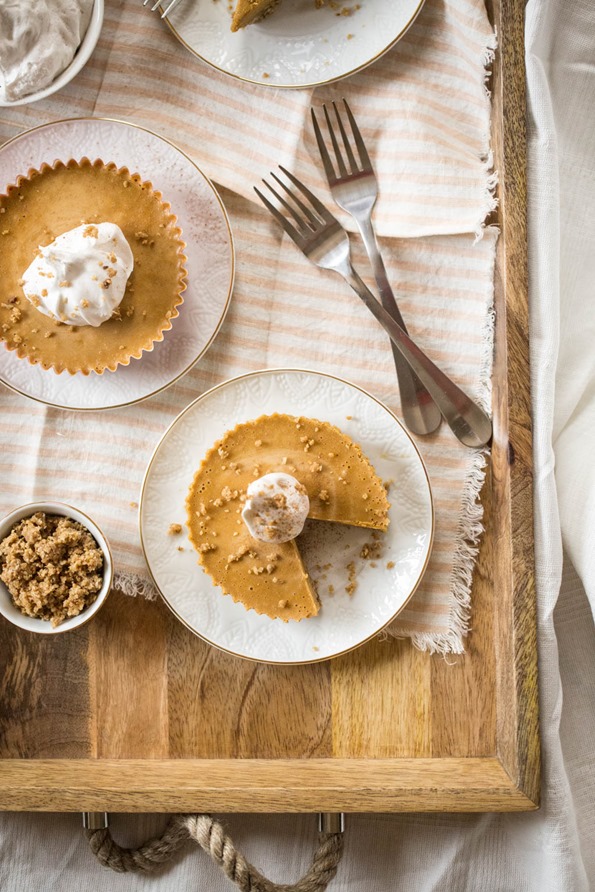
Mini Pumpkin Pie Tarts with a Sunflower Cookie Crust (Nut-free)

Vegan, gluten-free, nut-free, refined sugar-free, soy-free

This is a luxurious and creamy nut-free version of my favourite Raw Pumpkin Pie from The Oh She Glows Cookbook. After many trials, I ended up using a combination of sunflower seed butter and full-fat coconut cream to replace the cashews in the original recipe, and it worked out so well! The pie has a light coconut flavour, but it’s balanced out nicely by the earthy sunflower seed butter. As a bonus, this filling doesn’t use any whole nuts or whole seeds so you don’t need a Vitamix (or other high powdered blender) to get the filling super smooth. I used 4 tart-sized (about 4-inches diametre) “freestanding” baking cups which I found at Target, but you can also use a standard muffin tin lined with paper liners (or simply greased well) to make mini tarts. I’d imagine a 7-9 inch springform cake pan would work well too. The dough is a bit difficult to shape into a traditional pie crust (with high sides) so that’s why I went with a flat crust for this recipe. If you don’t mind fiddly things, then by all means take a stab at the regular pie crust. Also, the paper liners are easily removed if you remove them while the pies are frozen.

Yield
8-10 servings
Freeze time
24 hours (chill can of coconut milk in the fridge) + 3-5 hours
Prep Time
30 Minutes
Cook time
12 Minutes
Total Time
42 Minutes

Ingredients:

For the crust:
  • 1/2 cup raw sunflower seeds
  • 1 3/4 cups rolled oats (use certified gluten-free if necessary)
  • 1/4 teaspoon fine sea salt
  • 1/4 cup coconut oil, melted*
  • 3 tablespoons pure maple syrup
  • 2 tablespoons smooth sunflower seed butter (pour off oil before measuring)
  • 2-3 teaspoons water, if needed to bind dough
For the filling:
  • 1/2 cup canned full-fat coconut cream**
  • 1 cup unsweetened pumpkin puree
  • 3/4 cup pure maple syrup
  • 1/2 cup coconut oil, melted*
  • 2 tablespoons + 2 teaspoons sunflower seed butter
  • 2 teaspoons pure vanilla extract
  • 1-2 teaspoons pumpkin pie spice, to taste***
  • 1/4 teaspoon fine sea salt
For serving:
  • Coconut Whipped Cream (I used So Delicious Coco Whip here)

Directions:

  1. Preheat oven to 350F. Grab four (4-inch diameter) baking paper cups, or 12 standard muffin paper liners and set aside. You can also use a 7-9 inch springform cake pan greased and lined with a circle of parchment paper.
  2. Add the sunflower seeds into a skillet and toast the seeds over medium heat for 5-8 minutes, until lightly golden and fragrant. Remove from heat.
  3. For the crust: Add the toasted sunflower seeds, oats, and salt into a food processor and process until finely chopped, resembling a coarse flour. Now, add the melted oil, maple syrup, and sunflower seed butter, and process until the mixture comes together into a heavy dough. The dough should stick together when pressed between your fingers very easily. If it’s still a tad too dry, add the optional water and process again until it comes together. I find that I always need 2 teaspoons of water, but it’ll depend on your ingredient’s moisture content.
  4. Divide the dough equally between the liners, crumbling it all over each base. (Note: I reserved about 1/2 cup of the dough for sprinkling on the pies when serving.) Lightly wet your fingers. Starting at the centre, press the dough into the base to form a crust. If the dough starts to stick to your hands at any time, lightly wet your hands and shake off the excess water. Once the crust is all pressed in, poke the base with a fork about 2-3 times to allow the air to escape while baking. I place the 4 liners onto a baking sheet so it’s easy to remove them from the oven.
  5. Bake the crusts for around 10-12 minutes until lightly golden around the edges. Place baking sheet on a cooling rack and cool the crusts for at least 15-20 minutes, or longer if you have the time.
  6. For the filling: Open the chilled can of coconut milk. Scoop off 1/2 cup of the white coconut cream only (not the water) and place it into a blender. (You can save the remaining contents of the can for a smoothie or other use.) Add the pumpkin puree, maple syrup, melted oil, sunflower seed butter, vanilla, pumpkin pie spice (to taste, I use 2 tsp), and salt. Blend, starting at a low speed and increasing the speed, until smooth.
  7. Divide the filling equally among the cooled crusts. Carefully, transfer the baking sheet (or muffin tin, if making 12 mini tarts) into the freezer on a flat surface. Chill until firm, about 3-5 hours. There’s no need to cover it.
  8. After the tarts are solid, carefully remove the paper liners. Here you can transfer the pies to the fridge for a mousse-like texture, but I prefer the texture when frozen after sitting on the counter for 5-10 minutes before serving.
  9. Serve with coconut whipped cream on top, if desired. This pie filling softens a great deal at room temperature, so it’s best not to leave leftovers on the counter. Return them to the fridge or freezer for best results.

Tips:

*A note about coconut: Health Canada classifies coconut as a “seed of a fruit” and not as a tree nut, however the U.S. FDA classifies coconut as a tree nut, so as you can see there is some confusion over classification when it comes to coconut. As always, if you think you might be allergic to coconut, be sure to talk to your doctor before consuming.

If you want to minimize the light coconut flavour in this pie, you can use refined (flavourless) coconut oil here rather than virgin.

**Be sure to chill a can of full-fat coconut milk for at least 24 hours before you begin this recipe. When ready, open the can and carefully scoop out 1/2 cup of the white coconut cream making sure not to use any of the coconut water.

***I used 2 teaspoons of Whole Food’s 365 Pumpkin Pie Spice since I’m currently away from home. You can also try my homemade Pumpkin Pie Spice Mix.

veganpumpkinpienutfree1

Oh She Glows

Pumpkin Pie Caramel Bars

Pumpkin_caramel_bars_1

And we arrrrre back! If you have read the updated version of our latest post, you know that last week was an exhausting one for us. We are sorry about the decision to pull that recipe but it made us so happy to read your cheering comments on instagram regarding honesty and transparency.

We promised you a new recipe soon, and this one surely delivers. It’s a two layer, pumpkin pie caramel bar covered in dark chocolate. It takes a little jiggling to cover the bar in chocolate and some waiting for the pumpkin layer to set, but apart from that, it is pretty straight forward. Instead of making a separate caramel layer, we chose to combine our favourite date caramel recipe with a simple pumpkin pie recipe and it just made the whole thing a lot easier. And of course mega-delicious. When eaten straight from the freezer it has proper ice cream texture, and when left an hour in room temperature the inside gets more caramel-like. Personally, I prefer it somewhere in between – when the pumpkin caramel is a little soft but still quite frozen.

Pumpkin_caramel_bars_2

We are not big on Thanksgiving celebrations here in Sweden but if we would arrange a Thanksgiving dinner, I think these would be optimal as a cold, sweet and modernised version of a pumpkin pie in between or after all the warm, savoury dishes.

I already mentioned that it can get a little messy when you cover the bars in chocolate. If chocolate-messy-fingers isn’t your thing, you can make Pumpkin Caramel Slices instead of bars by leaving the mixture in the tin and pouring the chocolate (3 oz / 80 g is enough) on top, so you get three visible layers instead of having the chocolate covering the sides. It’s a lot easier (but perhaps not as fun). Just remember to wait until the chocolate is firm before cutting up the slices.

Pumpkin_caramel_bars_3

Pumpkin Pie Caramel Bars
Makes 20 bars

Coconut base
5 fresh dates, pitted

1 tbsp coconut oil
1 scant cup /250 ml / 80 g desiccated coconut, unsweetened

Salted Pumpkin Caramel
½ cup / 70 g cashew nuts, pre-soaked for 3-5 hours
1 cup / 250 ml / 220 g canned pumpkin puree or homemade (see note how to make it)

4 tbsp tahini
4-6 tbsp drinking water
4 tbsp coconut oil
10 soft dates, pitted
1/2 tsp cinnamon
1/4 tsp ginger
1 pinch cloves
1/2 tsp flaky sea salt

150 g / 5 oz dark chocolate, 70%.

Add dates and coconut oil to a food processor and mix on high speed until you get a sticky paste. Add the coconut and mix again until all is combined. Line a 4 x 8 inch / 10 x 20 cm loaf tin with parchment paper and scoop the coconut mixture into it. Use your palm to flatten out coconut tightly into one thin base layer and then place the tin in the freezer while creating the pumpkin caramel.

Add all the pumpkin caramel ingredients to a blender or food processor and mix on high speed until smooth. Start with 4 tbsp water and then add a splash more if the mixture is too thick to blend. When completely smooth, taste and add more salt or dates if needed. Take out the tin from the freezer and scoop the pumpkin caramel on top of the coconut base. Use a spatula to smooth out the surface or knock the tin against the table a few times to get it even. Place back into the freezer for at least three hours or until completely firm.

Use a knife to carefully flip the frozen mixture out of the tin. Trim the sides for more even looking bars then use a sharp knife to cut 20 bite-sized pieces, about 1 x 2 inches / 2,5 x 5 cm, that you spread out on a parchment paper (or place back into the freezer while melting the chocolate).

Melt chocolate in a water bath (here is a simple instruction video).Use a spoon to spread the chocolate evenly around each bar or simply pour the chocolate over them (or a combination of the both), leave the bottom uncovered. You can dip the bars straight into the chocolate but if you are not careful with the chocolate’s temperature, the cold bars will chill the chocolate which makes it harder to handle. Try to keep the bowl of chocolate over the water bath until the last bar is covered to ensure that the chocolate is evenly tempered and thus easier to handle.

Store the bars in the freezer and eat chilled or slightly thawed.

Homemade Pumpkin Puree
Preheat the oven to 200°C / 400°F and line a baking tray with parchment paper. Cut one 1 small Hokkaido pumpkin or Butternut Squash into quarters, scoop out the seeds and fibrous strings and place cut-side down on the baking tray. Bake for approx. 25-45 minutes (depending on the size of the pumpkin) or until the skin is golden and bubbled and the flesh is tender. Set aside to cool. Spoon the flesh of the pumpkin into a food processor and process on a high speed until completely smooth. Store in the fridge in an airtight container for up to five days or in the freezer. Apart, from these bars, the puree can be used in Pumpkin Pie, Pumpkin Soup or the Pumpkin Waffles from Green Kitchen Travels.

Pumpkin_caramel_bars_4

Green Kitchen Stories

Pumpkin Gingerbread Muffins (vegan)

veganpumpkingingerbreadmuffins

I love to transform my favourite recipes into something new. Often, it’s not too far of a stretch to take a solid recipe base and create something different and fresh. Maybe I’m a baking nerd, but I just love the process of calculating measurements, swapping new ingredients for others, figuring out new baking times, and streamlining the method. My goal with recipe writing is to provide as many pertinent details as I can so you feel like I’m in the kitchen with you, but I also try to simplify and condense, too. It gives me great joy to refine and improve a dish and the written recipe itself over multiple trials.

Yup, I’m definitely a baking nerd. There’s no denying it.

My Pumpkin Gingerbread Loaf with Spiced Buttercream is a bit of a legend on this blog. I created the recipe for a blogging competition, Project Food Blog, five years ago (side note: my recipe writing style has clearly changed since then!). Despite being buried in the archives, this loaf has stood the test of time and remains popular during the fall and winter seasons. I’ve had requests for a muffin version – something a bit lighter and more wholesome that could pair with breakfast or an afternoon snack. (Wait a second. The original loaf with frosting doesn’t count as breakfast? I’ve been doing it all wrong.)

Joking aside, it’s a great idea. So maybe it’s a few years late, but I’m not a miracle worker! Ok, maybe I am. I made the original loaf more wholesome by using whole-grain spelt flour rather than all-purpose white flour. Despite using this heavier flour, I was astonished by how light and fluffy the muffins turned out! Spelt flour is incredibly tasty with a lightly sweet and nutty flavour that works so well in a muffin. Actually, I kept saying to Eric that these muffins taste a bit like a spiced bran muffin (in a very good way!). In just 1/4 cup of whole-grain spelt flour you’ll find 4 grams of protein and 4 grams of fibre, too. Look for whole-grain spelt flour in the natural foods or specialty section of grocery stores or you can find it online. Keep in mind that it’s not gluten-free so it won’t work for those with gluten allergies. You’ll also find pumpkin, blackstrap molasses (a great source of iron), pumpkin pie spice, maple syrup, and more. It’s like a big fall hug. Get ready, because your place is going to smell like a gingerbread house. No joke.

veganpumpkingingerbreadmuffins2

Pumpkin Gingerbread Muffins

Vegan, soy-free

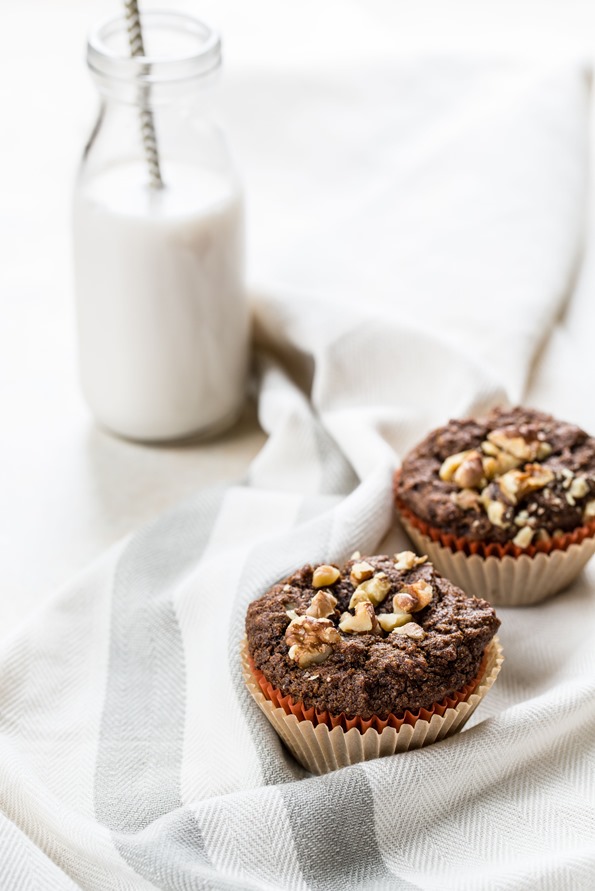
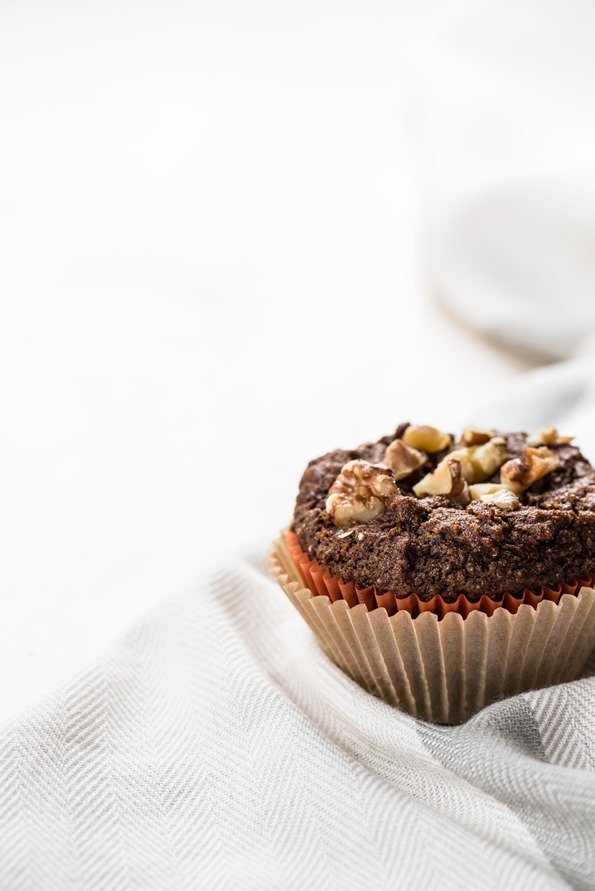
Despite using whole-grain spelt flour, pumpkin puree, and molasses, these muffins rise beautifully and they are so light and fluffy! I think you’re going to love them. They are perfectly spiced (not too strong and not too light) and great for fall and winter baking. You won’t believe how incredible these muffins will make your house smell, too. Throw a batch in the oven before company comes over and your entire place will smell like a gingerbread house! This recipe is adapted from a reader favourite recipe: my Pumpkin Gingerbread loaf with Spiced Buttercream.

Yield
1 dozen
Prep Time
15 Minutes
Cook time
22 Minutes
Total Time
37 Minutes

Ingredients:

For the wet ingredients:
  • 1 tablespoon chia seeds
  • 3 tablespoons water
  • 1 cup unsweetened pumpkin puree*
  • 1/3 cup grapeseed oil or melted coconut oil**
  • 3 tablespoons pure maple syrup
  • 1/2 cup packed brown sugar
  • 1/4 cup blackstrap molasses
For the dry ingredients:
  • 1 2/3 cups whole-grain spelt flour***
  • 1 tablespoon pumpkin pie spice (see tips below for link to recipe)
  • 1 teaspoon baking soda
  • 1 teaspoon baking powder
  • 1/2 teaspoon fine sea salt
  • Heaping 1/2 cup toasted chopped walnuts (optional)

Directions:

  1. Preheat the oven to 350F. Line a muffin pan with large paper liners. (this is my favorite brand as they never stick!)
  2. In a mug or small bowl, whisk together the chia seeds and water. Set aside for a few minutes to thicken.
  3.  In a large bowl, whisk together the dry ingredients (spelt flour, pumpkin pie spice, baking soda, baking powder, and salt).
  4. In a medium bowl, whisk together the wet ingredients until smooth (chia mixture, pumpkin puree, oil, maple syrup, brown sugar, and molasses).
  5. Add the wet mixture to the dry ingredients and stir until just combined. No patches of flour should remain. Be sure not to overmix the batter as spelt is a delicate flour.
  6. If using, stir in the chopped walnuts. You can also reserve some for garnish on top, like in the photos.
  7. Divide the batter equally between the 12 muffin liners. They should be about 3/4 full or a bit more. Add any reserved walnuts on top and gently push down (optional).
  8. Bake the muffins for 20-24 minutes until a toothpick comes out clean.
  9. Cool the muffins in the pan for 5-10 minutes, and then transfer each muffin onto a cooling rack until completely cool.

TIPS:

* If your pumpkin puree is a bit grainy, try throwing it into a food processor and processing it until smooth before making this recipe. Or you can beat it with electric beaters. This will simply prevent clumps in the dough.

** If using melted coconut oil, make sure that the rest of the wet ingredients are all at room temperature (do not use refrigerated milk, pumpkin, maple syrup, etc. as they will harden the coconut oil).

***I haven’t tried these muffins with any other flour yet, but I expect that regular all-purpose flour will work (like in the loaf recipe). If you try any different flours please leave a comment with what you used and how it worked out!

Here is the Homemade Pumpkin Pie Spice Mix recipe

Make it nut-free: Simply omit the walnuts.

pumpkinspicegingerbreadmuffinsvegan

Photography credit: Ashley McLaughlin Photography

Oh She Glows

Homemade Pumpkin Pie Spice Mix

pumpkinpiespicemix

For the past couple seasons, I’ve been on the hunt for pumpkin pie spice mix. And I’ve been slowly going crazy not being able to locate it in any local grocery stores. Don’t they know how many they would sell from me alone?! I longed for the day I would cross paths with it, making a mental note to buy 10 if I ever did. Only that day never came and I went about my life smiling on the outside, but secretly feeling like a piece of me was missing. Until that beloved day when a recipe just fell into my lap!

I feel like fellow bloggers and cookbook authors, Nicole Axworthy and Lisa Pitman, get me. They know that vegan staples aren’t always offered in grocery stores (yes, I just called pumpkin spice mix a “vegan staple”…let’s go with it), and sometimes we want or need to make things in our own kitchen. In their new book, DIY Vegan, you’ll find more than 100 vegan recipes showing home cooks just how easy it is to create knock-offs of common store-bought staples, only without the sometimes scary ingredient lists. For the most part, I try to limit the amount of prepared foods that I purchase due to the unpronounceable ingredients many contain. And really, these foods don’t always leave me feeling my best. Yes, more and more brands are coming out with simple, whole-foods ingredient lists (hooray), but sometimes these brands aren’t accessible or they’re just plain old expensive. So, I enjoy making my own staples when time allows; especially if I can make a huge batch and store it for several months, like with this pumpkin pie spice mix. Major kitchen win!

As Nicole and Lisa say, "Seriously, are you going to pay extra for someone else to stir your spices? We didn’t think so. Make your own in seconds, make some for your friends, start a business selling your own spice-stirring services. And then eat pie."

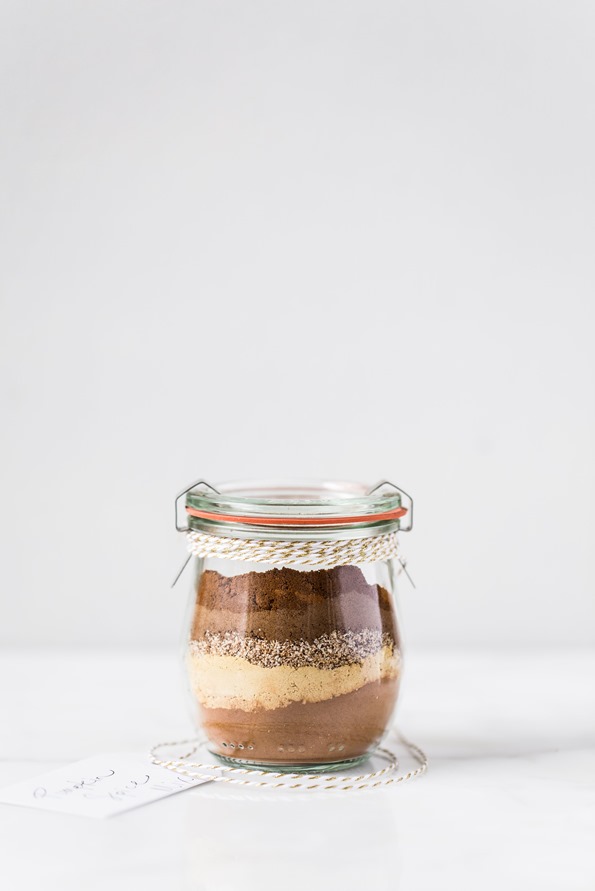
In DIY Vegan, you’ll find vegan recipes like Buttermilk, Cashew Coffee Creamer, Simple Sour Cream, Coconut Yogurt, Cultured Nut Cheese, Whole-Grain and Seed bread, Cheesy Crackers, Taco Seasoning, Spelt Pizza Dough, and many more. I went straight for the Pumpkin Pie Spice Mix of course, and after falling in love I made a triple batch to keep on hand. It’s just so easy and flavourful, and now I never have to go without. If you noticed that super cute jar at the top of this post, you’ll see that it also makes a fun gift for the pumpkin pie spice mix lover in your life. Just place the spices into a tiny jar (you can layer it for fun), add some baker’s twine, and loop on a homemade tag. Wouldn’t this be a cute idea for a housewarming gift or a party favour? Or maybe I’m just weird. Rest assured, if you ever brought me this I would light up like a Christmas tree.

Coming up soon, I’ll be sharing a baked good that I created using this very pumpkin pie spice mix. You don’t want to miss this one, folks. It’s the seasonal baked good I promise you’ll want to whip up all season long. So go on and make this spice mix then meet me back here for Part 2! Deal?

pumpkinpiespicemixhomemade

Homemade Pumpkin Pie Spice Mix

Vegan, gluten-free, grain-free, no bake/raw, nut-free, oil-free, refined sugar-free, soy-free

Use this pumpkin pie spice mix in cakes, cookies, bars, oatmeal, smoothies, lattes, chia seed pudding, and more! I like to keep a large batch of it on hand and I find myself using it in just about everything. This recipe is reprinted with permission from DIY Vegan. Copyright © 2015 Nicole Axworthy and Lisa Pitman. Published by St. Martin’s Griffin.

Yield
2 1/2 tablespoons
Prep Time
5 Minutes
Cook time
0 Minutes
Total Time
5 Minutes

Ingredients:

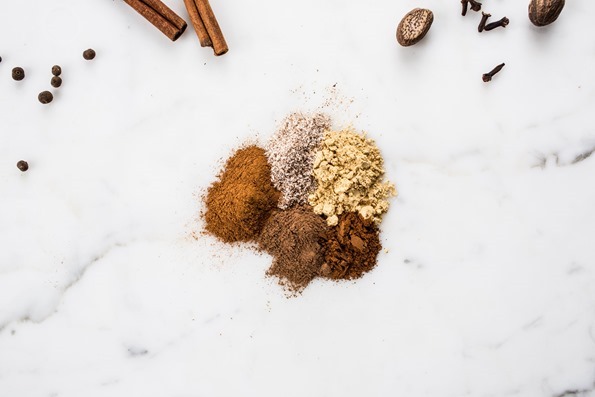
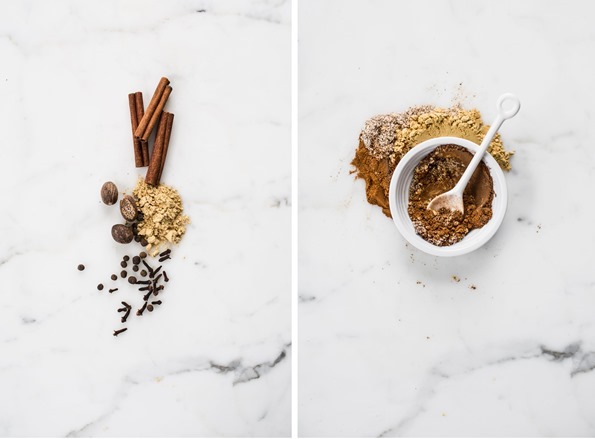
  • 4 teaspoons cinnamon
  • 2 teaspoons ground ginger
  • 1 teaspoon freshly grated nutmeg (I pack it in the teaspoon)
  • 1 teaspoon ground allspice
  • 1/2 teaspoon ground cloves

Directions:

  1. Combine all the ingredients in an airtight container or jar. Attach lid and shake to combine. Store at room temperature for up to 6 months. Shake jar before each use.

pumpkinpiespicemix2

Photography credit: Ashley McLaughlin Photography

A big congrats to Nicole and Lisa on this beautiful cookbook, and for allowing me to share this recipe with you today! DIY Vegan is hot off the press this Tuesday, October 27th so be sure to check it out online and in bookstores!

Oh She Glows

One-Pot Pumpkin & Cabbage Stew

One_pot_pumpkin_stew_01

Hi, this is David! Luise will soon tell you about this recipe of hers and we also have a little quick video where we demonstrate it, but I just wanted to mention one thing before we get all warm and cosy. If you are reading this on an Apple device, our typography has probably turned all bold and ugly on you. I am so sorry for this! It really hurts my design soul to see our site like that. During our six years of blogging, we have never changed the design of this blog. We have always loved the design and felt like it has become part of our blogs identity, but the theme that we built our site on has been outdated for a very long time and we have managed to keep it alive with band-aids and chewing gum. However, I am not sure if we can keep this design much longer; the typography is acting like a confused teenager, the site loads slowly, is not very mobile or printer friendly and my web skills can’t seem to fix all this. So bare with us while we are figuring out how this blog should transform into a more user friendly version. It will probably look ugly for a while but change is on its way. (And if you are a super-talented and design minded web wizard, feel free to shoot me an email: david@greenkitchenstories.com). Over to you Luise!

One_pot_pumpkin_stew_02

The first morning frost has arrived and Stockholm has turned into a beautiful multi coloured Autumn city. It is cold and sunny but daylight hours are quickly slipping away. The shorter days mean more time inside with warming teas, candle lights and large batches of slow-cooking food with hearty flavors, nourishing ingredients and lots of herbs.

This dish embraces Autumn ingredients like pumpkin, cabbage and apples, and the combination of rice and beans gives you a complete source of protein. If you live in a different climate or time-zone, you can combine any kind of grains and legumes with whatever vegetables the season is offering.

Comforting one-pot meals are cheap, no fuss-family dinners that often last for a couple of days. Not to mention how easy they are. With only one-pot simmering on the stove, you both save dishes and don’t have to focus on keeping track of several pots with different cooking times. If you soak the grains and beans in the morning, you’re set to cook everything for dinner. Apart from the general health aspects of pre-soaking grains, I have found that it’s extra important in one-pot meals, since the rice don’t dilute the colour of the stew as much when it is pre-soaked.

Here is a little one-minute video that we created to show you how easily this dish is assembled. Hope you like it. Remember to subscribe to our youtube channel for more recipe videos.

One_pot_pumpkin_stew_03

One-Pot Pumpkin, Cabbage & Rice Stew
Serves 4–6

We have kept the flavours quite simple in this stew and instead add extra herbs and diced apple as a fresh twist right before serving it. I imagine mushrooms and tomatoes would be a delicious addition in this stew too. You can also try a bolder choice of spices or other type of grains and legumes. You can even throw in a piece of parmesan rind as it simmers to add a nice umami flavour to the stew (just remember to remove it before serving).

1 large onion
4 garlic cloves
1 tbsp coconut oil, ghee or olive oil
1 butternut squash or pumpkin of any kind
3 sprigs rosemary, mash them a few times with the end of a knife
zest of 1 organic lemon, grated
1 small head of cabbage
1 cup uncooked whole grain rice, pre-soaked
1 cup uncooked black eyed peas, pre-soaked
water to cover, approx. 6 cups / 1 1/2 liter
1 tbsp vegetable bouillon powder (with no added MSG)
3 dried bay leaves
sea salt and pepper, to taste

To serve
plain yogurt of your choice
fresh parsley, chopped
fresh apples, chopped
grated parmesan, optional

In the morning: Place whole grain rice and black eyed peas in two separate bowls, cover with (filtered) water and let soak for 8-12 hours. Then drain and rinse and they are ready to be used in the recipe.

Peel and finely chop onion and garlic. Prepare the pumpkin; peel it, divide it in half and scoop out the seeds. Then chop it into cubes. Heat oil in a large pot, add onion, garlic and rosemary sprigs, let fry for a minute or so, stirring occasionally. Add the cubed pumpkin and lemon zest and stir to combine. Slice the cabbage, discard the stem. Now add cabbage, soaked and rinsed whole grain rice and black eyed peas, water, bouillon, bay leaves, salt and pepper and stir around to combine everything. Cover with a lid and bring to the boil, then lower the heat and let cook for 45-60 minutes. Check every now and then to see if more water is needed and gently stir around. It is ready to serve when the rice and peas are very tender. Serve in bowls with a dollop of yogurt, fresh parsley and chopped apples.

Green Kitchen Stories

Homemade Pumpkin Spice Latte with Salted Pumpkin Spice Syrup

pumpkinspicelattevegan

I’m baaaaaaaack!

Miss me? Better yet…did you miss my tempting recipes popping into your feed each week? I sure have missed you all and this blog. Thankfully, it’s finally time to kick up my heels and celebrate because I handed in my second cookbook manuscript yesterday. All 250 pages of it including 100+ recipes (most are new!), headnotes, chapter openers, introductory chapters, etc. I seriously can’t believe I did it. Can someone pour me a drink…or 10?! I’m so excited to get my life back in order! And I’m so excited to start sharing recipes on here again at regular intervals. I have SO many ideas/goals/hopes/dreams for this space.

It’s funny how different the first book writing process went compared to the second. When I submitted my first book’s manuscript, I don’t think I had ever felt so much doubt in my life. I had all this anxiety near the very end and concluded that a bunch of finalized recipes had to be re-worked at the last minute. All of a sudden, none of them were good enough. Eric was like, did you fall on your head…they taste amazing! Yes, writing recipes for print brought the cray cray out in me. I turned into a full-fledged RECIPE-ZILLA.

I kept coming back to the age old question – Is this book enough? – which I think deep down means, Am I enough? Am I good enough? Yea, I’m getting deep today. It’s a question I’ve struggled with my entire life so I shouldn’t have been surprised when this crippling doubt reared its ugly head. In the end, the first process taught me how to make peace with my work, the creativity I put out into the world, and with whatever the response to the book would be. That’s a big one. I just had to let it all go.

I’m not saying I haven’t had moments of doubt during the second book’s creation because I surely have, but this time around I’ve felt much more focused, organized, and best of all, confident in my ability. It was something only experience could teach me, I think. Even Eric mentioned how calm I was this last week as I put the final touches on everything. (Ok, ok, I handed it in 4 days late, but when your editor gives you an extra weekend you take it!) Even though I know there is a lot of work ahead (many rounds of edits, design collaboration, press, etc), at least I (kinda, maybe) know what’s to come.

But I’m totally not thinking about that right now. Now is the time to drink all the espresso! Can you tell I’m hyper? Just a bit. Yes, I’m getting festive with homemade pumpkin spice lattes, and I hope you’ll join me. I’d say these are a serious upgrade from my 2010 attempt (cue nostalgia from a blog post 5 years ago!), but how could it not be with a homemade pumpkin spice syrup?! I am obsessed with this homemade latte recipe. Can’t stop. This syrup is a game changer, and you’ll find yourself dreaming up many ways to use it. Always a good detective, I bought a legit Pumpkin Spice Latte from Starbucks so I could compare them side by side. Guess which latte won?

homemadepumpkinspicelattevegan

Homemade Pumpkin Spice Latte with Salted Pumpkin Spice Syrup

Vegan, gluten-free, grain-free, oil-free, refined sugar-free, soy-free

I don’t have an espresso machine so I find the easiest way to make an authentic-tasting latte at home is to simply buy a few shots of espresso at the local coffee shop! I’ve tried using strong coffee as a substitute for espresso (in varying amounts) and I don’t find it comes close to being as good as the espresso version. It’s not horrible tasting by any means, but it misses that incredibly rich, deep, and flavorful espresso flavour which I think is key for a latte. So yes, I think it’s worth the effort to use actual espresso here. That being said, feel free to experiment with coffee versions too. Eric, who isn’t a coffee fan, loved a version I made with 1/4 cup strong coffee instead of 1 shot of espresso. It was so much milder, and didn’t have a pronounced coffee flavour. Lastly, a note about milk frothers: I don’t own one, but I discovered that you can create super creamy and frothy almond milk by adding the heated milk into a French press and pumping the plunger for 30-60 seconds vigorously. (Note: I use a plastic french press so I am not sure if this is safe with the glass kind! Be cautious if trying it out.) It creates the creamiest almond milk EVER! I am seriously hooked. I tried coconut milk and didn’t have quite as frothy results. Soy milk will also work well, but I prefer the flavour of almond milk here. Actually my @theglowspot instagram post had a great discussion about various plant-based milks and their frothing ability…pretty interesting stuff! Let me know your tips below.

Note: The Salted Pumpkin Spice Syrup is lightly adapted from Paleo’ish On A Dime.

Yield
3/4 cup syrup + 1 latte
Prep Time
5 Minutes
Cook time
5 Minutes
Total Time
10 Minutes

Ingredients:

For the Salted Pumpkin Spice Syrup:
  • 1/2 cup coconut sugar
  • 1/2 cup pure maple syrup
  • 1/3 cup unsweetened pumpkin purée*
  • 1 teaspoon cinnamon
  • 1/2 teaspoon freshly grated nutmeg
  • 1/4 teaspoon ground cloves
  • 1/4 teaspoon pink Himalayan sea salt or other fine sea salt, or to taste
  • 1/4 teaspoon pure vanilla bean powder or 1 vanilla bean, seeded or 1/2 tsp pure vanilla extract
For the Pumpkin Spice Latte:
  • 2 tablespoons (1 shot/1 ounce) espresso
  • 1 cup unsweetened almond milk
  • 3-4 teaspoons Salted Pumpkin Spice Syrup
  • Coconut Whipped Cream, for garnish (optional – I usually skip it)
  • Dash cinnamon or pumpkin pie spice, for garnish

Directions:

  1. For the Pumpkin Spice Syrup: Whisk together all syrup ingredients in a medium pot over medium heat. Simmer for about 5-6 minutes, stirring frequently, until smooth and slightly thickened. Remove from heat. Once cool, pour leftovers into a jar and secure lid.
  2. Prepare the espresso. Tip: I like to buy a few espresso shots from the coffee shop since I don’t have an espresso maker. I keep leftovers in the fridge for 1-2 days and reheat as needed.
  3. Add milk into a small pot. Heat over medium and bring to a simmer. Immediately remove from heat. Froth the milk using a milk frother or a French Press. Tip: I use my French Press to froth the milk. Simply add the heated milk into the press and secure lid (make sure it’s closed and not vented). Pump the plunger vigorously for about 30-60 seconds. Be careful as the hot milk can shoot out a bit.
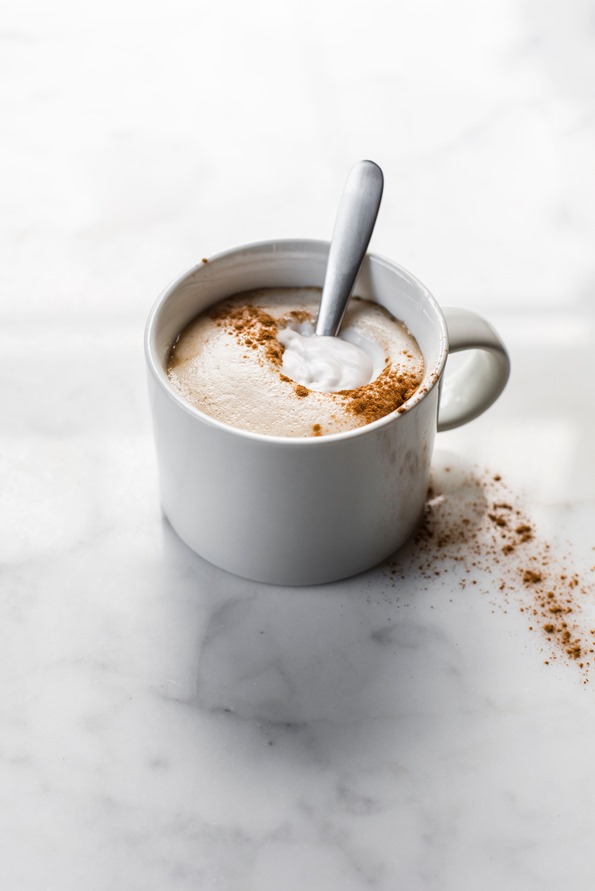
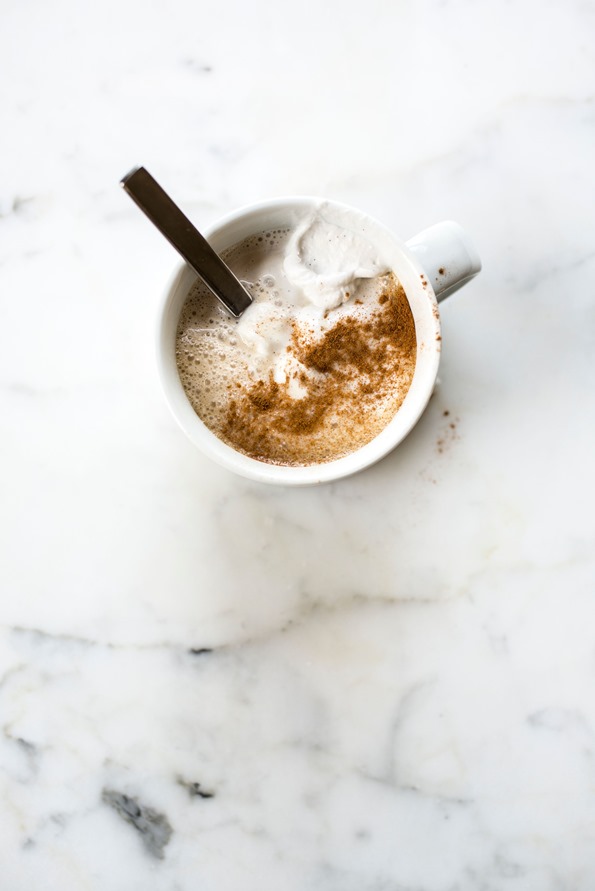
  4. Pour hot espresso into a mug. Top with all of the frothy milk. Add 3-4 teaspoons of the syrup, to taste, and gently stir to combine. Top with a dash of cinnamon or pumpkin pie spice, and Coconut Whipped Cream, if desired. Serve immediately. The syrup will keep in an air-tight container in the fridge for at least 2 weeks, most likely longer. You can use it in regular coffee too, or try stirring it into a bowl of hot oatmeal for a seasonal twist!

Tip: If your pumpkin puree is on the grainy side (some brands are more than others), it might benefit from a quick blend or puree in the blender or food processor before using.

lattepumpkinspicevegan

Photography credit: Ashley McLaughlin Photography

Oh She Glows

Curried Pumpkin Soup with Coconut

Curried Pumpkin Soup with Coconut | http://naturallyella.com

Post originally published on October 8th, 2012. Last updated on October 4th, 2015.

Curried Pumpkin Soup |http://naturallyella.com

Let’s talk soup. This soup is amazingly creamy and delicious with being vegan and gluten free.  The pumpkin plays well with the curry and coconut- it’s a perfect meal.  I’ve even thought about leaving it more stew consistency and adding rice to the dish to make it a hearty main.

I recommend two routes for the curry powder: homemade or buy it from a spice shop (I have a few favorites but I’m digging Oaktown right now).  The curry powder in the grocery store won’t do any meal justice!  There are so many different ways you can whip up curry powder (I highly recommend just searching for “homemade curry powder” and find the right one for you).  I made this with a spicier thai red curry powder but I think any type of curry powder would be delicious!

See the Recipe.

The post Curried Pumpkin Soup with Coconut appeared first on Naturally Ella.

Naturally Ella