Fantastic Falafel Waffles
Falafels. These definitely sit at the top of my list for most attempts at a healthy makeover and at the bottom of the list of success. How to get them crisp without deep frying? How to get them to hold together without eggs? What is the right balance of herbs and spices? Why are they so darn delicious at a restaurant and so darn underwhelming at home?!
First, it involves NOT cooking your chickpeas. Nope. Not even for a second. Of course I know that this is the traditional way to do it, but I was skeptical for some reason. Skeptical that I wouldn’t turn into a giant, human gas factory. Any of you have had the misfortune of eating poorly cooked legumes will understand what I’m talking about. It’s pretty uncomfortable. And not just for you. BUT! Miracle of miracles, this did not happen, and on top of a happy tummy, my falafels came out crisp, deliciously spiced, and they didn’t fall apart at all.

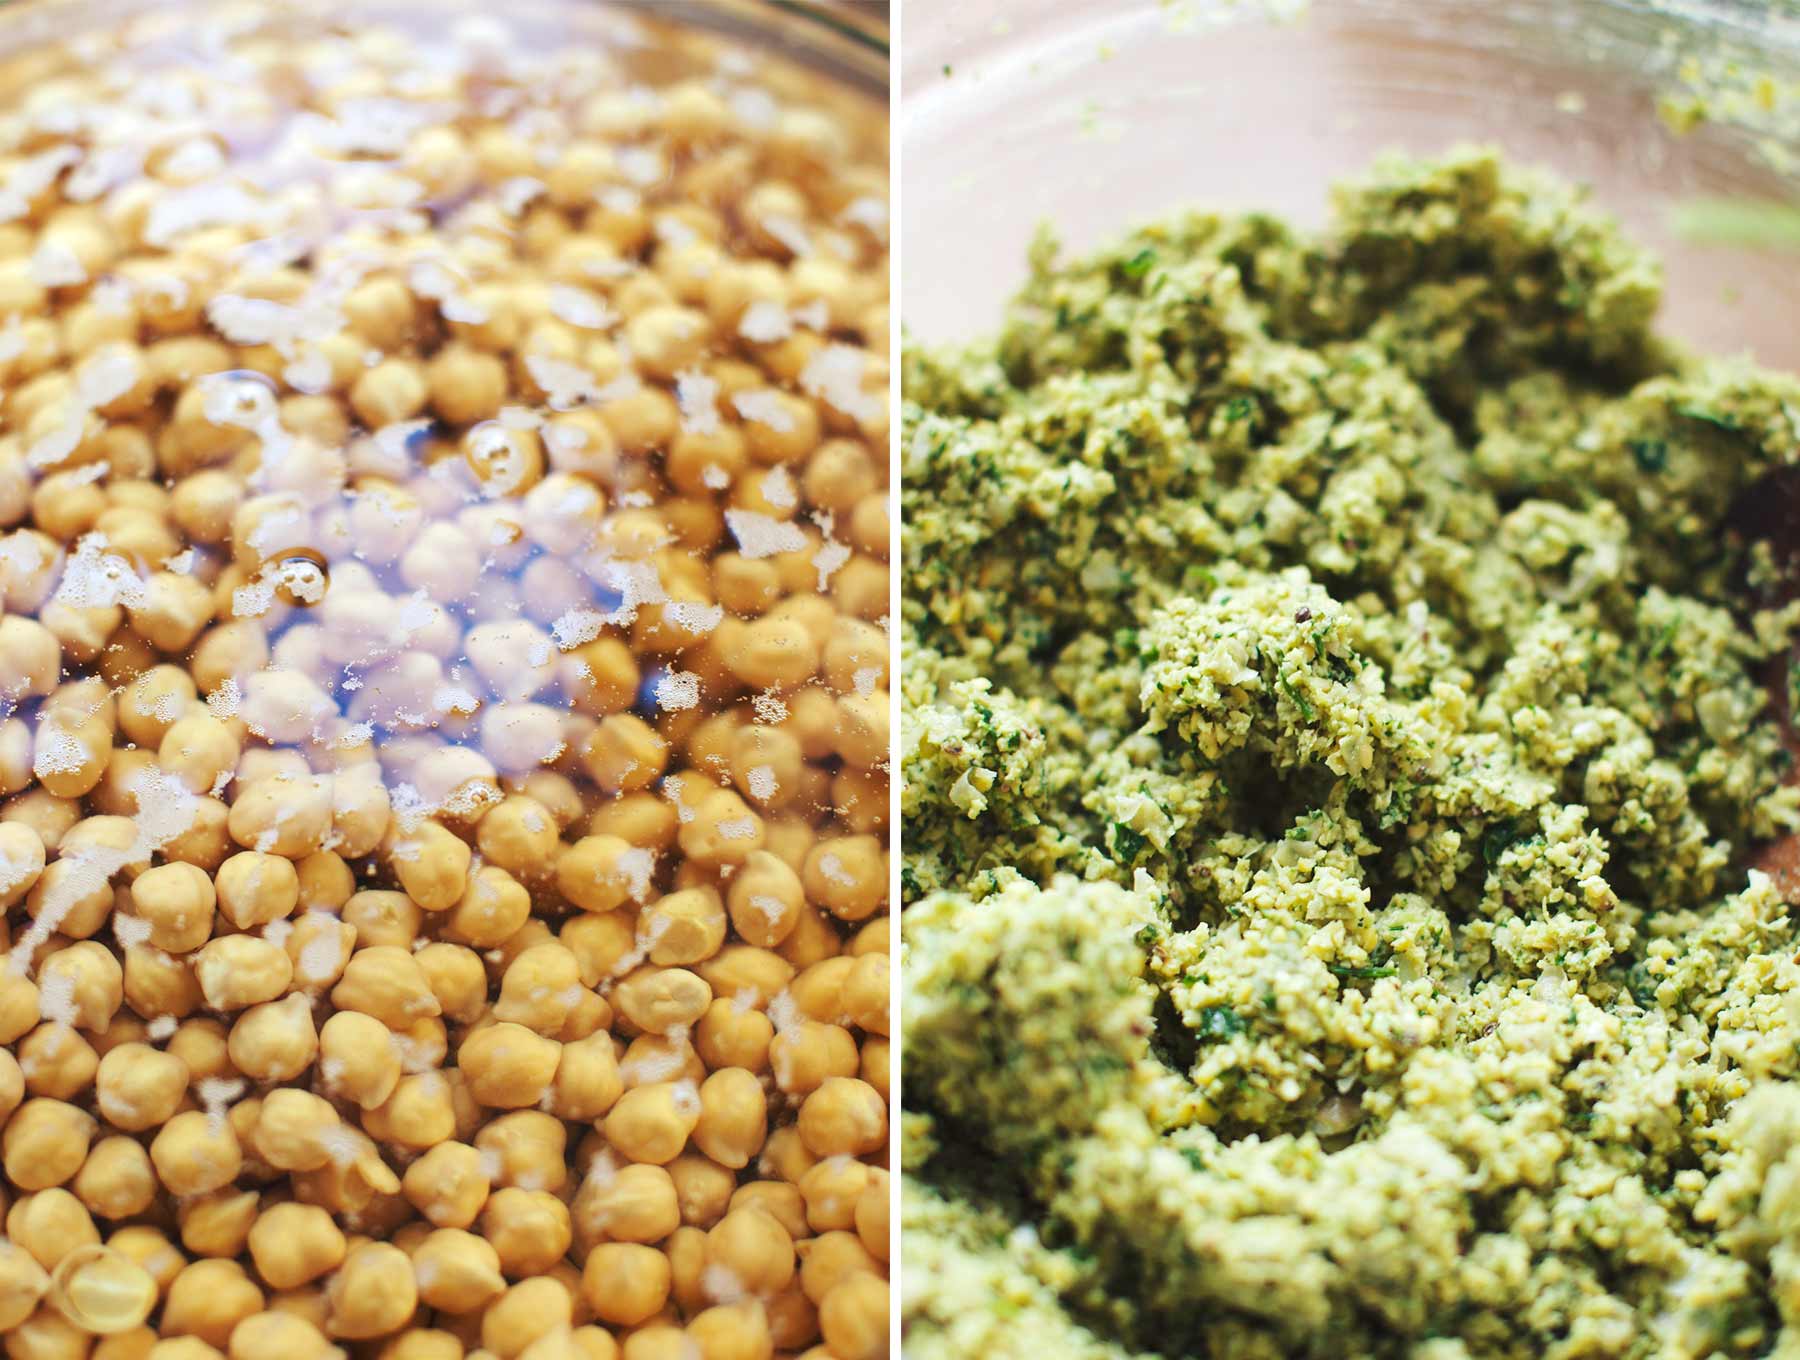
The chickpeas must start out raw and they must be soaked for 24 hours. Make sure to add an acidic medium to the water ( I use lemon juice or apple cider vinegar), give them a good rinse after draining, and you should be okay. I used chickpea flour as a binder, instead of all-purpose flour (duh) and this worked great to hold it all those tasty ingredients together. If you can’t find chickpea flour, try another gluten-free flour, which I’m pretty certain will work just as well. Fresh herbs are also a must for flavour – I chose both flat-leaf parsley and cilantro – so that the “dough” will look rather verdant once blended up.
The second trick is contact with high heat. Deep frying gives us the most crisp and delicious falafels, but it also gives us a whole host of un-want-ables, like oxidized fats and free radicals. Boo. You can cook falafels in the oven, but the dough is never going to get super crisp because the heat is surrounding the falafel instead of connecting directly with it. Again, boo. Enter: the waffle iron. A waffle iron uses high heat that can come into direct contact with the dough, and with minimal fat. Plus it’s fun to say. Falafel Waffle. Obviously, this was meant to be.
Chickpea Party Tricks
We all know that chickpeas are fiber all-stars, providing 50% of your RDI in just one cup, (whoa!) but they have another party trick up their sleeve that I bet you didn’t know about. Two-thirds of the fiber in chickpeas is insoluble, meaning that it doesn’t break down during digestion, but instead moves through our digestive tract unchanged until it hits the large intestine. The fun starts here, where friendly bacteria (think probiotics!) go to town on said insoluble fiber and actually break it down to create short-chain fatty acids, including acetic acid, propionic acid, and butyric acid. These short-chain fatty acids can then be absorbed by the cells that line the wall of our large intestine and used for energy! How rad is that?! Butyric acid is in fact the preferred source of energy for the cells lining our colon, and with this bonus fuel comes greater potential for optimally active and healthy cells. This translates into a reduced risk of colon problems including colon cancer. So friends, invite chickpeas to your next dinner party – they’ll feed you and your colon cells. Can your pot roast do that?

I cooked several (ahem) of these waffles over the course of my day, you know, for research purposes. The ones I made first were the lightest and the crispiest. I still liked the ones that I cooked later on, but I found their consistency was a little dense and chewy, so I recommend using up the dough right away instead of making it ahead of time.
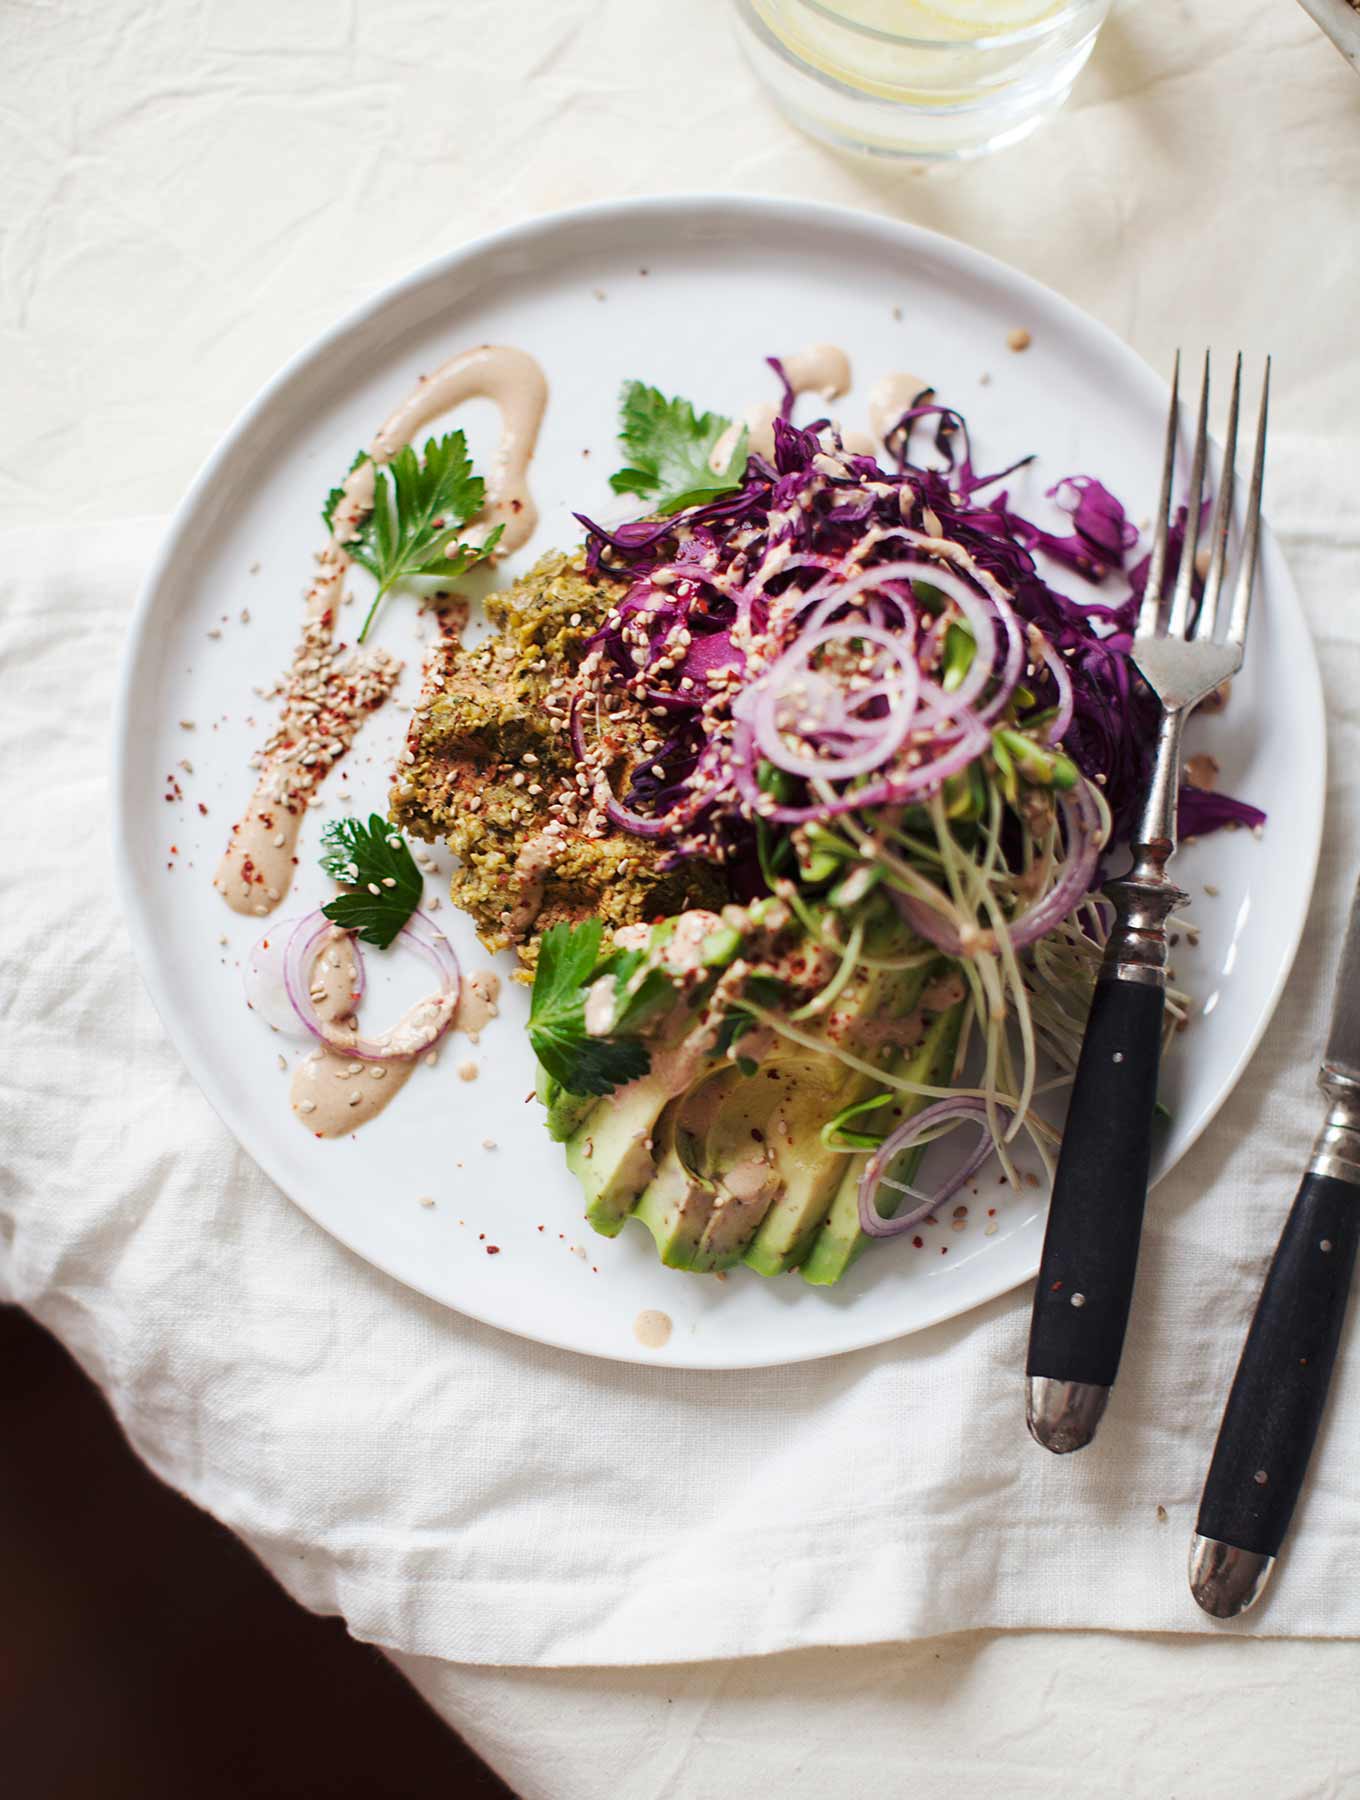
I made a couple little extras to accompany the Falafel Waffles, but these are merely (really delicious) suggestions. The Bright Cabbage Slaw take about 2 minutes to whip up, and lends a welcome, acidic top note to the dish as a whole. Try the Harissa Tahini Sauce as well – it’s savoury, creamy, and a little bit spicy. I was inspired by the one Jessie made over at Faring Well – thanks for the spark! Serve the falafels with whatever else you have on hand; avocado is really tasty, sprouts, fresh chilies, pickles, roasted veggies etc. You can also toss a falafel waffle into a pita or wrap if you want to take it to go, or serve them on top of a bed of whole grains for an even more substantial meal.

Falafel Waffles
Makes 10-12 waffles
Ingredients:
2 cups / 400g dried chickpeas
2 cloves garlic
1⁄2 cup chopped + packed / 45g flat-leaf parsley
1⁄2 cup chopped + packed / 35g cilantro
11⁄2 Tbsp. ground cumin
11⁄2 tsp. ground cinnamon
2 tsp. ground coriander
11⁄2 tsp. fine grain sea salt (to taste, depends on if using canned)
1 tsp. cracked black Pepper
zest of 1 lemon
3 Tbsp. freshly squeezed lemon juice
2/3 cup / 115g chickpea flour
1/4 cup / 60ml water, as needed
1 tsp. coconut oil for greasing the waffle iron
1 batch Harissa Tahini Sauce (recipe to follow)
1 batch Bright Cabbage Slaw (recipe to follow)
To serve:
2 Tbsp. sesame seeds, lightly toasted
finely sliced red onion
sprouts
avocado
roasted vegetables (pumpkin and cauliflower are yummy)
crushed chili flakes
Directions:
1. Cover chickpeas with plenty of water and 2 Tbsp. freshly squeezed lemon juice or apple cider vinegar. Let soak for 24 hours. Drain and rinse very well. Set aside.
2. In a food processor mince garlic. Add the chickpeas, chopped herbs, spices, lemon zest and juice. Pulse until the chickpeas are very finely minced, but not paste-y. Transfer contents to a large mixing bowl.
3. Add the chickpea flour and mix well, then add the water a few spoonfuls at a time until the mixture holds together well when pressed.
4. Make the Bright Cabbage Slaw and Harissa Tahini Sauce, if using.
5. Heat your waffle iron to medium-high. Brush with a little coconut oil. Divide the falafel dough into 10-12 equal portions, Gently pack each portion together so that it holds well, especially around the edges. Flatten out the portion you are using and press into the hot waffle iron, lower the lid and cook anywhere from 5-10 minutes, depending on your equipment. The falafel is done when it is golden brown and crisp. Remove from waffle iron and place in a warm oven until ready to serve.
6. Serve hot falafel waffles with the Bright Cabbage Slaw, Harissa Tahini Sauce, red onion, avocado, sprouts, chili flakes and anything else you fancy! Enjoy.
Bright Cabbage Slaw
4 cups / 300g finely shredded red cabbage
3/4 tsp. fine grain sea salt
11⁄2 Tbsp. lemon juice or apple cider vinegar
1 tsp. maple syrup or honey, to taste
a handful of chopped parsley, cilantro, or both
Directions:
Combine the cabbage, salt, and lemon juice in a large bowl. Massage the salt and lemon into the cabbage for about a minute until it begins to wilt. Drizzle with maple syrup if desired, season to taste and fold in the herbs.
Harissa Tahini Sauce
Makes about 1 cup / 250ml
Ingredients:
1/3 cup / 80ml tahini
1 large clove garlic, finely minced
2 Tbsp. freshly-squeezed lemon juice
1 Tbsp. extra virgin olive oil
2 tsp. Harissa paste (available at Middle Eastern grocers)
pinch of salt, to taste
1 tsp. maple syrup or honey
approx.1⁄2 cup / 125ml water, as needed
Directions:
Add all ingredients to a blender and blend on high until smooth and creamy, adding water to thin as desired. Store leftovers in the fridge for up to one week.
Show me your falafels on Instagram! #MNRfalafelwaffles
Americolor Gel Paste Food Color, Electric Pink Review
More Eletric Products
Baked Farro Risotto with Cauliflower

If you’ve picked up a copy of The Easy Vegetarian Kitchen, you’re probably already familiar with my love of using farro in risottos. The chewy texture of cooked farro lends itself well to the overall dish. Even when using the pearled variety, it feels a bit heartier than if using arborio rice.
Of course, time isn’t always on our sides to make regular risotto and that’s where this baked version comes in handy. No stirring and adding liquids, just throwing things in a pot a few times. The recipe from which I adapted this one calls for adding butternut squash at the beginning but I like my cauliflower to have texture. I add the chipped cauliflower part of the way through cooking. Feel free to experiment with cooking times based on your preferred tenderness. Read more and see the recipe.
The post Baked Farro Risotto with Cauliflower appeared first on Naturally Ella.
Panasonic NN-SD372S Stainless 950W 0.8 Cu. Ft. Countertop Microwave with Inverter Technology Review
More Microwave Products
Presto 05411 GranPappy Electric Deep Fryer Review
More Fryer Products
Quinoa Falafel

| Disclosure: This recipe was created for Ancient Harvest. See below for more details. |
One of the earliest items I learned to make when I first started cooking happened to be baked falafels. I had fallen in love with falafels thanks to a local Greek restaurant near school but once I moved away, I had major falafel withdraw. And so, I decided to learn to make them at home, only slightly healthier. I’d be lying if I said the baked version was just as good as the fully fried version, which is why in this recipe, I split the difference and do a shallow fry. You will also notice that I didn’t go the traditional route and use dried chickpeas. This is for one primary reason: I have a hard time planning ahead and when I want to eat falafels, I want them now. I use the oven to help dry out the chickpeas slightly, which helps keep the moisture levels a bit closer to the traditional recipe. While this recipe can be made without the quinoa, I like the extra bit of texture the cooked quinoa provides. Read more and see the recipe.
The post Quinoa Falafel appeared first on Naturally Ella.
BBQ Grill Mats Up to 400% Thicker Than Others Set of 3, 16″ x 13″ Works on Gas, Charcoal, Electric Grill and more, 100% Non-stick, Lifetime Guaranteed Review
Mini Pumpkin Pie Tarts with a Sunflower Cookie Crust (Nut-free, Vegan)
")
A couple weeks ago, I received a reader recipe request. Let’s call him “Jason”. Jason asked if I could create a nut-free version of my Raw Pumpkin-Maple Pie with a Baked Oat Crust (found in my cookbook, page 247) because his wife can’t have cashews and pecans. Apparently, it was tormenting her not to be able to try this pie! He wants to surprise her next month with this dessert as a special thank you because “she’s the best wife and mom ever”.
He went on to write, “Angela, I have no clue where to begin and don’t want to mess this up like I usually do.”
I immediately knew that I had to step up to the (pie) plate on this one (no pressure, no pressure!) because the world needs more love. And pie. Plus, I’ve always wondered how I could make this recipe without pecans or cashews, and now I have a nice option to share with you all. I tested multiple fillings and there was a clear winner that I’m sharing below. Spoiler alert – a combo of super luxurious full-fat coconut cream and sunflower seed butter worked so well as a replacement for cashews! It tastes so awesome.
I also paired it with a new toasted sunflower seed and oat “cookie” crust that’s a wonderful, crunchy compliment to the creamy and cool pumpkin pie filling. Pie crusts should never be boring or flavourless, and I love that this one is an easy “press-in” crust.
I meant to have this recipe up on Monday, but I ended up testing this pie about 7 times this week! I can’t sleep at night unless I’ve tested all of my options. Better late than never, I say. I’d rather not rush a recipe just to get it out on time. Anyway, I made this pie as a contribution to our Thanksgiving dinner later today (we’re in the US currently), and I’m so looking forward to the spread at my mom and stepdad’s. I hope those of you celebrating have a happy, fun, and safe Thanksgiving! And if you can’t make this pie today or this weekend, I hope you’ll include it on your holiday baking list.
Well, Jason (you know who you are) I hope this works out for you. If it doesn’t, I’d prefer that you not mention my name.
I’m joking! It’ll work out. Promise.


© copyright 2015 Oh She Glows. All Rights Reserved.